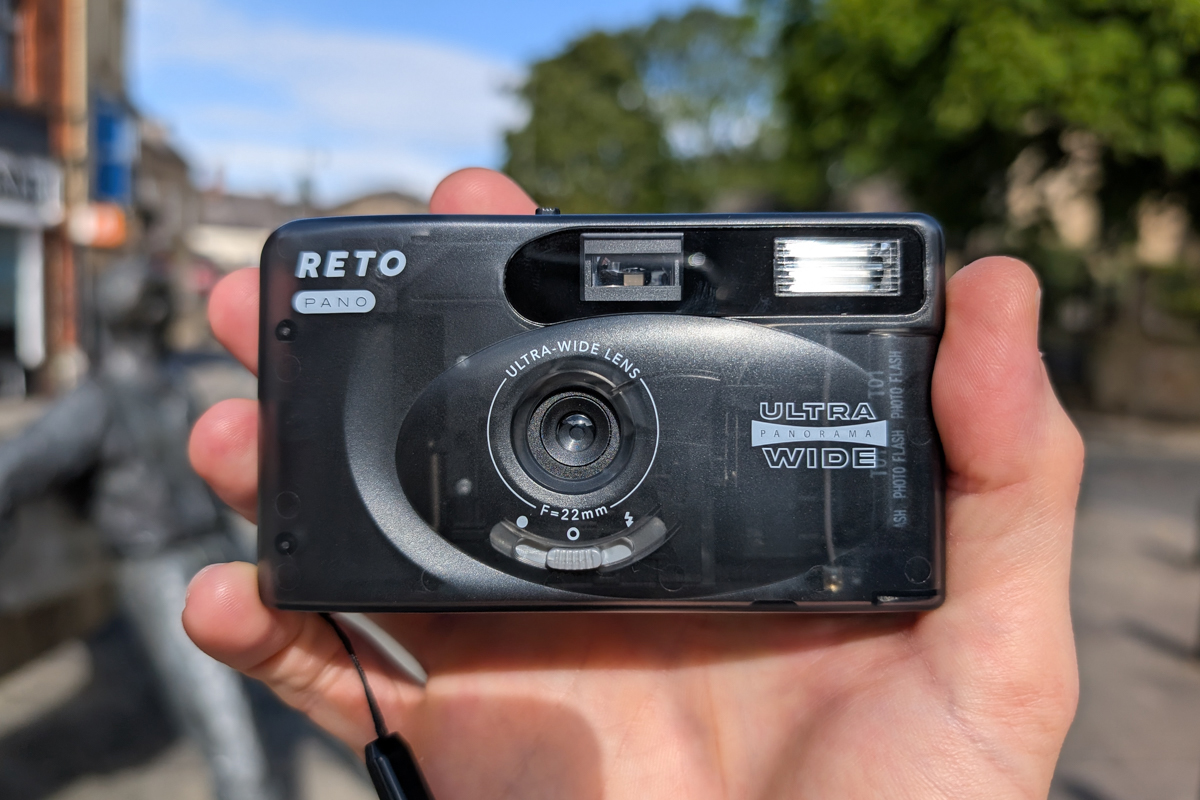
The Reto Pano is the third camera I’ve reviewed now from the creative Hong Kong-based company, and it’s the third that I’ve enjoyed shooting and liked the results I’ve gotten from.
My first experience with Reto was with the Ultra Wide & Slim – a basic little camera that brought to the table, as the name suggests, a very wide lens. Up next was the Kodak-branded Ektar H35N – a half frame camera with a number of other cool features too.
This latest offering serves up something different again. Panoramic shots. You’re not restricted to them, though. You can take standard aspect ratio ones too. A simple slider mechanism switches between the two options, making this a fun thing to play with.
Read on to learn all the information you’ll need about the Reto Pano, see what sort of images I got from mine, and get some inspiration for what you could shoot with yours too.
And if you haven’t got one yet, you can pick one up from Reto direct, from any of their official dealers in your country including B&H Photo in the US and Analogue Wonderland in the UK, or simply from Amazon.
Contents
- 1 First up, some quick example shots
- 2 What is the Reto Pano?
- 3 How the Reto Pano panoramic setting works
- 4 Criticisms of achieving panoramic shots in this way
- 5 Image quality and qualities of the Reto Pano
- 6 Shooting diptychs with the Reto Pano
- 7 My biggest problem with the Reto Pano
- 8 More Reto Pano example shots
- 9 What film to use in your Reto Pano
- 10 Where to buy a Reto Pano
- 11 Final thoughts on the Reto Pano
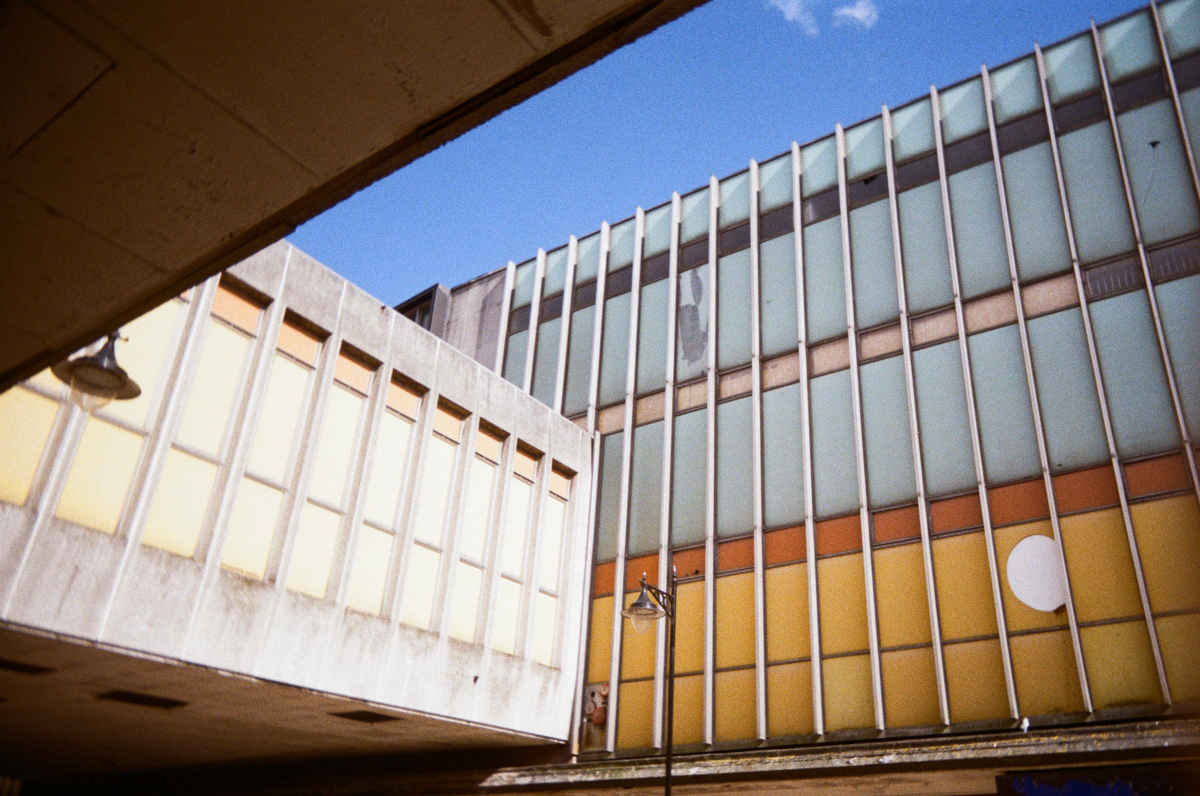
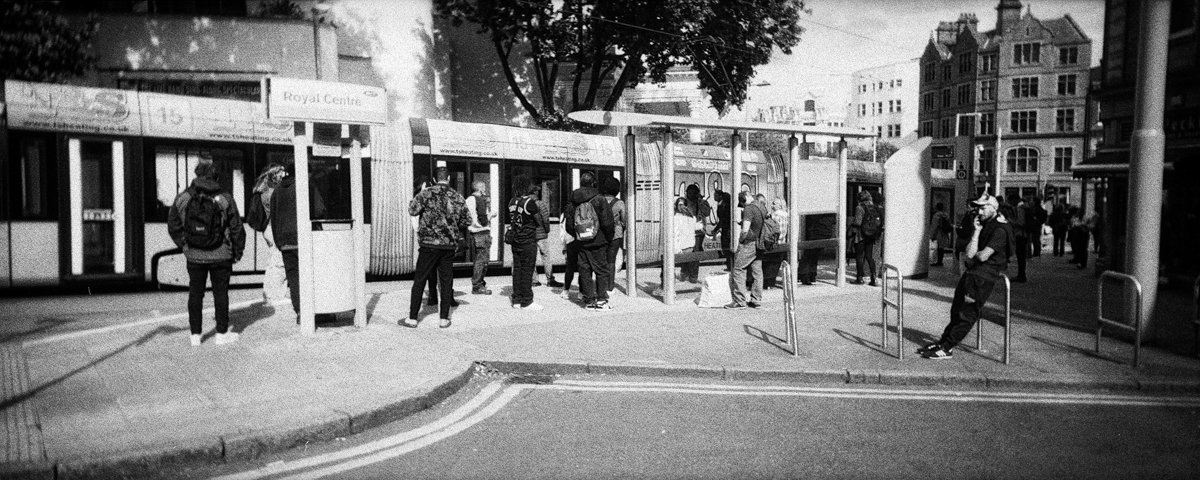
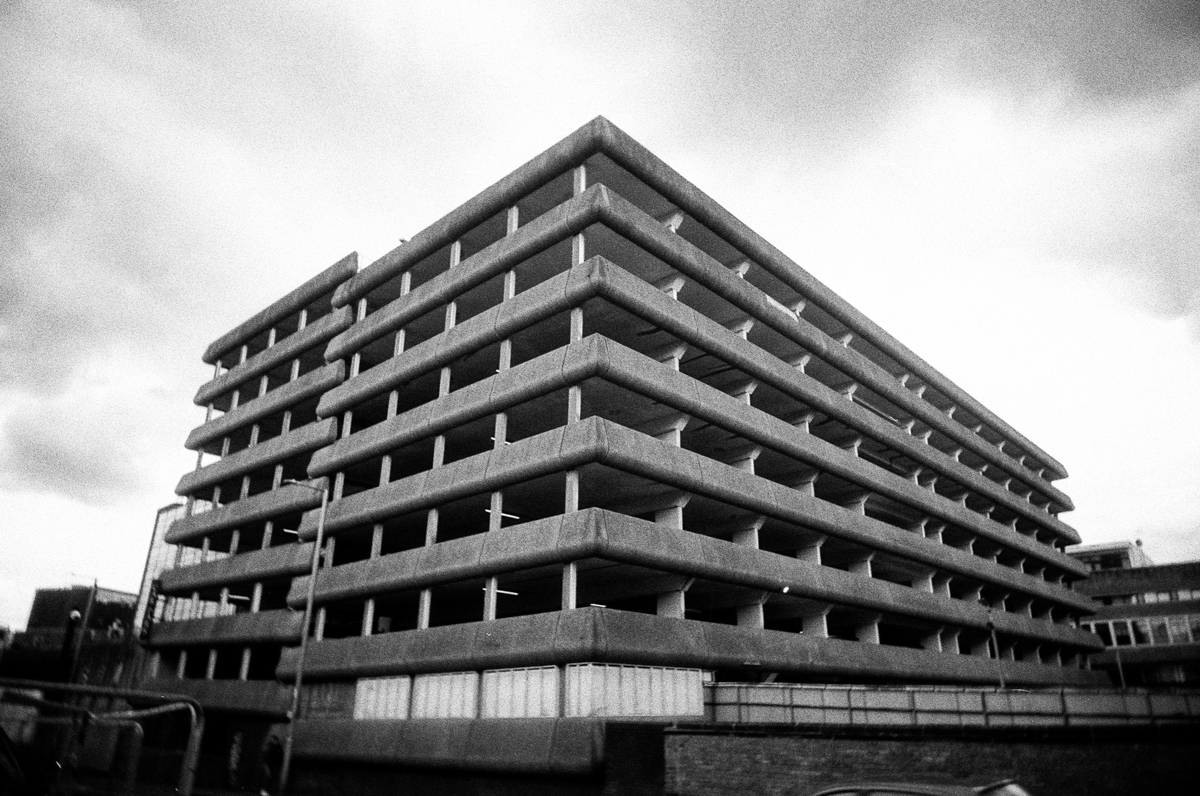
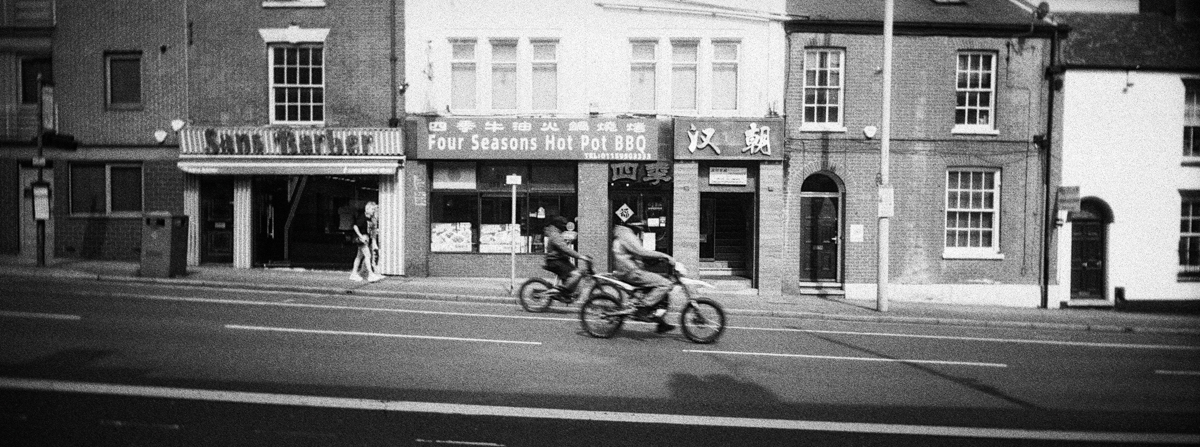
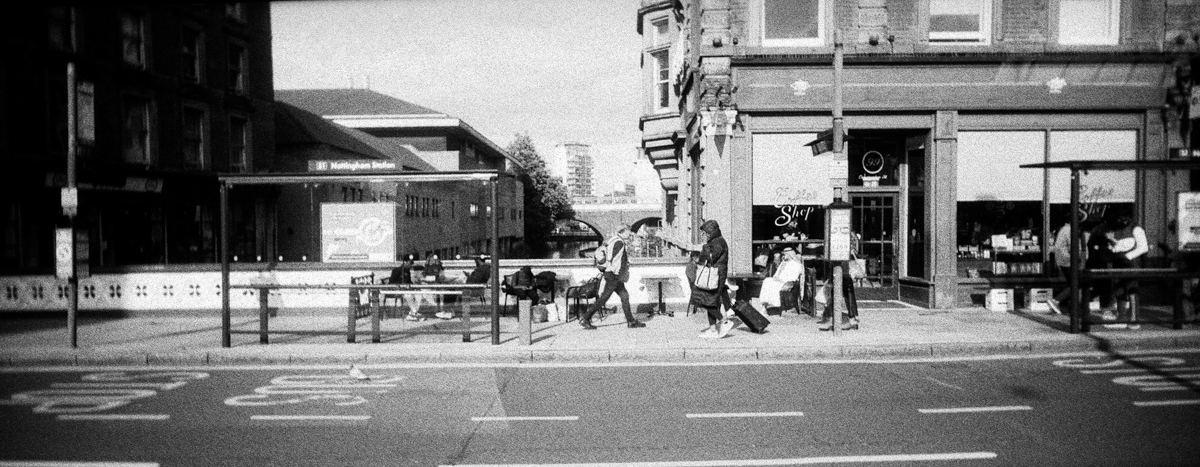
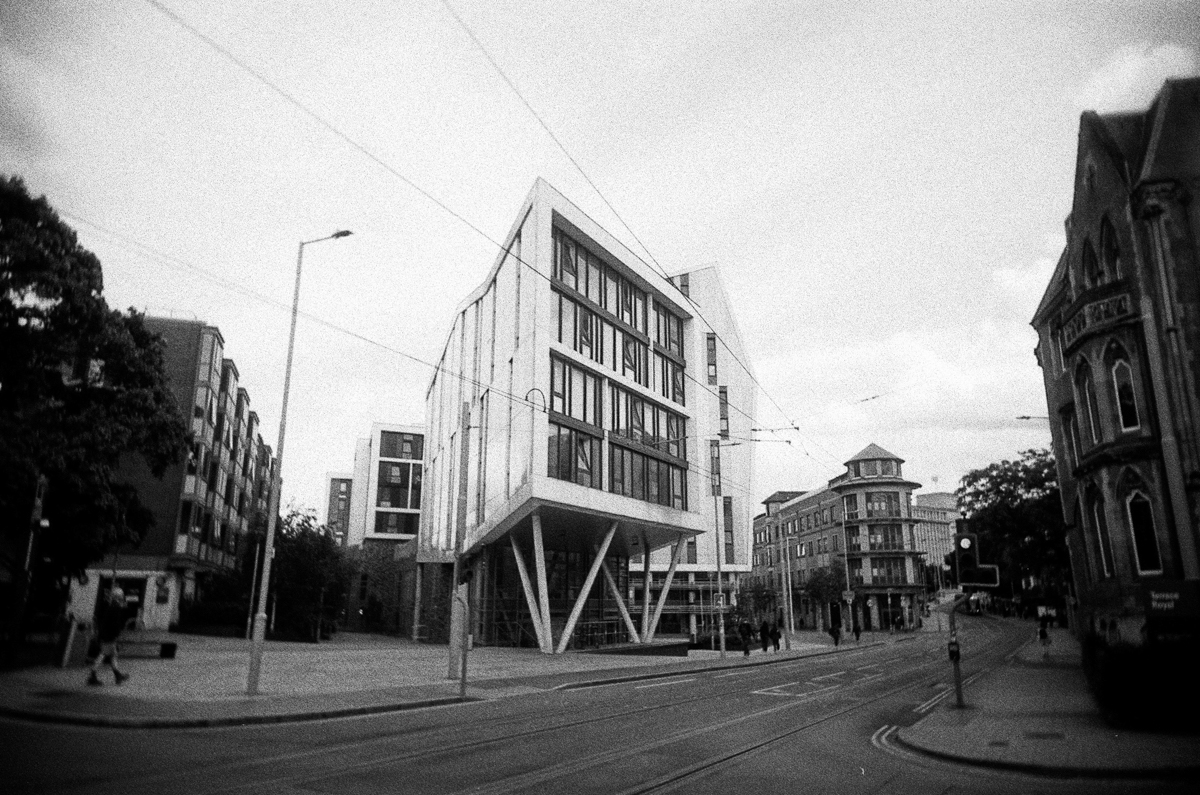
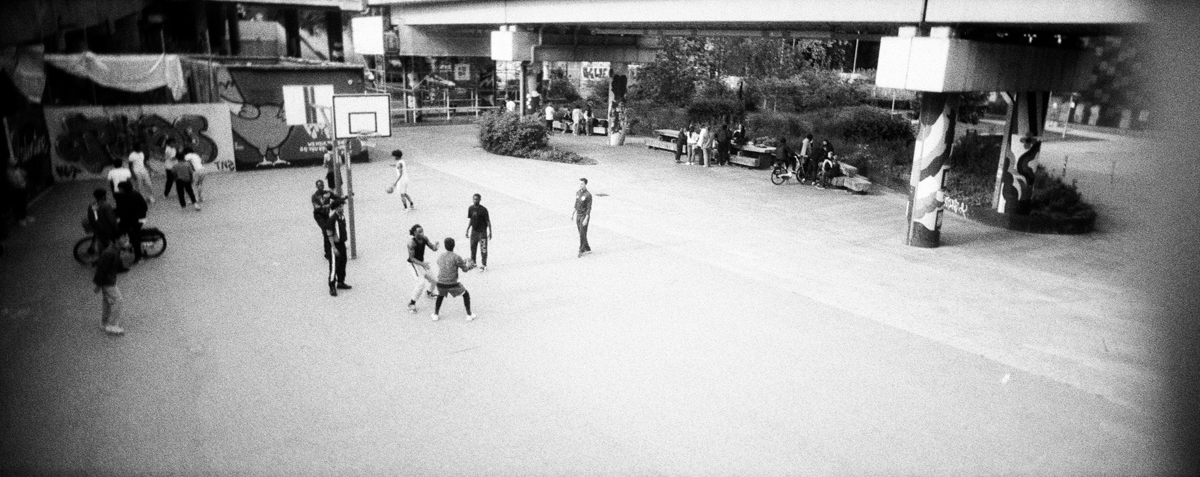
First up, some quick example shots
Before we get into the meat of this review, I think a few example shots would be a good thing to show you first.
They’ll help give you a better idea of what this camera can do – in both panoramic and regular aspect ratio mode.
The colour images were taken on Fujifilm 200 and the monochrome ones on Kentmere Pan 200.


What is the Reto Pano?
The Reto Pano is a 35mm film camera released by Reto in April 2025. It has a 22mm lens and allows you to take both regular aspect ratio shots and panoramic images on the same film roll.
It comes with the following specs:
- 22mm lens fixed at f9.5
- 1/100 fixed shutter speed
- 2-element optical grade acrylic lens
- 35mm x 24mm regular size images
- 35mm x 14.9mm panoramic images
- flash powered by 1x AAA battery
- dimensions of 110 x 62 x 32mm
- weight of 93 grams
- constructed mainly of ABS plastic
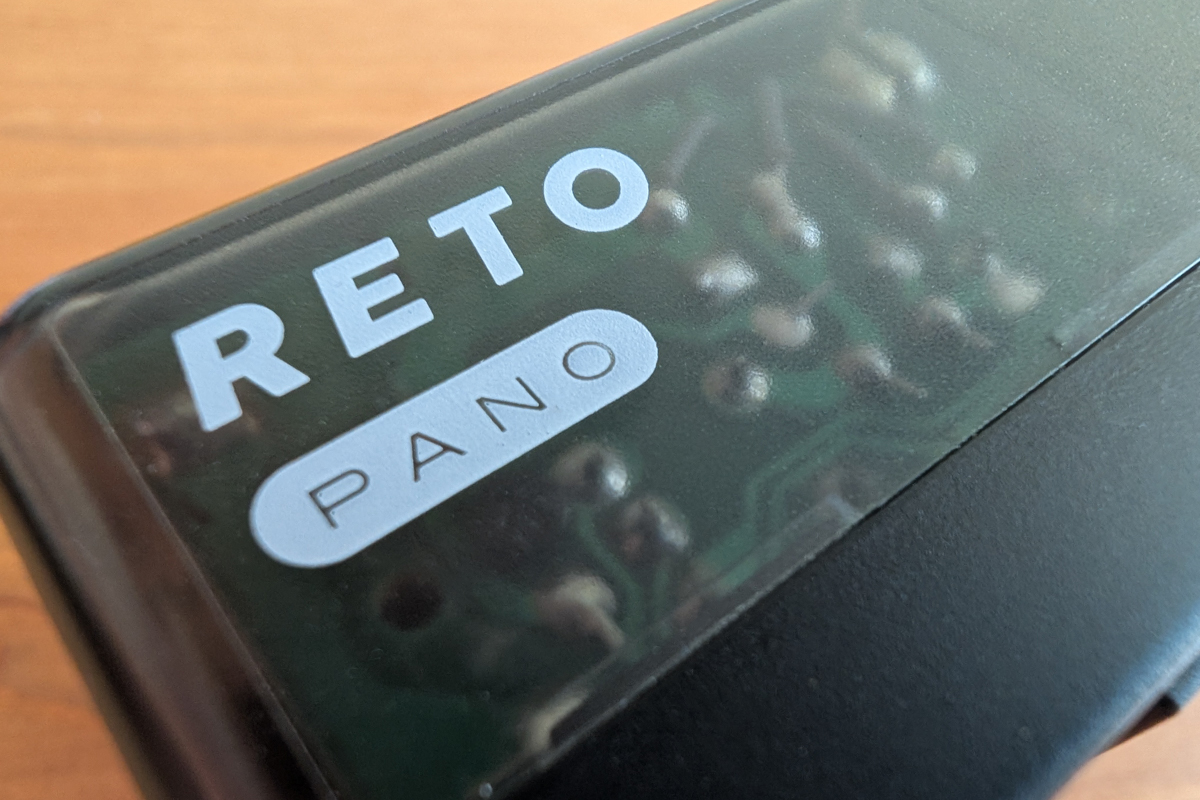
This camera is available in five colours – Sheer Black, Sheer White, Metallic Pink, Metallic Mint, and Metallic Silver.
The Sheer Black and White versions feature a translucent shell that allows some of the mechanism and electrical circuitry inside to be visible, while keeping the film compartment light-tight of course.


For full disclosure, Reto did send me this camera to try out and review here. There’s no obligation for me to be falsely positive about it though. I can say what I want. I just happen to really like it.
Having already used and reviewed some of their previous cameras like the Ultra Wide & Slim and the H35N, I find it interesting to note where a few of the components of the Pano come from.
The lens, for example, is 22mm wide with a 2-element optical grade acrylic construction. I’m pretty sure this will be the same one they used in the UWS and the first version H35 (the second one, the H35N, had an upgraded half glass lens).
The shutter button on top of the camera is the same one as used on the UWS, and the curved film plane that helps with distortion in images when shot with such a wide lens was also present in those previous Reto cameras.

You can see in the next images below that the entire rear of the camera is the same as the H35N, and that the insides of the H35N, the Pano, and the UWS are pretty much the same too, save for what they need for their special features.
The H35N has the half frame mask on each side of the lens, the Pano has the movable flaps that change it between regular and panoramic mode (see the next part of this review for more on this), and the UWS has neither of the above.
I realise that most companies who make anything are going to reuse components.
Nikon weren’t redesigning their shutter mechanism for each new SLR. Ford don’t come up with a new gearbox for every new car. But I still found it kind of interesting to see it happen in real time with each new Reto release.
I’m sure it helps them to keep costs low and new ideas for cameras to come to fruition more quickly when they can iterate – while still making each new camera different to the last – rather than create from scratch each time.


How the Reto Pano panoramic setting works
If you’re familiar with the Hasselblad XPan or the Lomography Sprocket Rocket, you’ll know that both of these cameras give you panoramic photographs by using roughly two frames’ worth of film for each shot.
The image will take up the full height of your negatives and be around twice the width of a shot taken with a regular 35mm camera. This means getting around half the number of images from a roll of film, but they will be at full resolution.
Another way to do it, as cameras like the Minolta P’s, the Panorama Wide Pic, or the Sprocket Rocket with the film mask in do, is to simply mask off the top and bottom of the frame inside the camera so you get a letterbox aspect ratio on your film.
This means your images won’t use the full height of the film, and will only take up the width of a single frame on it. You’ll get the standard number of shots from your roll, but the final results will lose some resolution as not all of the film has been used.
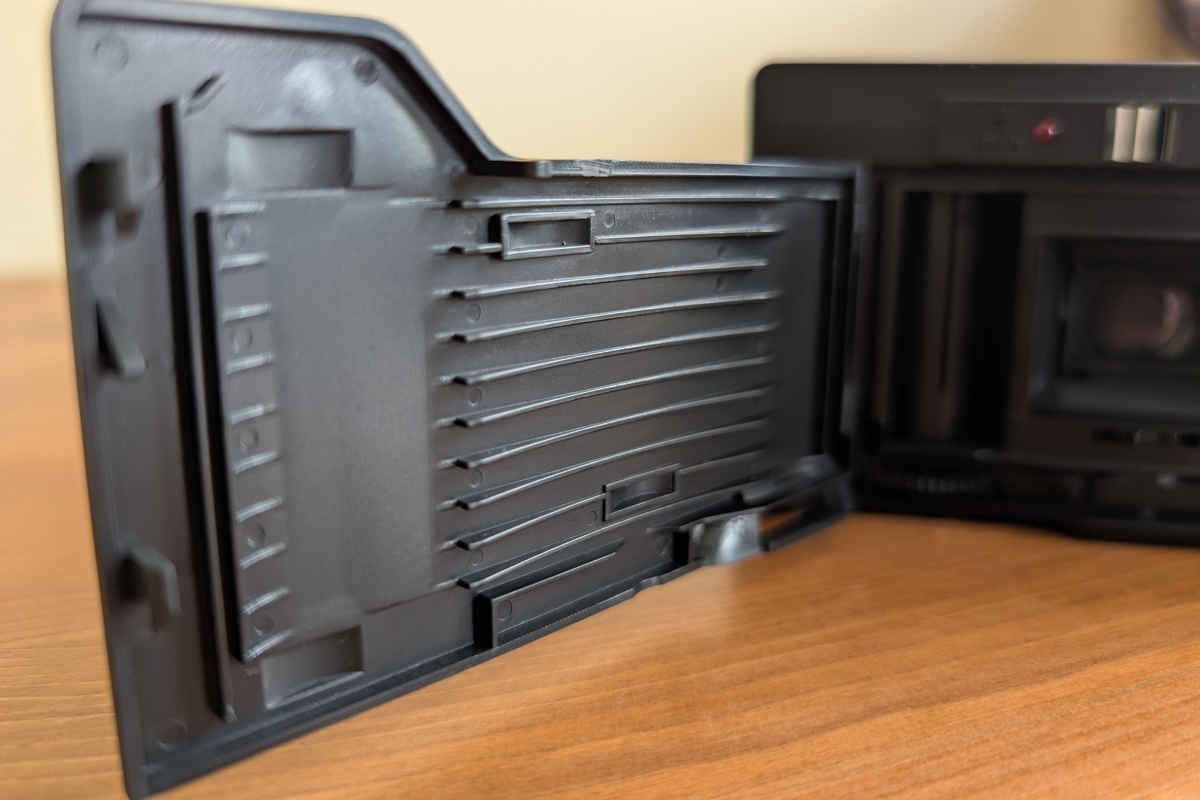
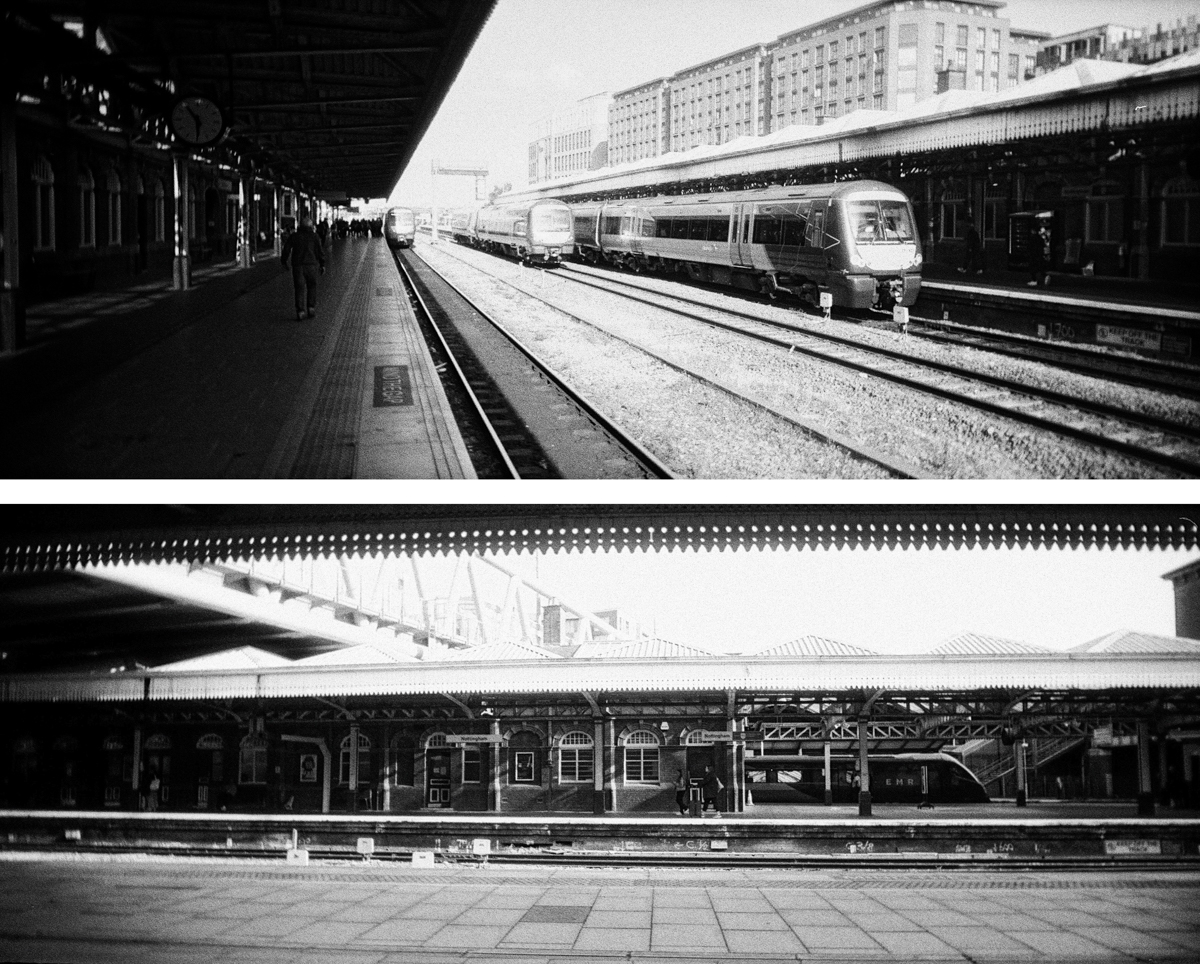
When shooting in Panoramic mode, the Reto Pano works in the latter way, with a pretty simple mechanism allowing you to switch between panoramic and regular shots simply by moving a slider on top of the camera.
This slider is placed next to the shutter button, which for me was a good choice ergonomically. It’s just right there when you need it.

When you slide the slider to change from normal to panoramic mode, a couple of flaps inside the camera move into position to act as a film mask and block out the top and bottom of your shot.
At the same time, another mask slides across in the viewfinder to give you a better idea of what you’re composing.
Of course, with this being a basic point ‘n’ shoot camera, you’re not looking through the lens like you are with an SLR. You should expect some inaccuracy between what you see and what you get.
But I do think this mechanism does a pretty good job of allowing you to compose well. Looking at the results I got, I don’t really see any examples of anything being cut off the top or bottom of the frames.
The following images show the film mask flaps in the open and closed position, and also the mask sliding across the viewfinder.


Criticisms of achieving panoramic shots in this way
I’ve heard some people say masking off part of your film is a bad way to achieve a panoramic shot. That it’s a waste of film, that you could simply shoot in the regular aspect and crop your scans digitally later, and you’re losing resolution in your final image when it’s blown up bigger.
Let’s address those points in reverse order.
I can’t argue with the one about losing technically resolution final point, aside from to say that I don’t think it matters for most people who only publish their work to be viewed on screens anyway.
I would also say that yes, cropping a full-size image to a panoramic shot later would help you to get the top and bottom of your frame exactly where you want them and potentially avoid chopping elements out of your image by having your composition be slightly too high or too low.
But there’s a lot of value in composing your shots with a panoramic field of view too. Like shooting in monochrome rather than shooting in colour and converting it later. I think it’s good to get into the right headspace for how it’s going to look at the time you press that shutter button.
To me, it makes the results feel more organic too. A digital crop after the event would feel more clinical, and would probably make me more indifferent and disconnected when shooting in the first place, knowing an exact composition was less important.
Finally, the point about masking off the top and bottom of your frame is wasting real estate on your film. Again, I can see the thinking behind this argument.
However, if we’re not bothered about losing a bit of resolution across the image, is it really that important? As mentioned earlier, other cameras like the Sprocket Rocket achieve panoramic shots by using more film per image, giving you half the number per roll.
If you can get 36 panoramic shots by masking off the top and bottom of the frame, could it be argued that needing double the amount of film width per shot and only getting 18 is wasting film too?
Maybe. I don’t care that much though. I support and enjoy both methods. Live and let live.

Image quality and qualities of the Reto Pano
Now we know what exactly the Reto Pano is and how it works, it’s time to get back to what’s important. The sort of shots you can expect to get from one.
For me, the image quality and qualities were pretty much as I expected, based on three factors.
Those factors are:
- it’s got an acrylic lens
- the lens is wide, at 22mm
- this camera was made by Reto
With the lens being acrylic rather than glass, you wouldn’t expect it to give the sharpest results you’ve ever seen. And in truth, it won’t do. However, in the middle of the frame at least, I think it does well enough for what it is, the camera it’s in, and the price this thing is being sold at.
That sharpness does drop off at the edges of the frame, but you would expect that anyway – especially with it being so wide. A lot of these cheap cameras suffer from this, even at more normal focal lengths. At 22mm, it’s always going to happen here.

Something else to expect with a lens this wide is barrel distortion, and that is present in a few of my images too – albeit more prominently when I shot in the normal aspect ratio.
A lot of my panorama shots where the background was a flat plane like a row of buildings on a street don’t suffer from barrel distortion at all.
It will happen more with elements closer-up in your shot or at the edges though, like the buildings on the sides of both the non-panoramic images below.

My final point on that list – about what I expected these shots to be like because the camera was made by Reto – was more of a personal opinion.
Having tried out a few Reto cameras before this, I had a good feeling this one would produce decent results purely because all the previous ones have too.
I’m pretty sure this is the same lens that was used in the Ultra Wide & Slim and the original Kodak H35, before the H35N got an upgraded glass one, and I had no complaints about what I got from it in the UWS and the H35.
So my final thoughts on the image quality and qualities of the Reto Pano are this: you’re shooting through a wide-angle, non-glass lens in a very inexpensive, new camera.
If you embrace the fun of what this thing is bringing, I think the results are actually really good.
Shooting diptychs with the Reto Pano
Because the last Reto-produced camera I used – the Kodak-branded H35N – was a half frame one, I felt the urge to shoot some diptychs in its natural portrait aspect ratio.
You can see some of them here.
While the wide horizontal shots you get from the Reto Pano weren’t as obvious a fit as those shots from the H35N had been, I thought I’d try some more diptychs with it anyway.
One on top of the other instead of side by side. Something different. A way to get a little bit more creative with the special feature of this camera.
Here are a few of what I got, shot on Kentmere Pan 200.

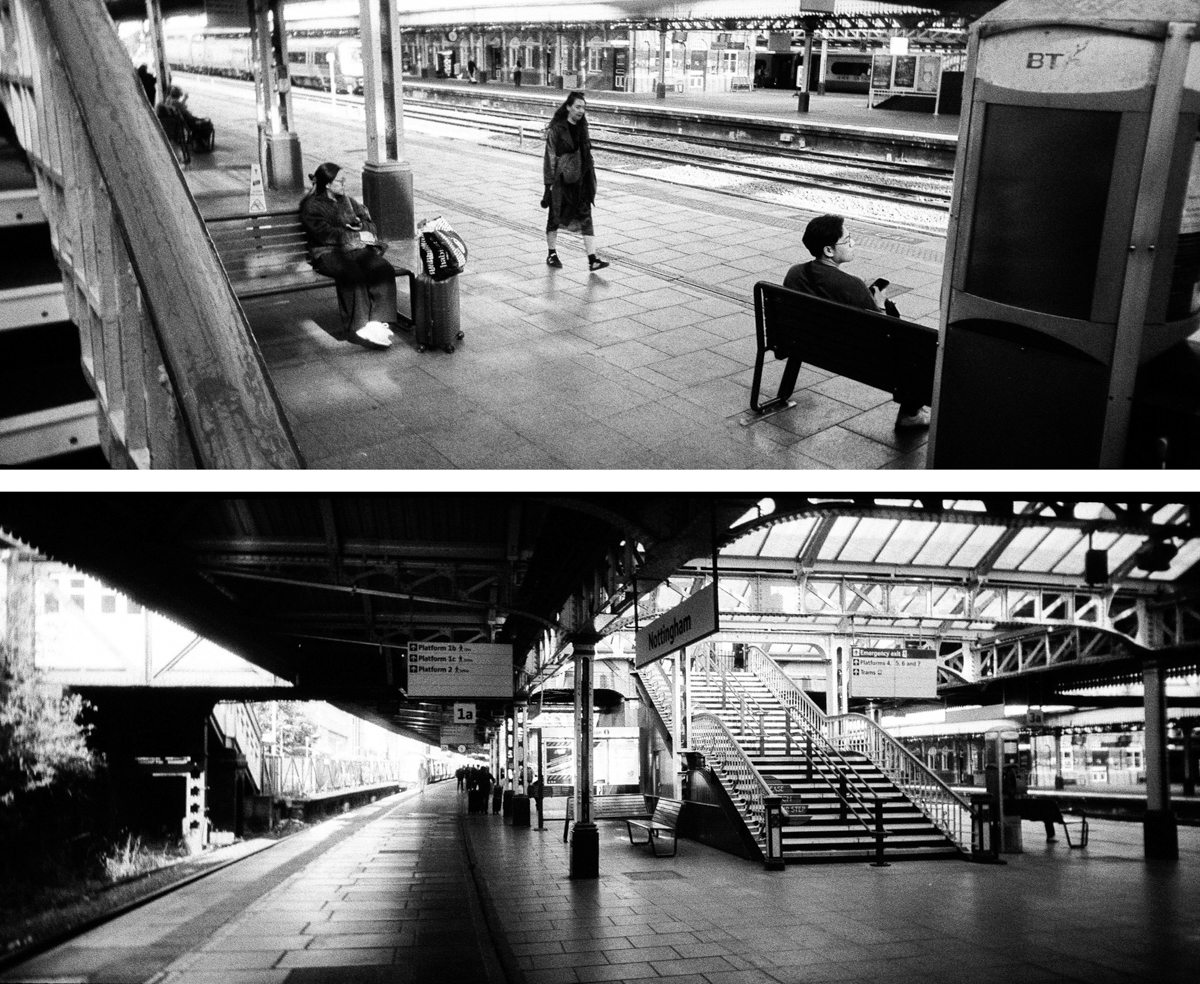
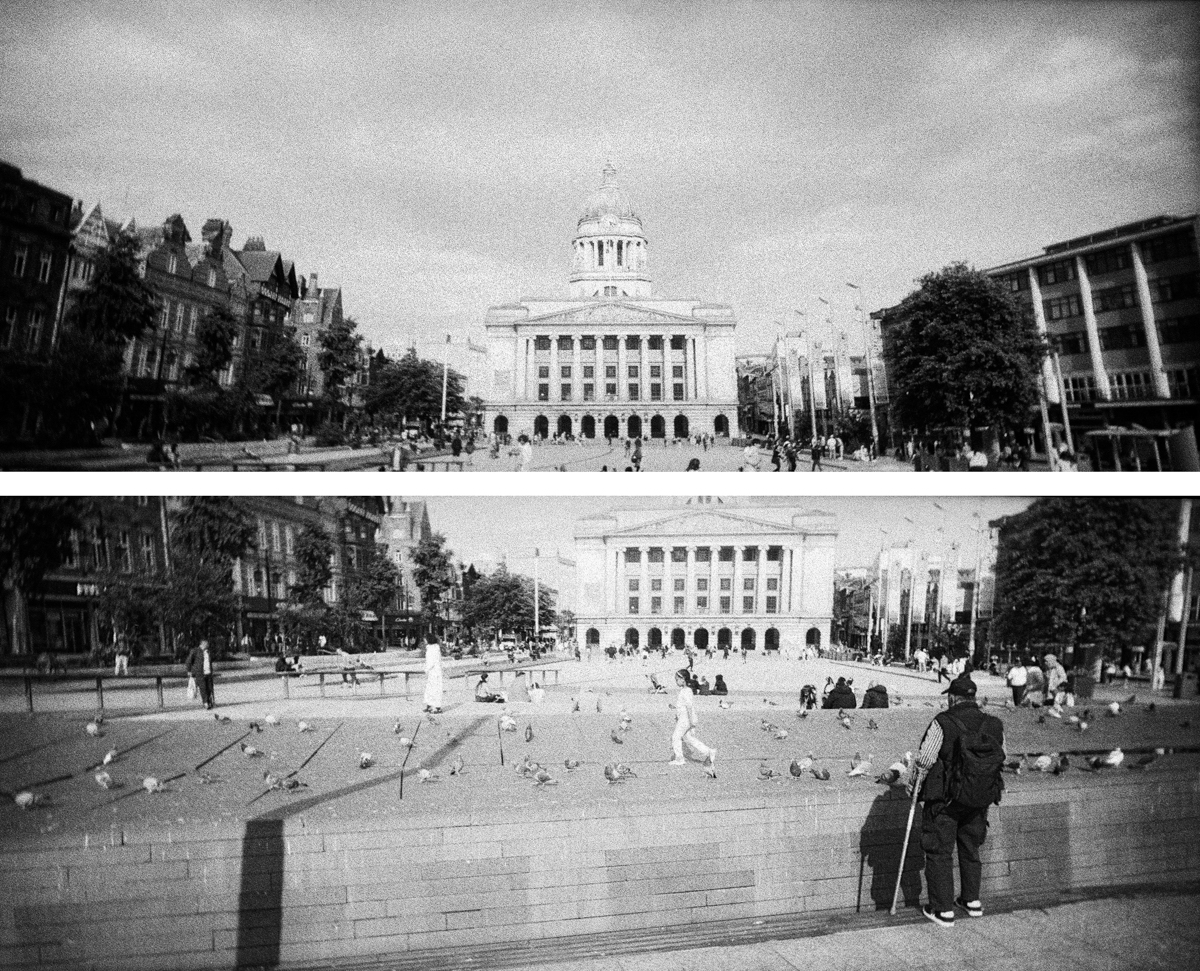


Lining those trees up on that second to last one was a deliberate thing, although it did take some cropping in the editing stage afterwards to really get them to match between the top and bottom images nicely.
What did make me think though when I shot the images to make that final diptych, the one featuring Nottingham’s Council House, was what if I could use both the Reto Pano’s shooting modes in one of these?
To make a diptych with a panoramic shot and a normal ratio one?
So I tried that too. With the Kentmere Pan 200 and the Fujifilm 200.
Both of them ended up being the same style. The bottom of a grand old building paired with a colonnade above. But that’s fine. It was only a quick idea to see if and how it might work.
Take it and run with it yourself, if you want. Make something different and better than I did. Shouldn’t be hard.


My biggest problem with the Reto Pano
Generally speaking, the Reto Pano is an easy camera to use and an easy camera to get interesting compositions from, whether you shoot it in panoramic mode or not.
Because even when you don’t, that 22mm lens is abnormal enough to make your shots stand out from those you’d shoot with most other cameras.
That wide lens, however, led to an occasional issue for me, and it’s one that I didn’t discover until I’d had both of my rolls developed.
Take a look.


I called this section my biggest problem with the Reto Pano for a reason. Because it is my problem.
That’s my finger in each of those shots, and I’ll tell you why I believe it’s there.
On the front of the camera, just to the side of the lens, there’s quite a big groove in the plastic. This is where my fingers must have naturally been finding as the best place to hold the camera when shooting.
Unfortunately, this was close enough that, coupled with such a wide lens, it’s easy for one of your fingers to intrude into your shots too. And because you’re not looking through the lens when you look through the viewfinder, this can happen without you knowing until it’s too late.
Again, it happening to me was my fault. It’s not any part of the camera there in my images where it shouldn’t be. It’s my finger, and I put it there.
But just be careful how you hold this thing when shooting, because it could easily happen to you too.

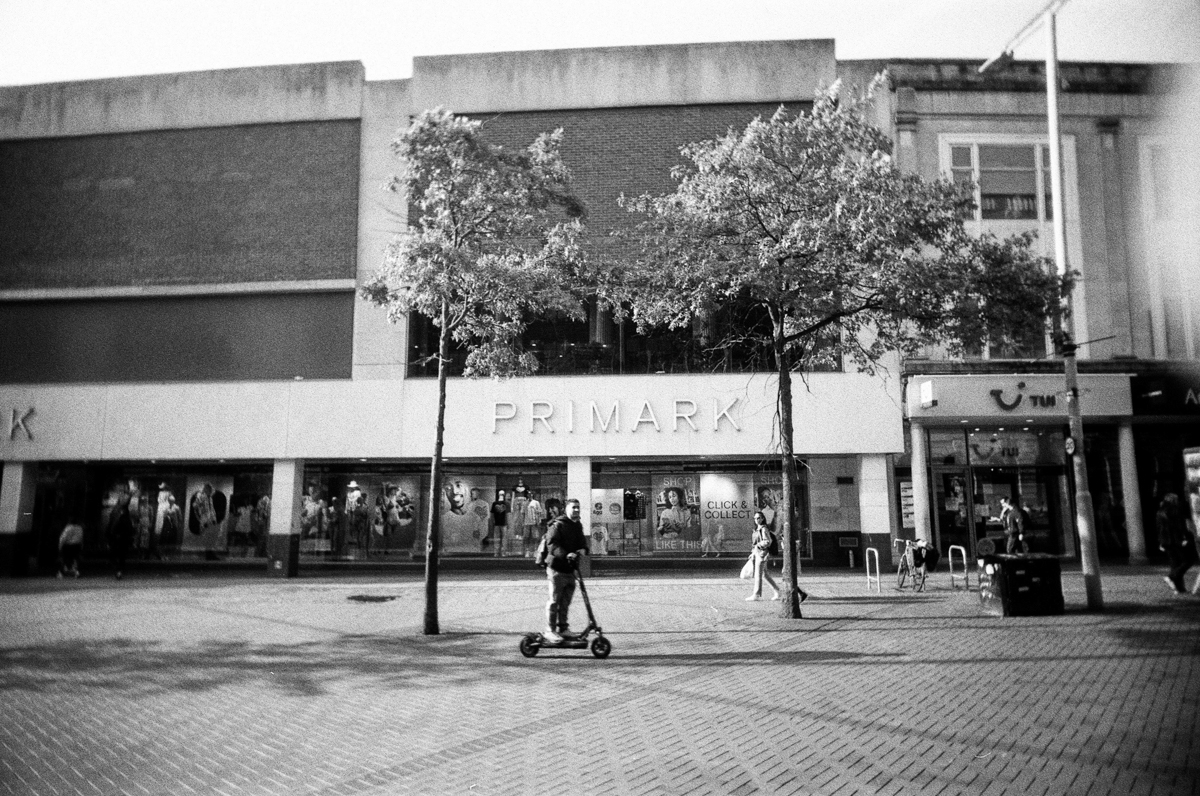
More Reto Pano example shots
I do like the Reto Pano, so I don’t want the final batch of example shots on this review to be ones that might paint it in a bad light.
Instead, I’m going to dump another set of ones that came out okay without my finger anywhere near them.


What film to use in your Reto Pano
When it comes to what film to shoot in your Reto Pano, I’m going to give the same advice I did for the Ultra Wide & Slim and the Ektar H35N.
Realistically, you’re probably going to want to shoot something in between ISO 100 and ISO 400. It really all comes down to the weather and light you’ll be shooting in.
Because you have a fixed aperture of f9.5 and a fixed shutter speed of 1/100 of a second, the only variables you have are the available light and the ISO rating of the film you choose. So you’ll be choosing a film to match the light.
A general rule would be ISO 100 and 200 films on brighter, sunnier days and ISO 400 on gloomier days when the light isn’t quite so good. I wouldn’t go with anything too expensive either. I’ll save that stuff for when I’m using a technically better camera.
As mentioned, I went straight down the middle with Fujicolor 200 and Kentmere Pan 200 in mine. It just gave me a touch more versatility if and when the sun went behind some clouds when I was out shooting.
Some suggestions for what else to use would look like this:
For colour film, perhaps:
For black and white film, perhaps:
- Kentmere Pan 100
- Fomapan 200
- Ilford HP5 Plus 400
Where to buy a Reto Pano
You can find a Reto Pano at most places that sell new film cameras online.
Reto sell them themselves and ship worldwide from Hong Kong, and they have a list of authorised dealers across the globe too. You can also check out the following stores specifically should you wish.
- find a Reto Pano at B&H Photo
- find a Reto Pano at Analogue Wonderland
- find a Reto Pano on Amazon
Shoot standard and panoramic images on the same film roll at the flick of a switch with the Reto Pano. A 22mm f9.5 lens in a compact body, it's ideal for landscapes, travel, street, or anywhere else that looks good shot through a wide-angle lens.
Final thoughts on the Reto Pano
There have been quite a few cheap plastic reusable cameras hitting the market in recent years.
I find the term reusable a bit strange, because to me that’s the standard thing for a film camera. It should go without saying.
But I think they call them that because they are, in terms of quality and functionality, not really much better or different than a disposable. They’re just designed to be used again and again. Like, you know, a normal film camera.
The reason I bring that up is to say that I think Reto have set themselves apart from most of what else has been released in the last few years by giving each new camera a different reason to use it.
Their previous offerings were a 3d camera based on an old Nimslo design, a reboot of what was most famously the old Vivitar Ultra Wide & Slim, and a couple of half frame cameras too in the Kodak-branded H35 and H35N that look a lot like the old Instamatic 133.
The Pano continues this trend. In regular shooting mode, its 22mm lens is wider than what a lot of people will have shot before. Unless they’ve tried the UWS, of course. Because it’s the same lens, with the same field of view.
As an aside, I think this Pano has made the UWS obsolete. There’s not much reason to buy one anymore. Not when you can get this one that does the same and has the panoramic mode and a flash too.
That panoramic mode is the real reason to buy this one though, and I really enjoyed shooting with it. As mentioned, you could just crop digitally later, but I don’t want to do that. In all the years I’ve been using film, I’ve never even thought about doing that.
Reto cameras are well-made for the price they cost, and I reckon this one is worth picking up and playing with too.
I enjoyed shooting mine, and I like the results I got from it too. And after all else is said and done, those two things are the main thing. 🙂
If you found that Reto Pano review useful, why not check out these other great film cameras too:


And if you think others will enjoy or benefit from this camera review too, help them find it by giving it a share. 😀

Something in my head: I really hope that Reto eventually puts the 3-element glass 25mm lens from the Snapic A1 into the guts of a Reto Pano. I dislike auto-motors, don’t care about double exposures, but would LOVE to have that nicer lens with the crop-pano like this where I can manual-wind rather than listen to whirring motors.
The core thing is the viewfinder. Being able to compose in Pano format goes a long way. The roll I put through the Reto Pano, I mostly would search for frames in pano, slide the crop mask out to shoot, then slide back in to compose.
I’ve got half a mind to buy a Nikon with some kind of swappable focus screen, and modify a screen to get the right composition for crop panos easily, but with nice SLR glass.
That’s a decent idea about upgrading the Pano with the Snapic A1 lens. They did similar with having the all plastic lens in the H35 and then putting the plastic + glass one in the H35N.
Even if they don’t though, it’s good that they’ve now developed that all glass lens for the Snapic A1 and will hopefully keep using it now in whatever comes next.
Hello, thank you for this complete review about the Reto Pano, and the many photo samples in it.
I’m a big fan of the Reto UWS; I own three (two “official” Retos and a copy, marketed as the “Superheadz wide & slim”). Why? Because they’re so thin and light that it’s easy to carry more than one, and thus manage two different ISO settings: 100 ISO in one pocket and 400 in another! And then be ready for any change of weather.
Here are some examples.
After reading your post, I decided to treat myself to a Pano.
I’d like to ask you a question: have you used the flash? What do you think of it in low light, and even in bright daylight for filling in shadows?
Thank you !
Hi Patrick.
You’re welcome. Yeah, I liked the UWS also, it was fun to play around with and you’ve done some fine work with yours too.
I didn’t get around to trying the flash on this Pano, no. I pretty much never use a flash with any camera so I didn’t try it out with this, even though it would have been useful for this review. 🙂 Maybe one day I’ll revisit and give it a go.
Sorry I can’t help you with any info on how it performs right now! 🙂
Lee