
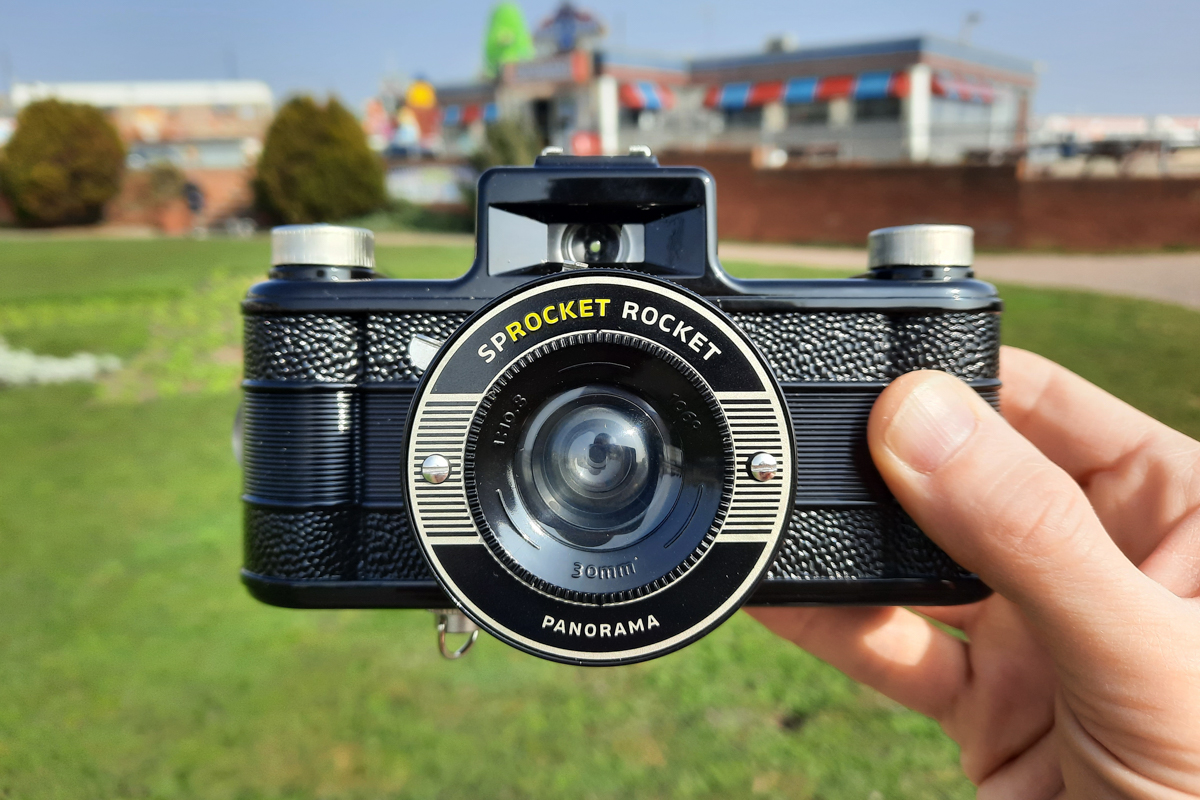
Lomography’s Sprocket Rocket is unlike any camera I’ve shot before, or since. All things considered, it’s quite unlike any camera anyone else has ever made before or since.
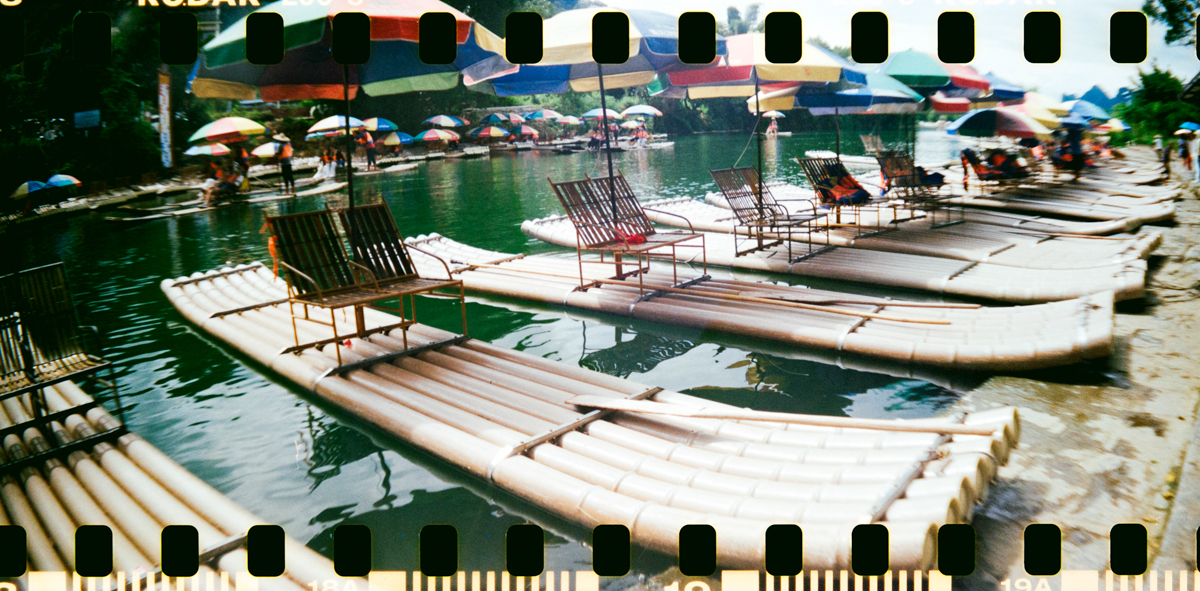
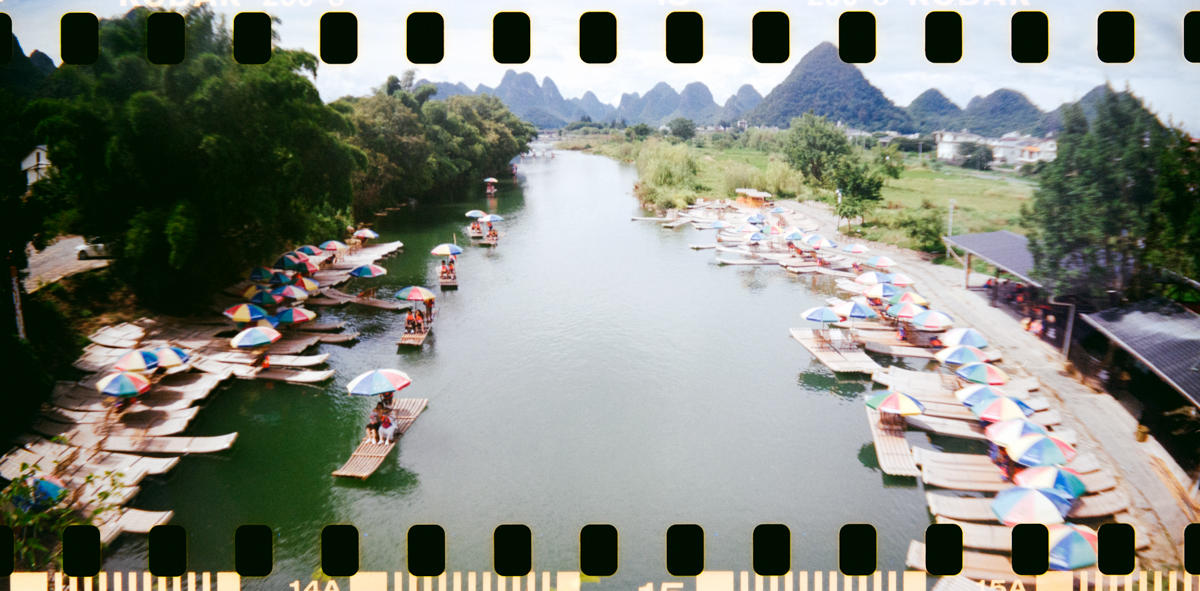
The build and operation are very simple, and the result is panoramic images with sprocket holes running along the top and bottom of them.
It’s not perfect. No camera is. Especially some of the ones from Lomography, as much as I like them as a company. But the payoff when things go well is definitely worth it for me.
We’ll explore everything about the Sprocket Rocket in this comprehensive review. If you have one, I hope you can take something from someone else’s perspective on it. And if you’re deciding whether or not to get one, I hope to help you make your mind up there too.
But first, some example shots to demonstrate what this camera is all about.


Sprocket Rocket specs and features
Although the photographs produced by the Sprocket Rocket are very non-standard, the first thing to know about this camera is that it’s very easy to use, with the few settings you can change having only two options to choose from.
These are:
- aperture – f/10.8 or f/16
- shutter – 1/100s or bulb
- focus – 0.6m to 1m or 1m to infinity
You have two other things you can decide before shooting but then not change until your roll is finished. These are your choice of film of course, and whether to insert the film mask in the camera that blanks off the sprocket holes.
Your decision on the latter will affect the aspect ratio of your images as follows:
- standard, no mask in – 72×33 mm (panoramic images with sprocket holes)
- narrower, with mask in – 72×24 mm (panoramic images without sprocket holes)
It’s worth noting that a lot of places, including Lomography themselves, state the Sprocket Rocket gives you a 3×1 aspect ratio, but this to me feels a little misleading by way of giving incomplete information. Let’s look again at those numbers.
- 72 by 33 is equal to 2.18×1
- 72 by 24 is equal to 3×1
So while it’s true that you can get 3×1 images from your Sprocket Rocket, you’ll only do so when you use the film mask. And I think most people will be buying this thing for the sprocket hole effect, which you only get without that film mask.
Not a dealbreaker, but something I noticed and thought was worth mentioning.

You’ll also get half the number of regular-sized images you would from a roll of film, as we’re using two frames per panoramic shot with this camera.
That means 18 from a 36-exposure roll, and 12 from a 24-exposure roll.
The 106 degree wide-angle lens comes in at a nominal 30mm, although that’s not really something you’ll need to know or care about with the Sprocket Rocket, and with this being a Lomography camera there is a very easy-to-use native multiple exposure feature too.
It’s available in a multitude of colours, and you also get a hotshoe on top for mounting a flash or perhaps an action cam if you’re into vlogging your camera adventures, as well as a tripod mount on the bottom for long exposures with that aforementioned bulb mode.
If you need any more information, you can view or download the Sprocket Rocket manual right here.
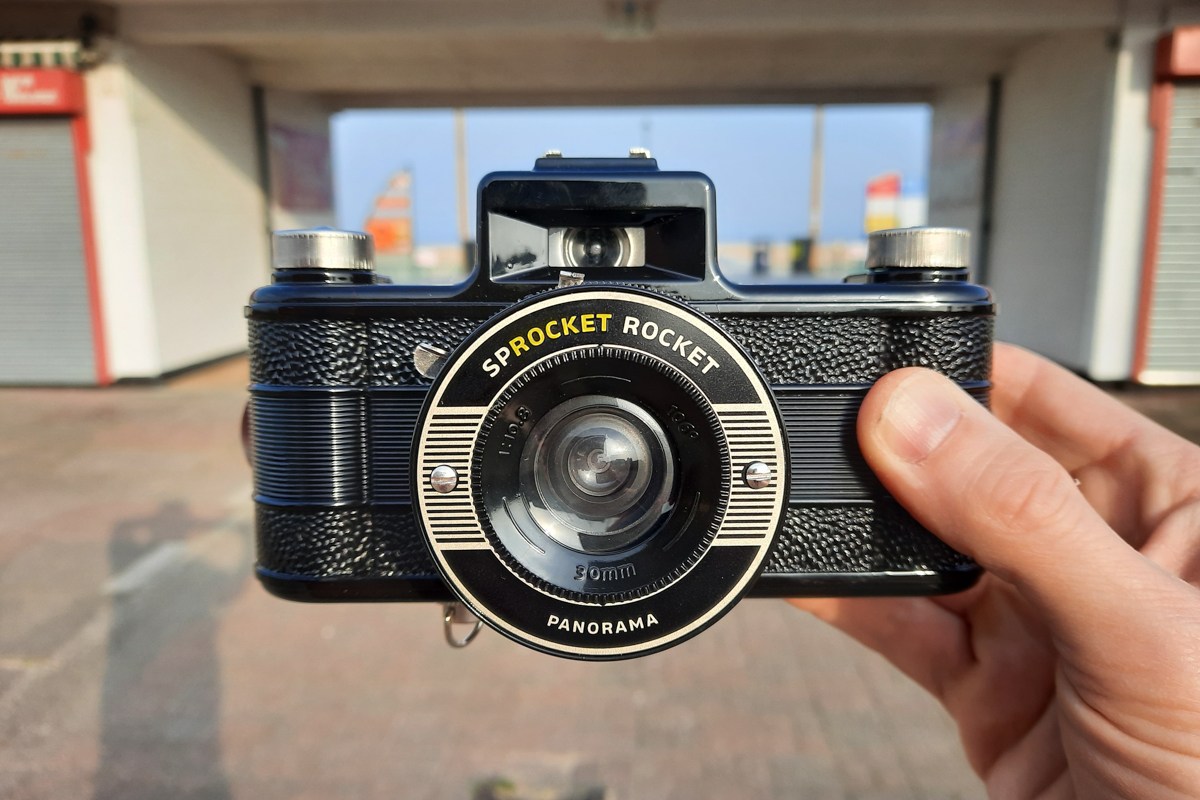
Sprocket Rocket design and shooting experience
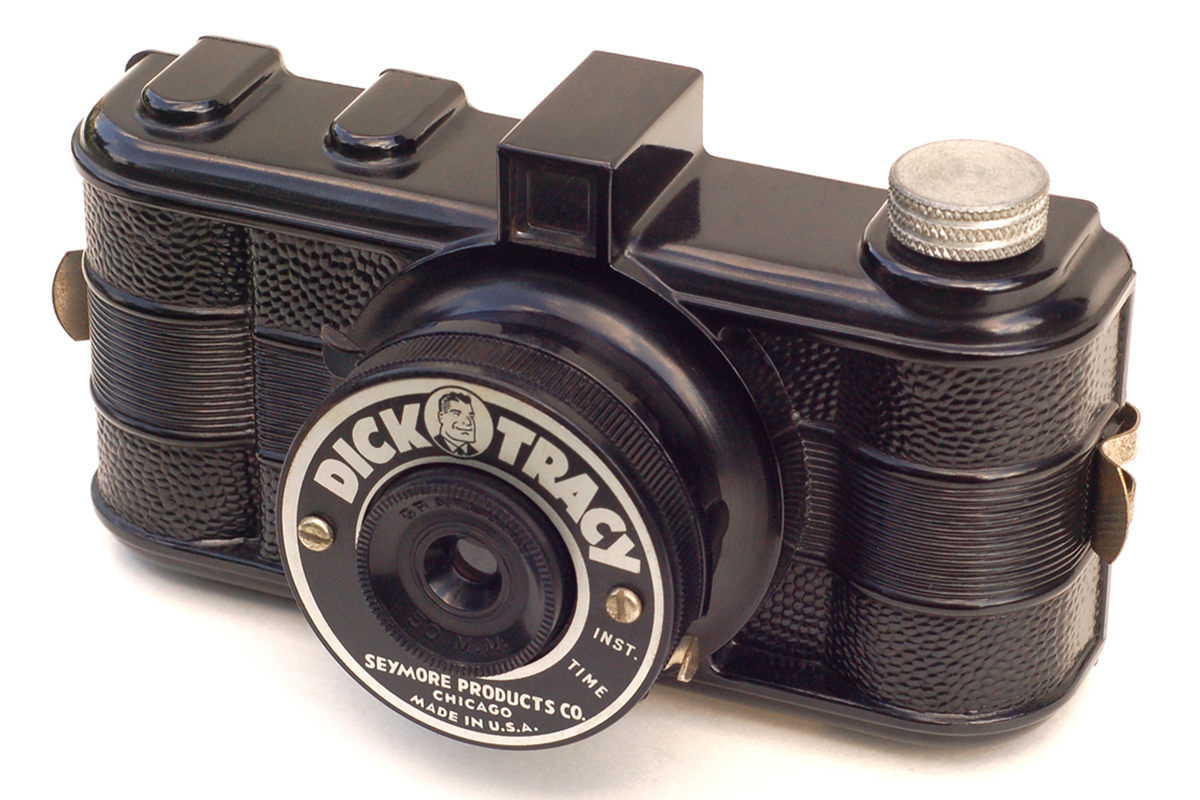
The Sprocket Rocket is definitely not a normal looking camera, but those aesthetics haven’t come completely from scratch in the imagination of whoever Lomography enlisted to design it.
In the late 1940s, a Dick Tracy-branded 127 film format bakelite camera was released, as shown in the image below from John Kratz on Flickr and shared under the CC BY-NC-SA 2.0 license.
As you can see from John’s collection, the model was rebranded and modified for a number of other versions too.
In my first two images that follow the Dick Tracy one, you can see the shutter release lever is the same, as are the clips that hold the backplate on.
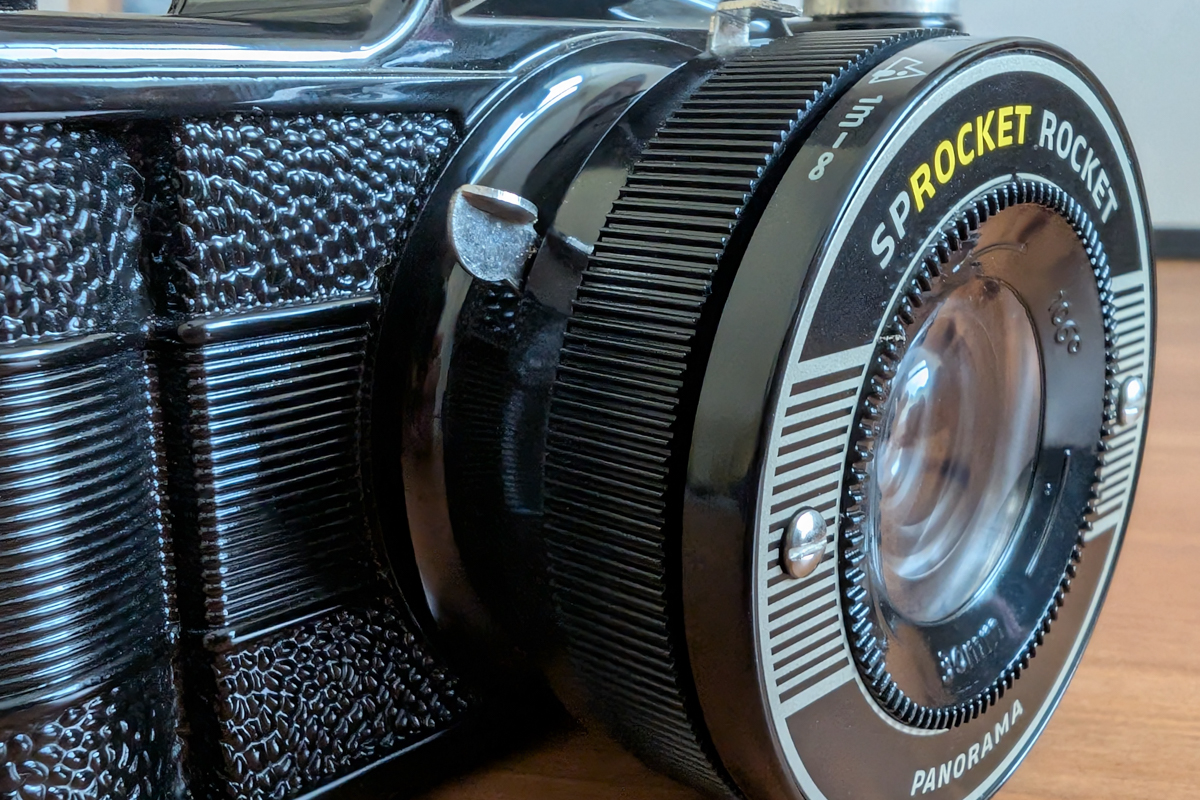
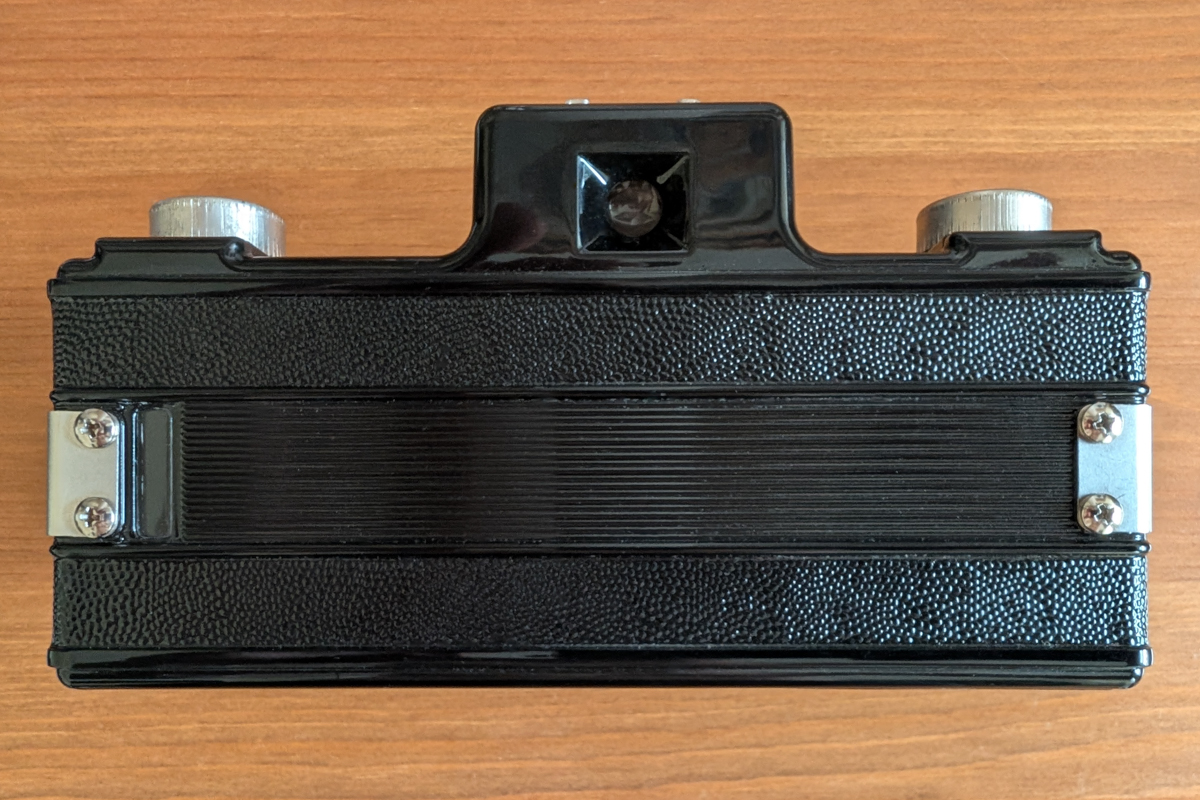
The next set of images is just here to show you where everything else is on the Sprocket Rocket.
They’ve been well enough thought out that they’re always easily accessible when you need them and don’t get in the way when you don’t. Which is good, because really I’ve gone whole rolls without having to adjust some of them.
The aperture lever for example, which is found below the lens. I’m probably only shooting a roll on days where the weather is going to be consistent enough that one aperture setting – likely the sunny one – will be fine.
You can also see the threaded tripod mount on the underside of the camera.
Wrapping up this anatomy of the Sprocket Rocket, we have the focus ring on the lens with its subtle arrow pointing at your selection, and the Normal or Bulb mode lever on top of the lens, next to the shutter release one.
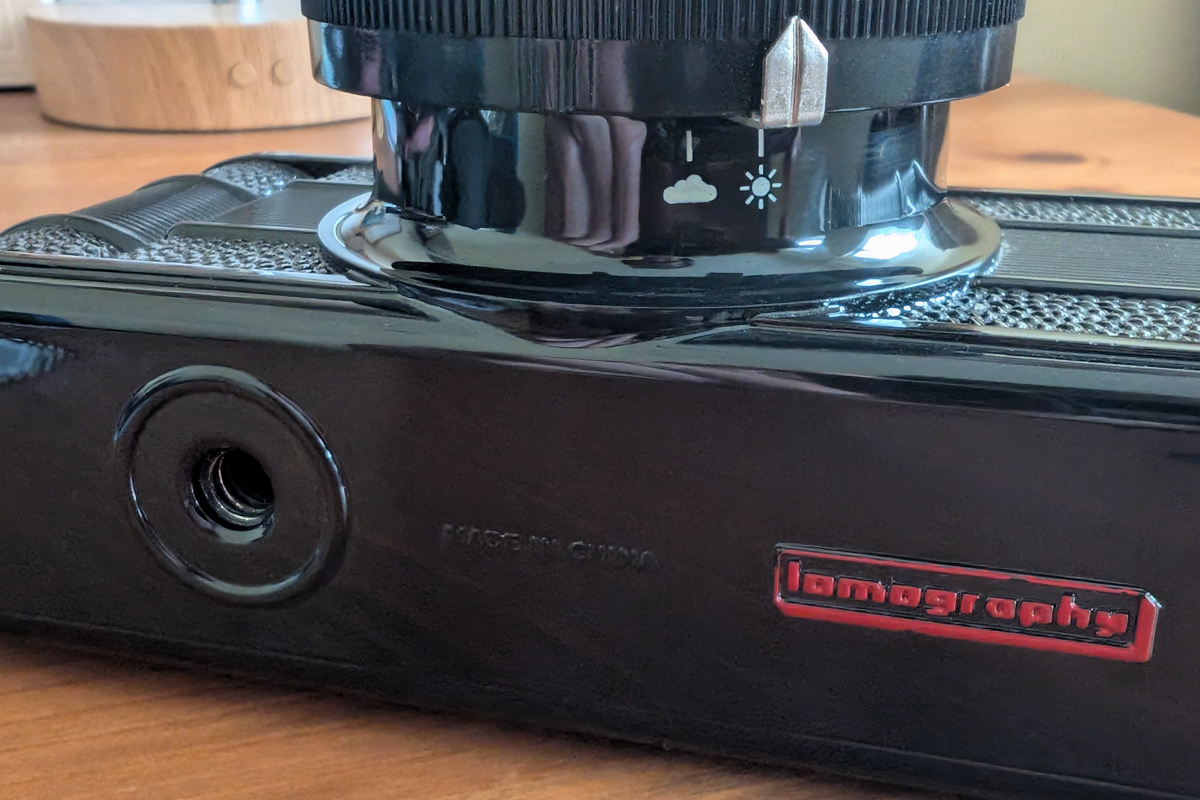
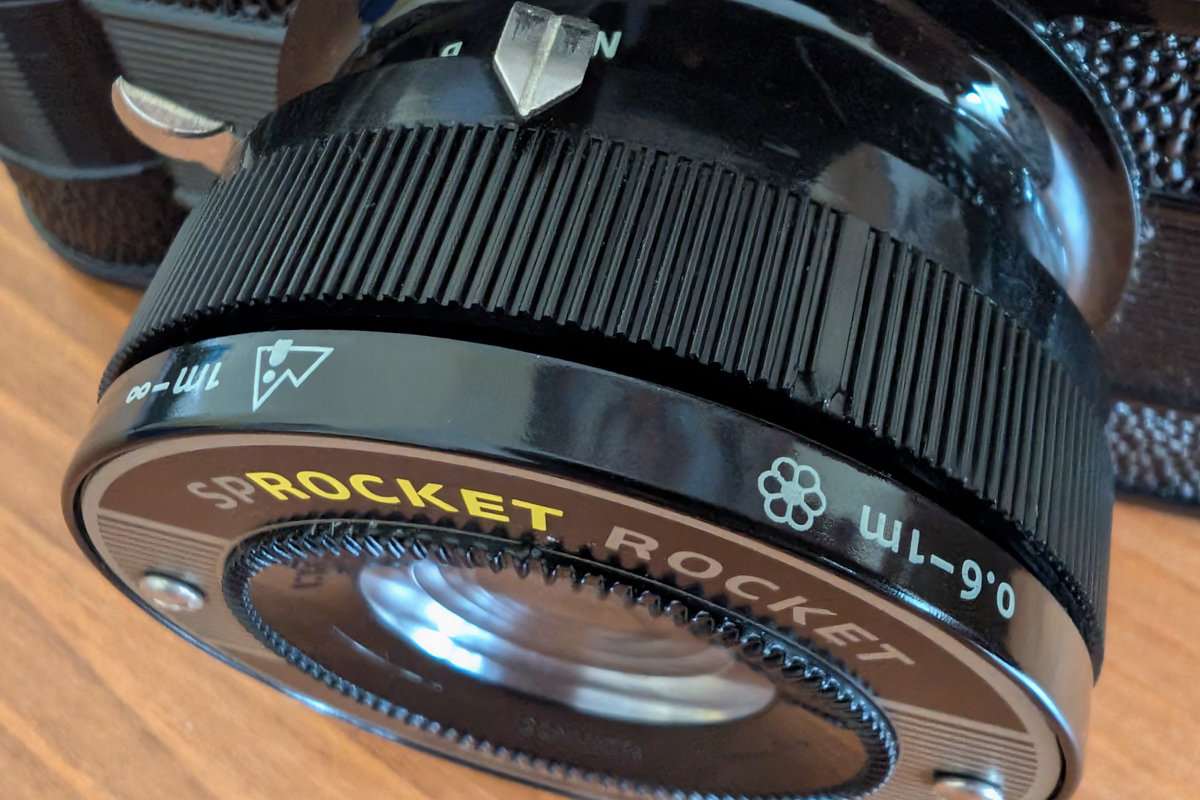
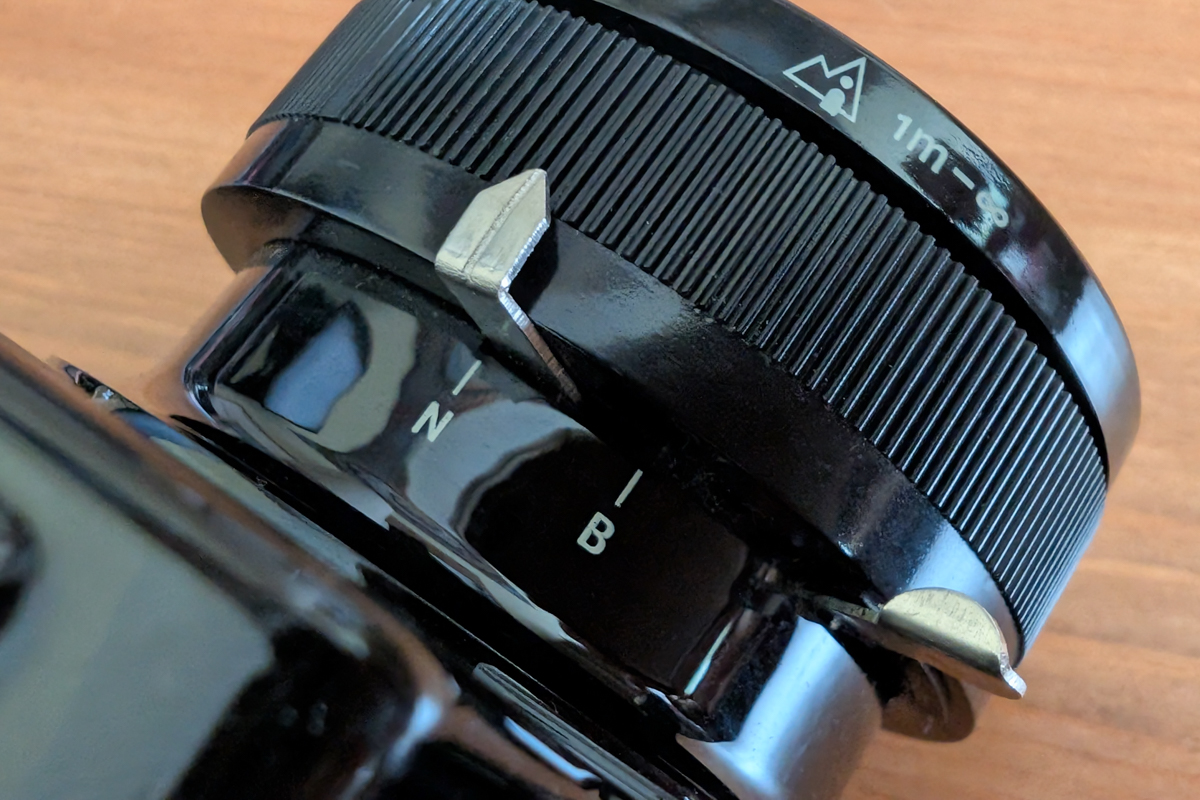
On top of the Sprocket Rocket are two dials. One of them is to wind your film on, and the other is to wind it back.
You’re able to use both of these any time you want to while using this camera, should you want to rewind your roll halfway through for some reason.
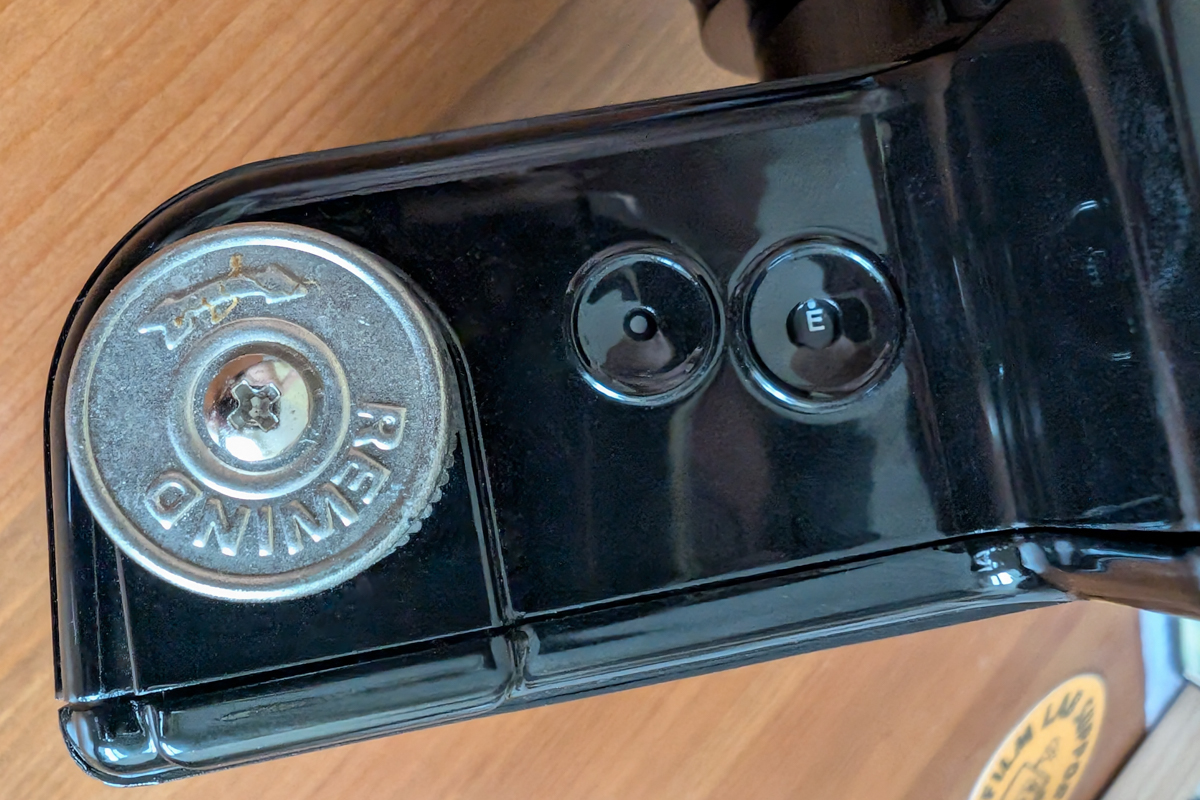
With there being no mechanism to prevent you from winding your film on too far or back again, you need a visual aid. And that’s what you have in the first of the two small circular windows next to the rewind dial.
Looking into it you’ll see a small white circle, which cycles around as you use the film wind dial after taking a photograph. When it comes back into view, you know you’ve wound your roll on far enough and are ready for shooting your next one.
Next to that is the film counter. In my images it’s displaying ‘E’ as the camera was empty. But it does a good job of counting in actual numbers once you begin shooting.
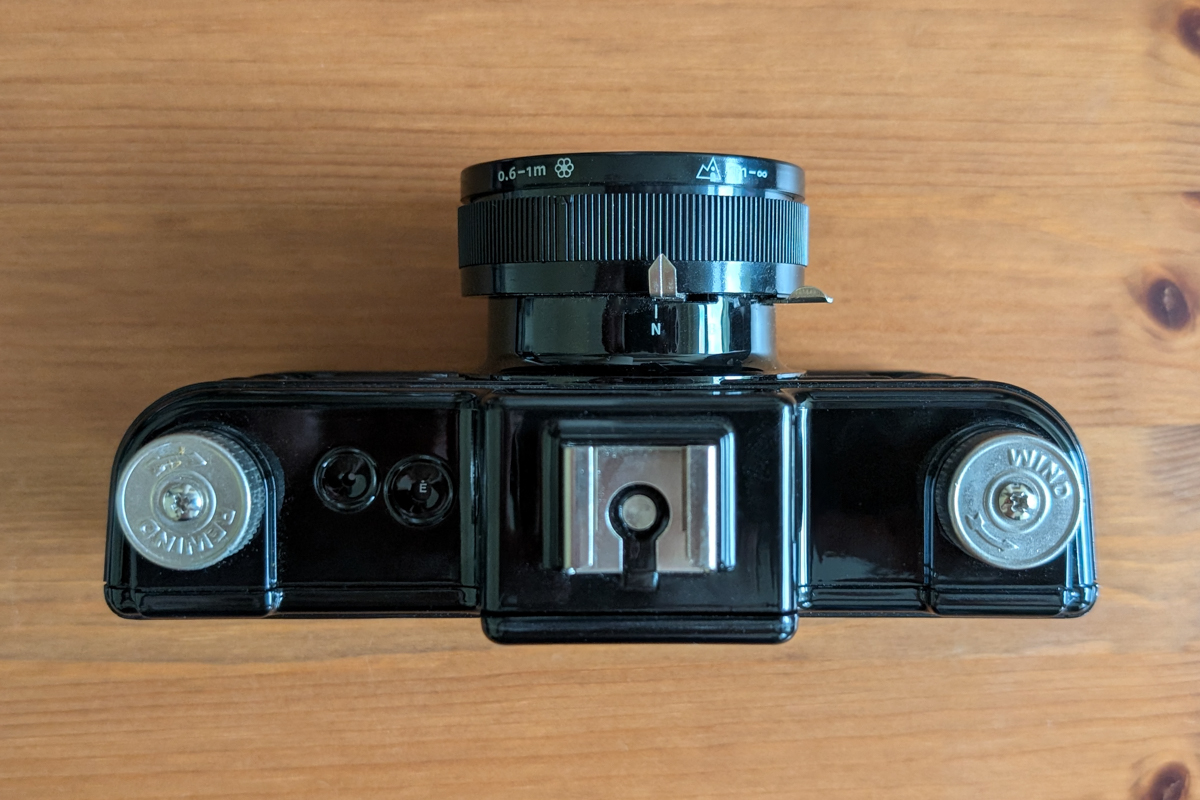
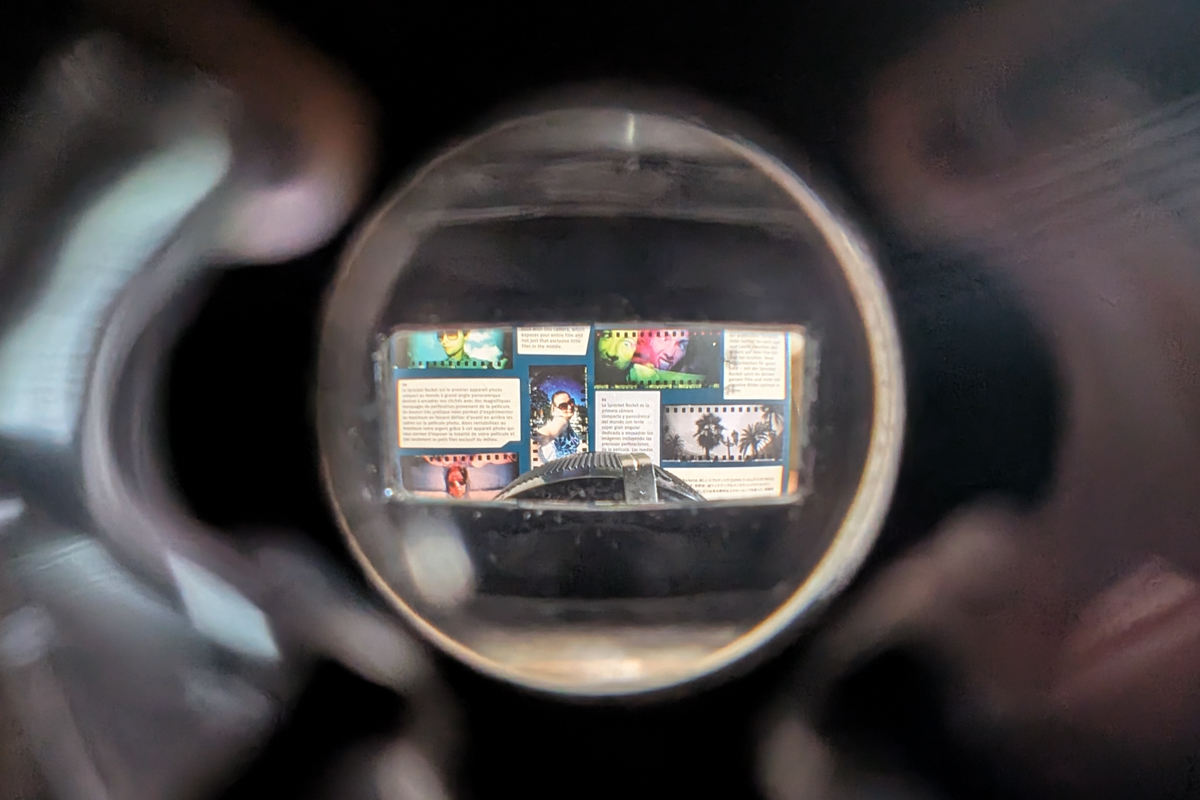
Finally for this section, a word on the viewfinder and lens.
The Sprocket Rocket is a very basic camera in its construction, and you’re obviously not looking through the lens when you look through the viewfinder. Aside from anything else, you know this because you can literally see the lens through the viewfinder.
Don’t worry. You get used to that.
I’ve found the viewfinder to be simultaneously a bit of an approximation of what you’re going to get, but also fairly accurate if you’re not shooting geometrically perfect compositions (which you probably won’t be with this camera).
I’ve certainly not had any issues with things being annoyingly off-centre like I have with the Kodak H35N, for example. For the style of what I’ve shot with this thing, it’s always been close enough.
The biggest problem I’ve had in terms of images not matching what I thought I was shooting has been crooked horizons. That can happen with any camera of course, and when it does it’s all on me, not the equipment. It’s just that with this one, if you have the sprocket holes along the top and bottom of your shot, you can’t really straighten it.
Aside from that, just be careful with your fingers and be sure you’ve removed the lens cap. I keep mine completely off and in my bag or pocket whilst walking around shooting the Sprocket Rocket.
The plastic lens isn’t that worth protecting between shots that I want to risk forgetting to remove the cap and waste my time and film on blank images.
Some colour Sprocket Rocket example images
The first roll of film I shot in the Sprocket Rocket was some of Lomography’s own Colour Negative 400, which is produced and supplied to them by Kodak.
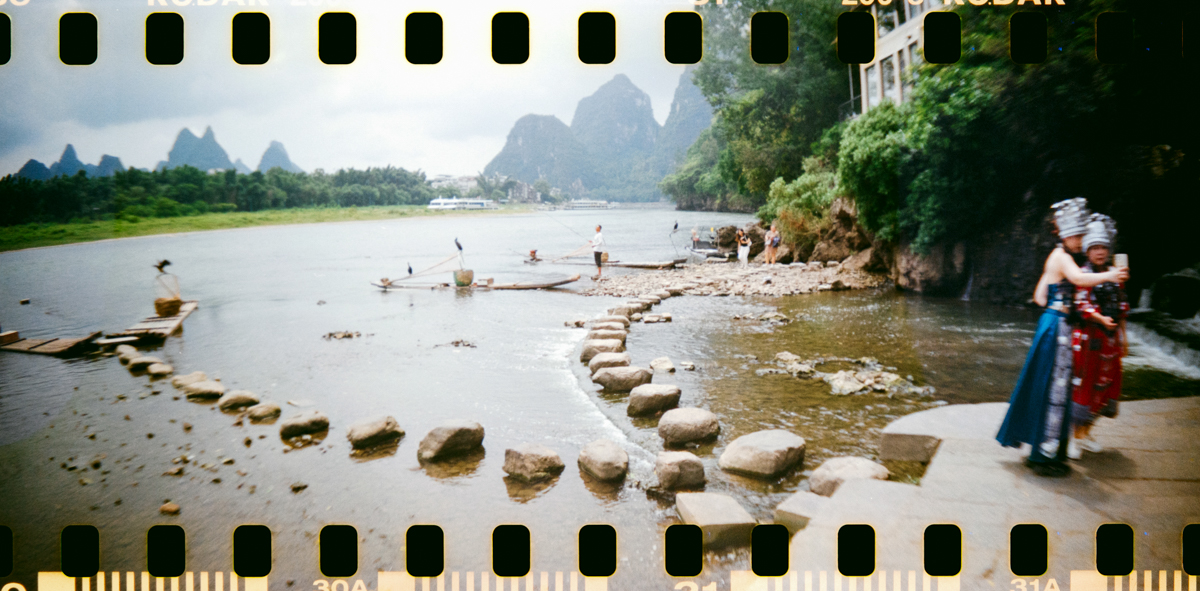
I remember when I got the scans back I was really impressed by what this camera was capable of. The novelty of the sprocket hole panoramas was one thing, but the sharpness of the parts of the images that were in focus was more than I’d expected too.
I word it that way because not everything in the shot is in focus. Even if you use the 1m to infinity setting, you’ll get some drop-off in sharpness away from the centre of your image, as you’ll see in the beach huts shot below.
There’s also some distortion with the huts seeming to curve away from me. They were, in fact, all sitting in a straight line.
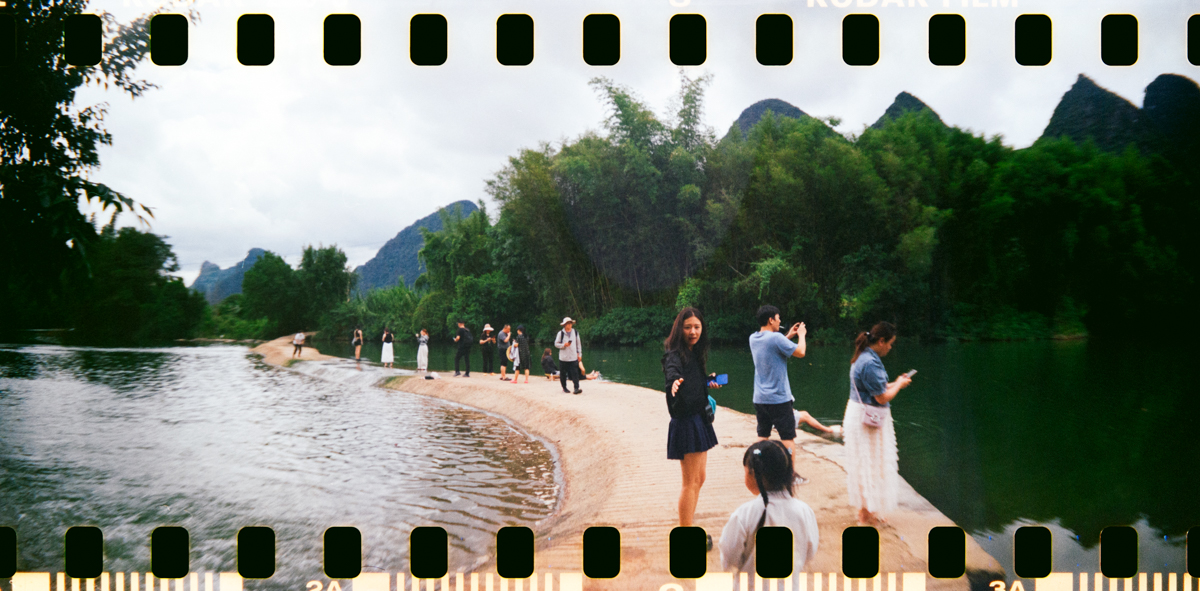
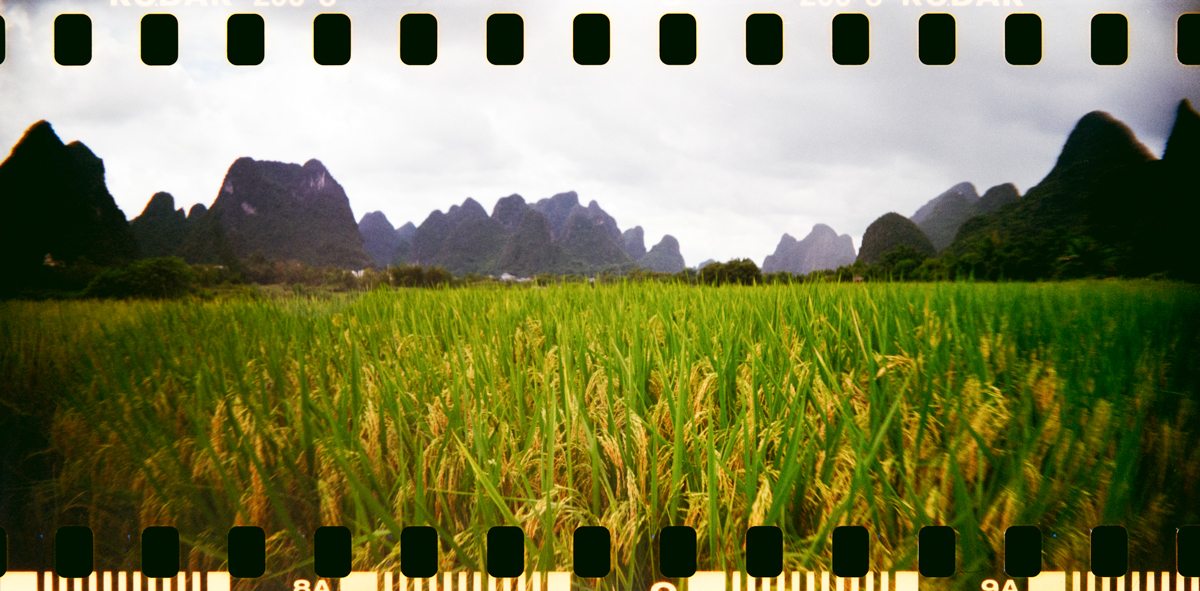
Generally speaking though, whether it be the Lomography CN 400 in Great Yarmouth or some Kodak ColorPlus 200 in Yangshuo, China, the Sprocket Rocket has always given me results I’ve liked from colour films.


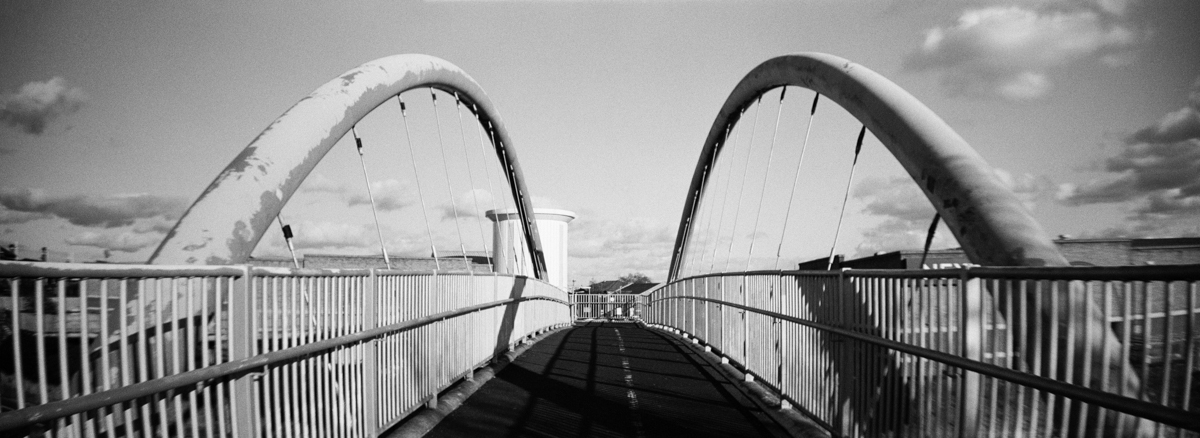
Some monochrome Sprocket Rocket example images
When I shoot with more normal 35mm film cameras, I often like to load up some monochrome and just head out onto a town or city’s streets.
Despite its more specialised nature, producing as it does panoramic sprocket hole images, I thought it would be a good idea to take the Sprocket Rocket and see what I could get when using it in the way described above.
It was a lot of fun. Having the much wider aspect ratio to play with helped make scenes I’d shot before different again, and figuring out what may look good across two frames’ worth of film and with those sprocket holes was a good exercise in composition too.
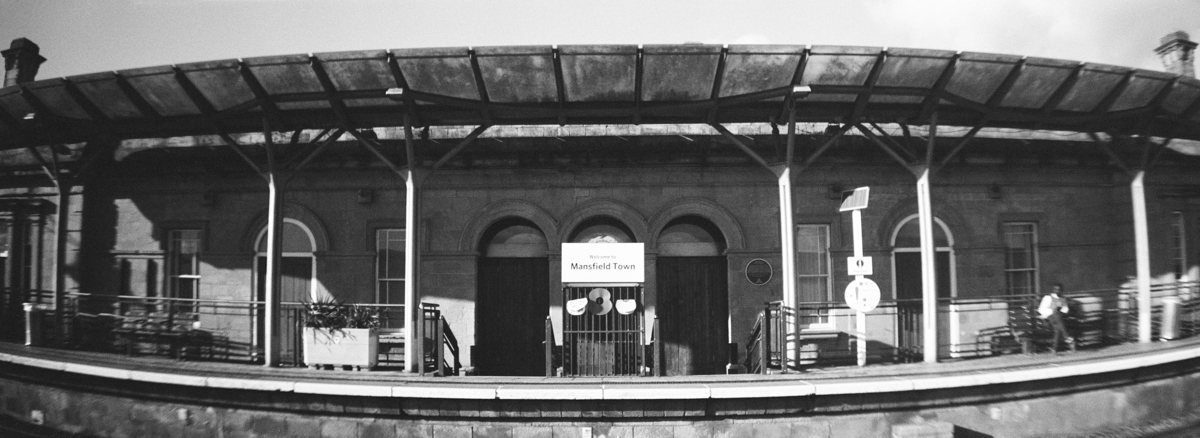
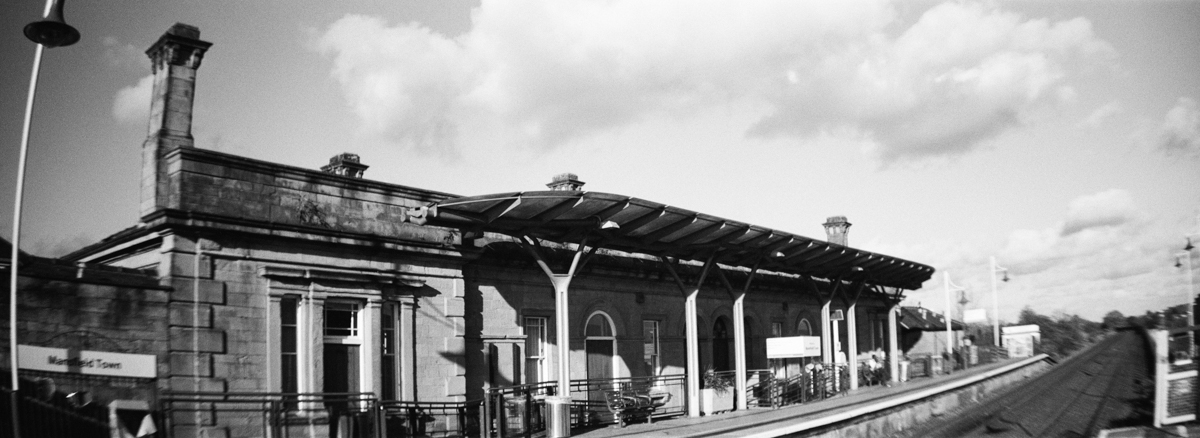
These are from a roll of Fomapan Action 400 in Nottingham, and are again photographs that I really like, despite displaying the same drop-off in sharpness and distortion we’ve already seen on the colour images.


Try your hand at some visually striking panoramic sprocket hole photography with the Sprocket Rocket from Lomography. Great value for money and fun and easy to use, it's probably like nothing else you've shot before or will again.
Using the close-up focus on the Sprocket Rocket
Most of those images posted there were shot with the focus ring set to 1m to infinity, with the scooters possibly shot with it at 0.6m to 1m. I can’t remember now.
But these next few photographs were definitely shot with it set to the latter.
I reckon 0.6m is quite good for a minimum focal distance for such a wide angle lens. It allows you to take some nice close-up shots, even portraits, and not worry so much about the backgrounds, because they should be more blurred and aren’t what’s important in the shot anyway.
It feels like I had a bit more creative freedom, like shooting in the more carefree Lomography way by having the backgrounds fall however they do and not worrying about the whole frame.
So while most of my shots with the Sprocket rocket have been wider compositions shot at 1m to infinity, I do like what it can do with this type of image too.


A couple of compositional tips for the Sprocket Rocket
This is a special camera, and there are a couple of things I’ve learned and like to keep in mind while shooting it, and think would be worth sharing with you here.
First is that you can’t really straighten your shots after the event. Let me explain.
So as mentioned, when I’m shooting with a close-up subject as described in the last section, I’m not too bothered about crooked backgrounds and horizons.
That last image of our Jimmy on the beach is a good example of that. I did compose it to have the pier in the background, but I don’t care that it looks like it’s built on a slope.
However, if you’re trying to make photographs with the Sprocket Rocket that live or die on having a horizontal horizon, you really need to be careful before you pull that shutter release lever.
Just as I wasn’t in this next one.

To me, this one is different to Jimmy on the beach. It’s a shot I wish I could straighten up. Because it was a deliberate composition that I took my time to line up through the archway and was meant to have balance and a level horizon.
So, again to me, the slight diagonal on the sea just makes it feel sloppy rather than Lomography. But I’m not going to fix it like I would if it was shot with a normal camera because then the sprocket holes wouldn’t be horizontal and I think that would look even worse.
When you go for that deliberately level shot and it works though, even with some barrel distortion going on, it does feel pretty good.
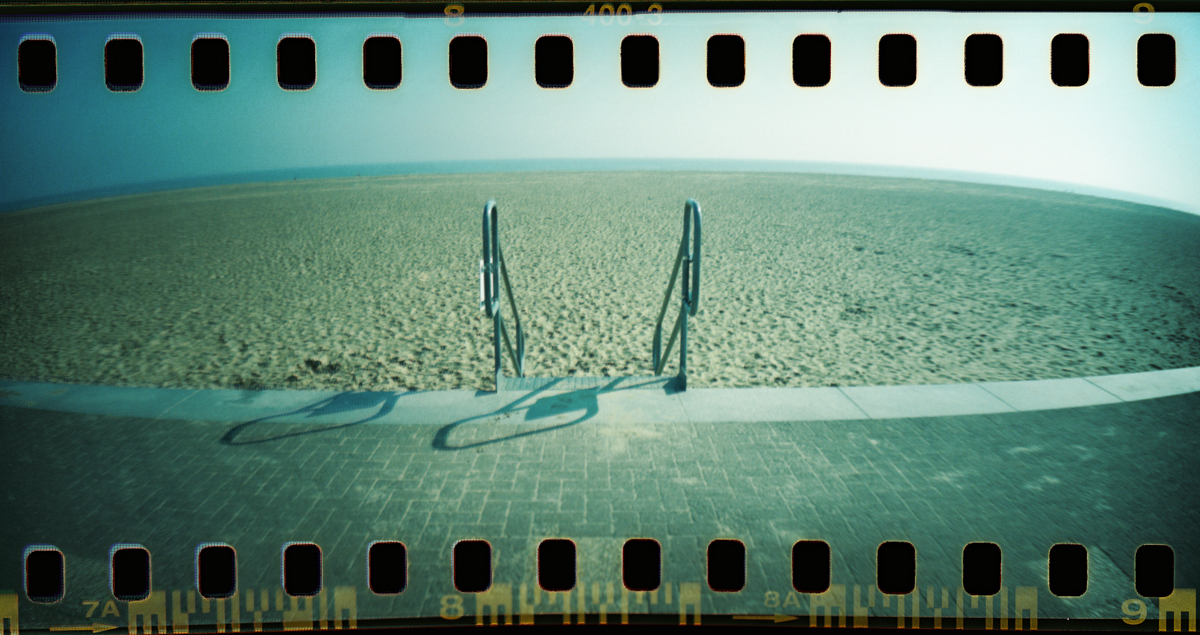
Of course, you don’t buy a camera like the Sprocket Rocket for its ability to give you flawless compositions. Nothing that Lomography produce has that in mind.
I actually like their ethos there, so this section is not me complaining. It’s just pointing out a couple of things that you might want to avoid if you have any perfectionist tendencies when you shoot your more normal cameras, like I do.
The second thing to mention if you’re being thoughtful and want to minimise any little flaws in your compositions with this camera is that you’re never going to know exactly where the sprocket holes are in your image.
This can work against you, but it could also work for you.
On one hand, cutting off the crown of the clock tower isn’t great. But on the other hand, the lady’s feet falling both sides of that sprocket hole is pretty cool.
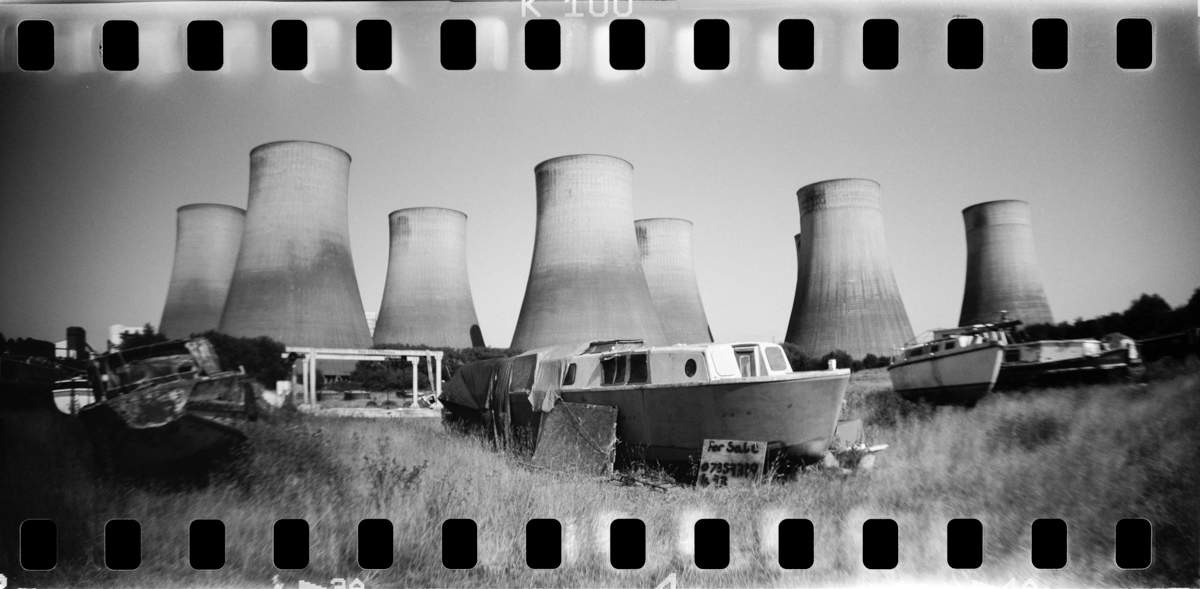
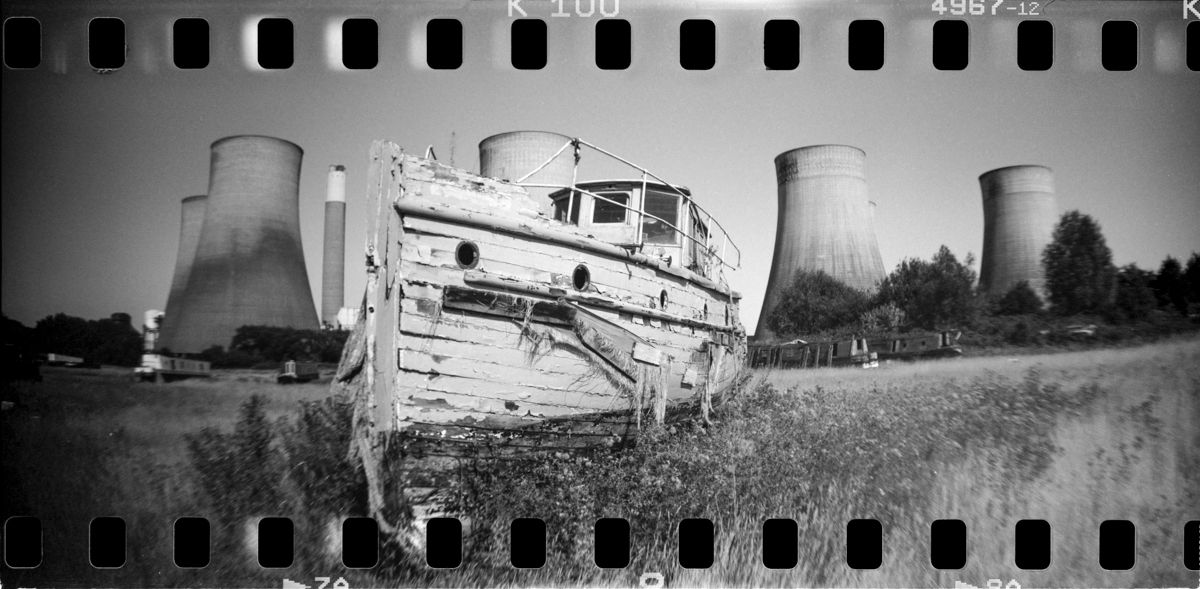
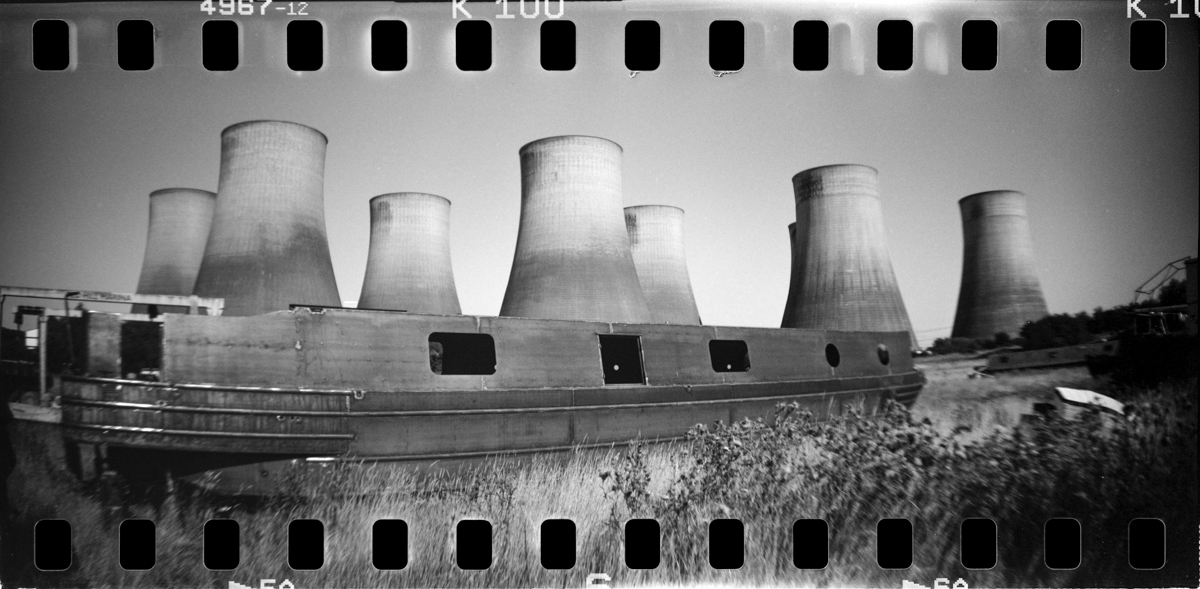
If you want to be safe, just keep any important elements in your shot far enough away from the top or bottom that it won’t be an issue either way.
That’s what I did – naturally, I should add – when composing the cooling-towers-and-boats shots below.


Doing multiple exposures with the Sprocket Rocket
If shooting panoramic photographs with sprocket holes in them wasn’t novelty enough for you, Lomography has you covered with what almost feels like a standard feature for their cameras.
Multiple exposures.
Some of their cameras, like the LC-A+, the LC-Wide, or the MC-A, have an MX switch, with MX standing for Multiple eXposure. With those, once you’ve taken a shot, engaging that switch allows you to take another without winding the film on.
With how the uber-basic winding system works on the Sprocket Rocket though, things are even easier. There’s no MX switch. There’s no need for one. All you have to do is take two or more shots before advancing the film.
I tried it a few times on the Lomography CN 400, with varying degrees of success in terms of my skills in making nice double exposure photographs.


Using the Sprocket Rocket’s non-sprocket film mask
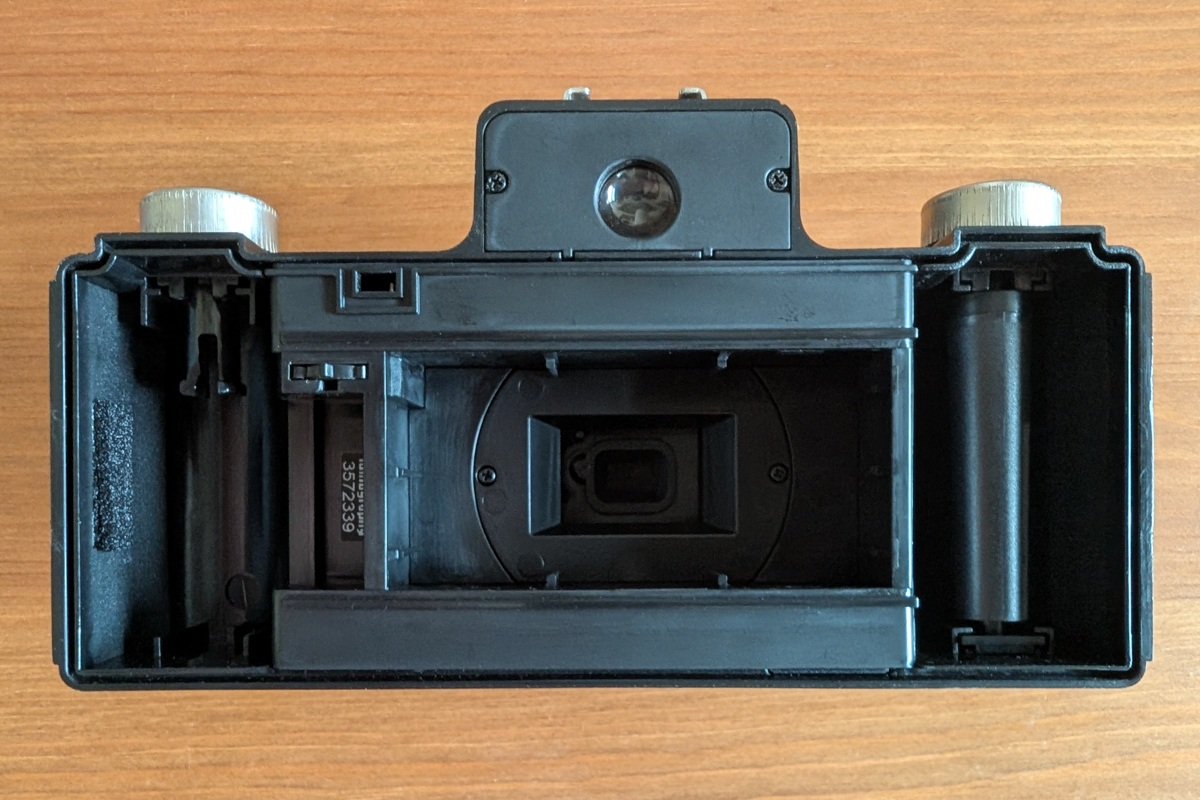
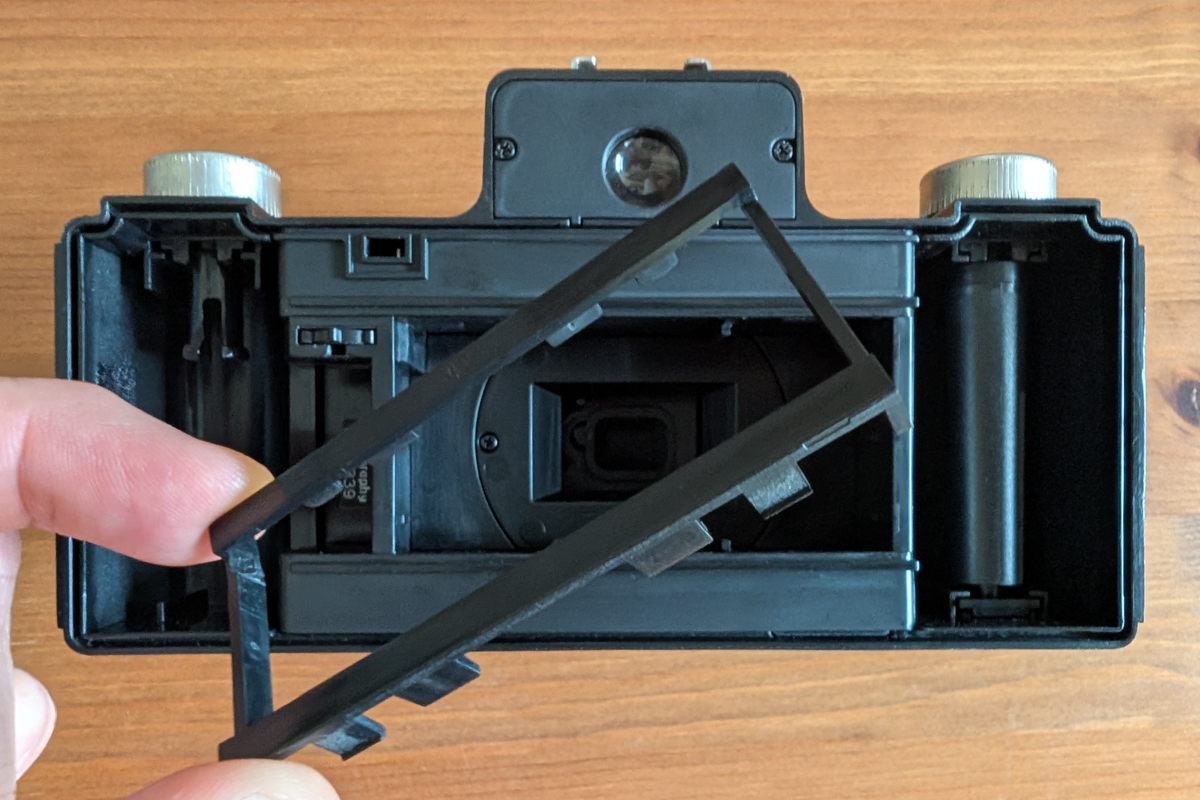
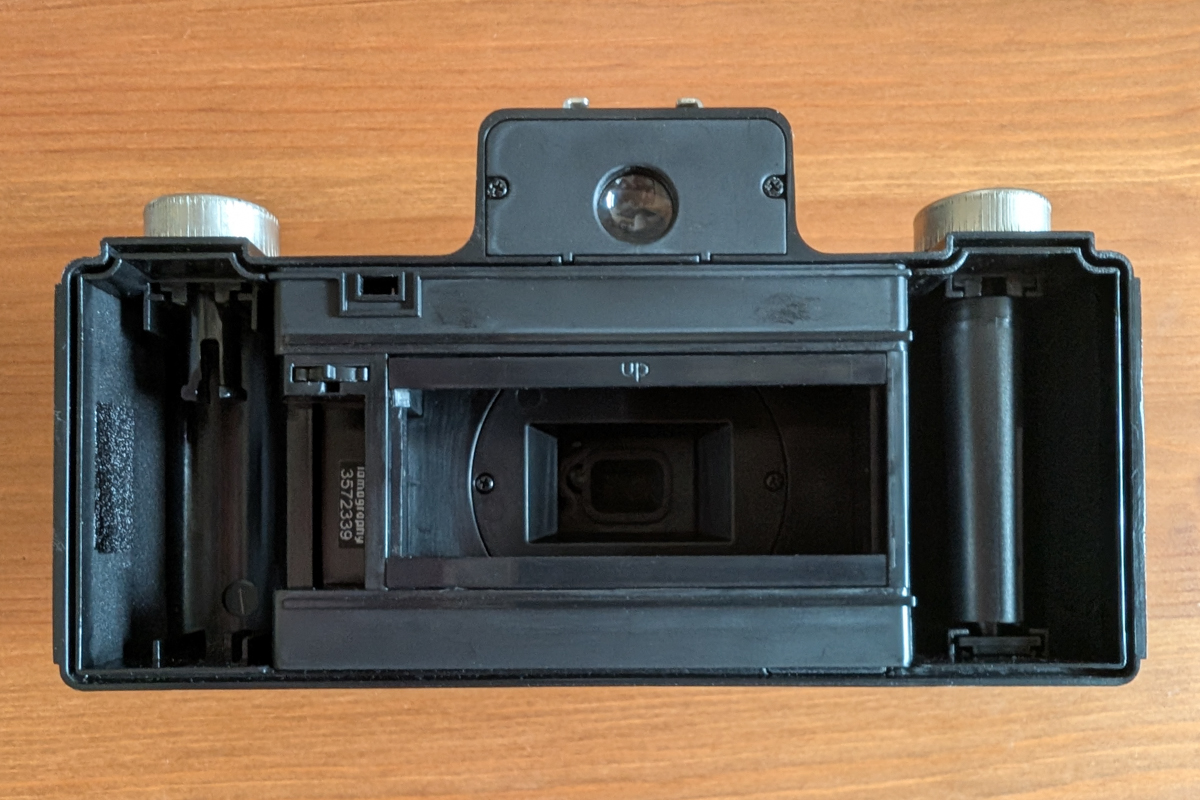
Included with the Sprocket Rocket is the film mask we mentioned earlier – a small plastic insert that you can place inside the camera between the lens and the film that blanks off part of the top and bottom of your frame.
It serves a similar sort of function to the mechanism you can slide in and out on the Reto Pano, that switches between normal aspect ratio and panoramic shots, albeit with one major difference.
With the Reto Pano, you can operate it between shots. With the Sprocket Rocket’s mask though, once it’s in and you’ve loaded your film, it’s in until you remove the film again.
So realistically, barring a good bit of messing about rewinding, removing, replacing and winding back to the same place again, the whole roll will have to be shot this way.
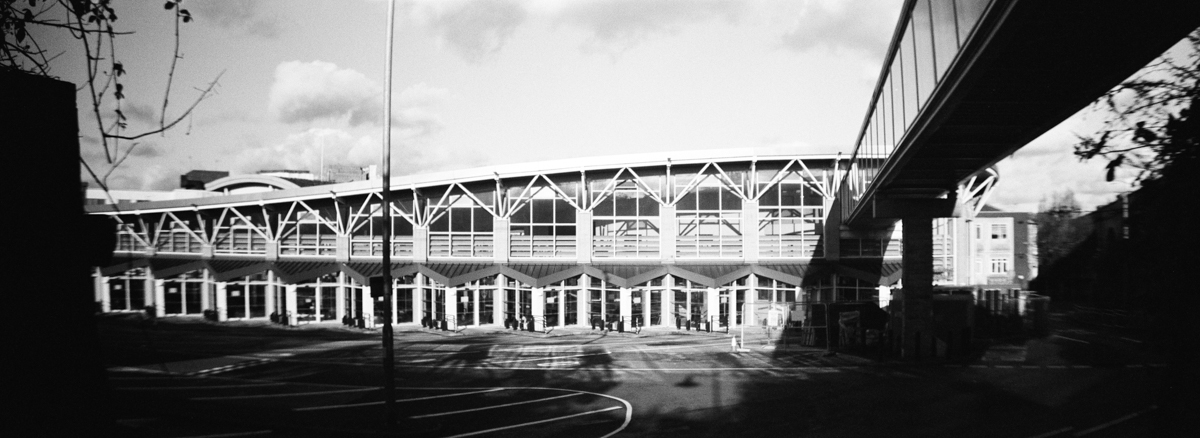
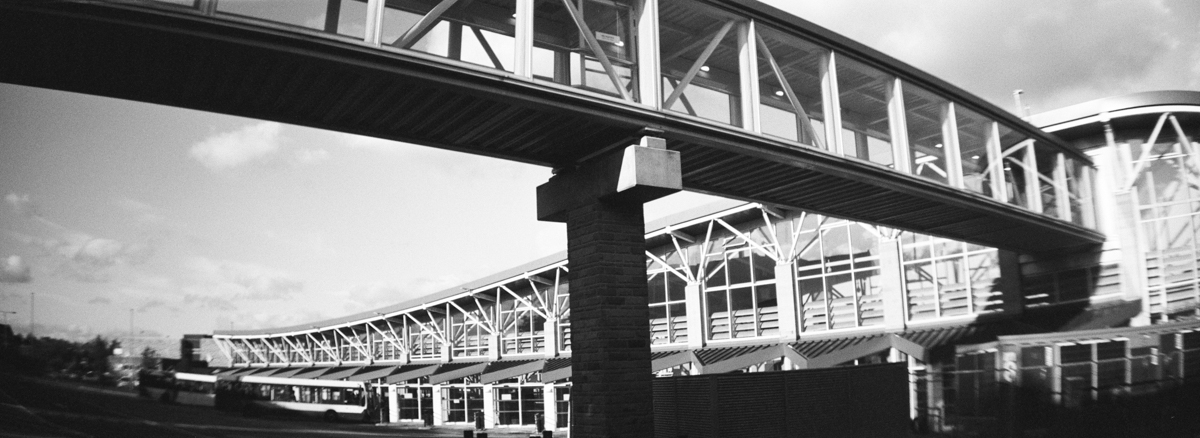
Here’s how that looks like to insert it, and what happens when you shoot with it in and the top and bottom of your images are cut off.
I’ve seen people comment elsewhere that this is a bit pointless, by the way. Why buy a Sprocket Rocket and then deliberately neuter its main selling point?
My take on this is, well don’t use it then. It’s a little piece of plastic that probably cost Lomography pennies to produce so it hasn’t made your Sprocket Rocket more expensive, it’s actually nice that they’ve thought to add it in, and it’s better to have it and not use it than not have it and wish you did.
One good thing about using the film mask is it removes that issue I mentioned earlier about not being able to straighten my images when they have sprocket holes along the top and bottom of them. So you have some nice panoramic shots you can make level to your heart’s content.
And to reiterate from earlier, you’re only getting that advertised 3×1 aspect ratio with the film mask in, if that is for some reason important to you.
Cool extras that come with the Sprocket Rocket
People can say what they want about Lomography but there’s no doubt they go above and beyond with the little extras they include when you buy a camera brand new from them.
And I’m not just talking about that film mask we looked at earlier. I mean books, posters, or little zines filled with photography created with the camera you’ve just bought.
When I got the Lomo LC-Wide, it came in a pretty big wooden box. It needed to, because there was a full-size hardback photo book in there.
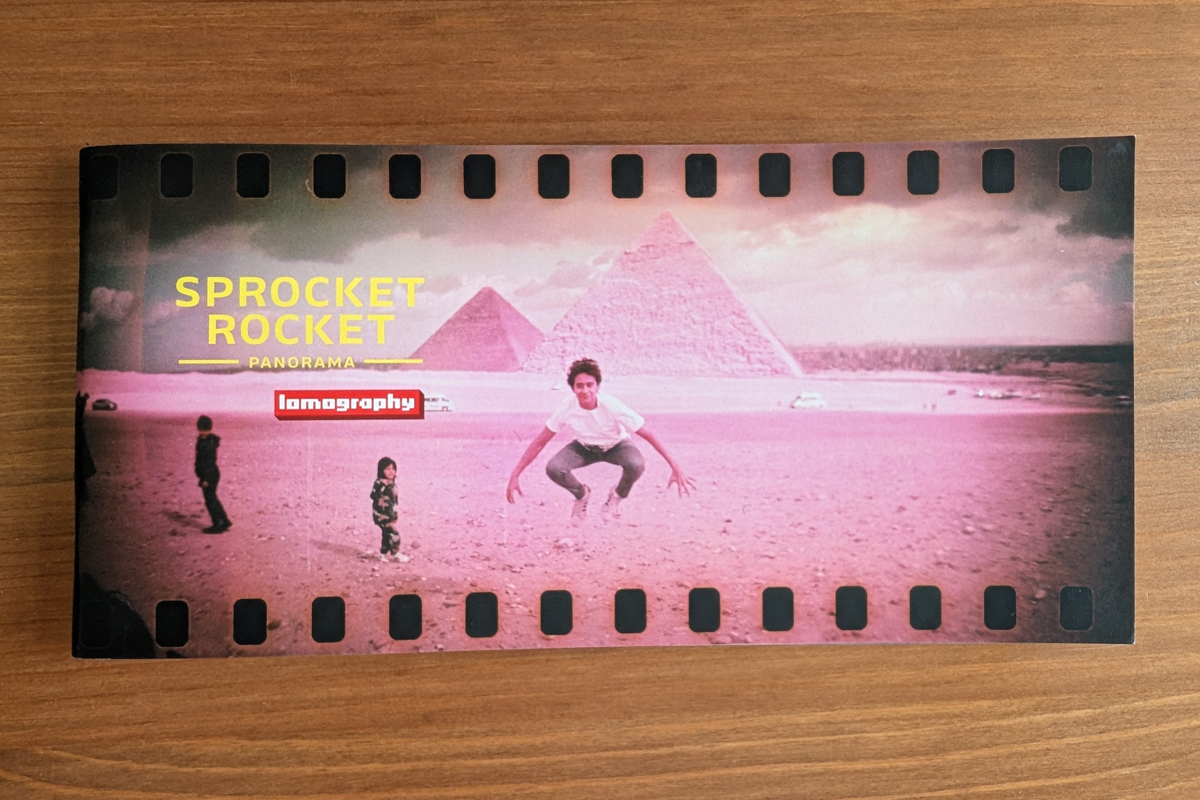
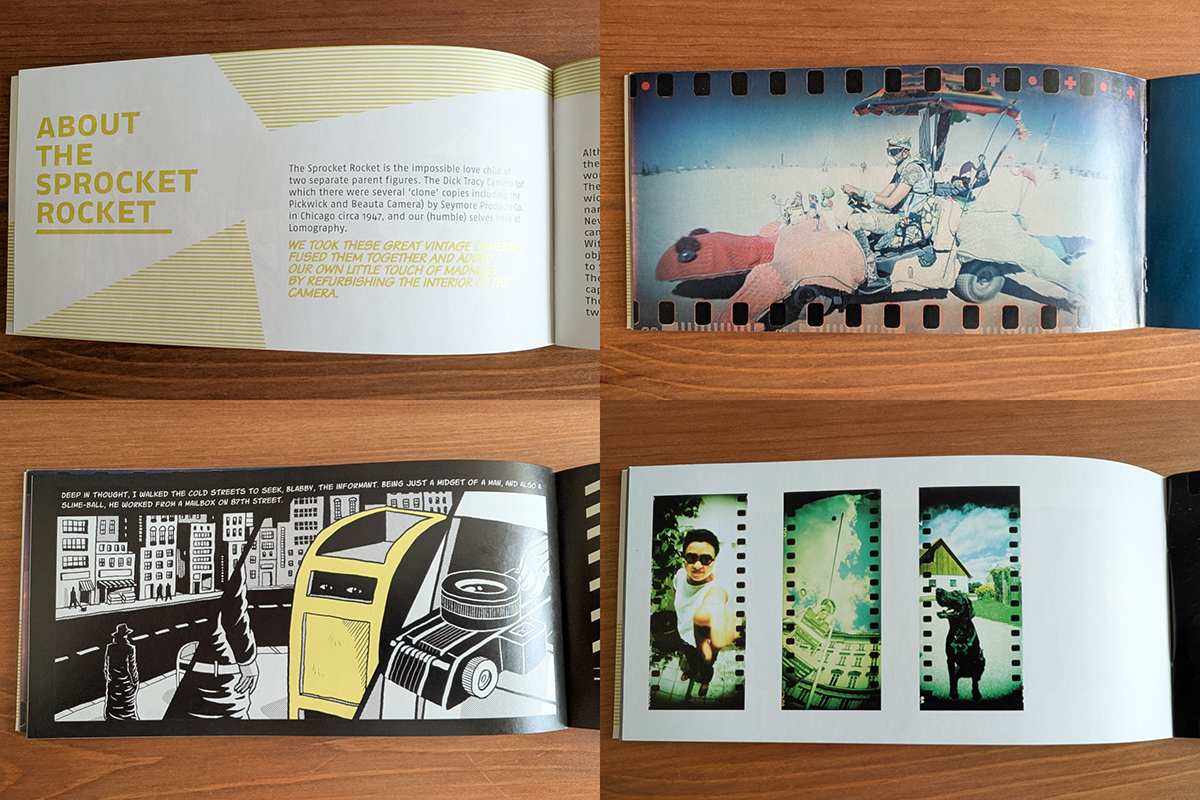
The Sprocket Rocket didn’t come with anything that outlandish, but this little booklet featuring information on the camera, plenty of example shots (looks like someone took a Sprocket Rocket to Burning Man for peak hipsterism), and a few graphic novel-style pages too which are a nice nod back to the Dick Tracy design origins of this thing.
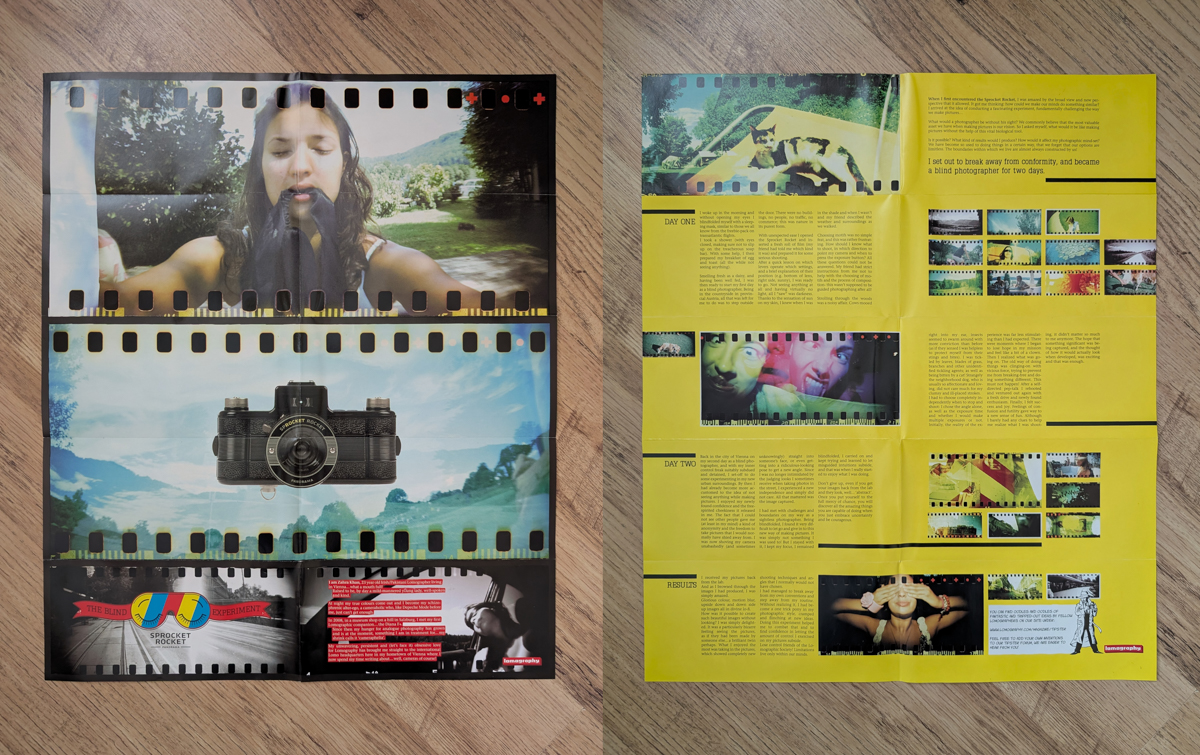
There was a double-sided poster too that featured a very experimental project – what photos would I take with a Sprocket Rocket if I was blind – by one Zahra Khan, and that was enjoyable to read and see the images on too.
Recommended film and scanning options for the Sprocket Rocket
My film recommendations for the Sprocket Rocket are going to be the same as for some other similarly basic cameras I’ve reviewed on here, like the Reto Pano or the Kodak Ektar H35N.
Because none of these cameras read the DX code on the canister, and they all have a fixed shutter speed and either only one or two aperture settings, you really do need to choose your film based on the amount of light you’re going to be shooting in.
My guideline would be ISO 100 and 200 films on bright sunny days and ISO 400 on more overcast days when the conditions aren’t so good.
Bearing in mind we’re shooting through a plastic lens that drops off in sharpness away from the centre, you might want to just stick to the budget stocks too, because there’s no real point using anything premium.
Unfortunately these days, that probably rules out any ISO 800 film, hence we’re capping out at ISO 400.
For colour film, maybe try some:
For black and white film, maybe try some:
- Kentmere Pan 100
- Fomapan 200 or Kentmere Pan 200
- Ilford HP5 Plus 400
One more thing to be aware of once you’ve shot your film is that it might be expensive to get your images from it. All labs will be able to develop it as normal, but some won’t have the capability to scan panoramic sprocket hole images.
And those that do will often charge more for doing it.
I’m not going to list any here that do or don’t, because things like that are subject to change. But unless you want to invest in some equipment of your own, like Lomography’s own Digitaliza range, shopping around or paying more than usual is unfortunately unavoidable.
Where to buy a Lomography Sprocket Rocket
You can get your own Sprocket Rocket direct from Lomography, although I don’t know what you might pay for shipping because that is going to depend on where in the world you live.
I would recommend also checking out retailers local to you that will have already brought some of these cameras into your country.
Analogue Wonderland is one option in the UK where I am, and B&H Photo is an option in the US too.
Have a look:
- find your Sprocket Rocket at Lomography
- find your Sprocket Rocket at Analogue Wonderland
- find your Sprocket Rocket at B&H Photo
Try your hand at some visually striking panoramic sprocket hole photography with the Sprocket Rocket from Lomography. Great value for money and fun and easy to use, it's probably like nothing else you've shot before or will again.
The thing I need to do now with my Sprocket Rocket
I always like to try as many features of a camera as I can before writing a review on this site. I might never have played with the film mask in the Sprocket Rocket if not for wanting to talk about doing so here.
One thing I haven’t got around to trying yet though is the bulb mode for long exposures.
That’s something I’m going to rectify, but I want to get this review published before I envisage having time to go somewhere I can get some decent images doing that.
I’ve also not tried using a flash on the hotshoe, but that’s something I’m less bothered about trying. Not really a big flash photography type of person, me.
Wrapping up this Lomography Sprocket Rocket review
Personally, I like Lomography and what they do. I like the creative spirit, I like the continuous release of new products, and I like a lot of those products too.
But not all of them are for me. This is partly because, whilst each is offering a different shooting experience, with a lot of them you end up with the same kind of result. That is, a 110, 120, or 135 format image in a regular size and shape.
And when that is the case, I’ll just go with what I think works best for me without having to try them all. And that might not even be a Lomography camera at all.
For example, I wouldn’t see the point in getting the Simple Use Reloadable unless it’s to write about on here. I’ve already got some cheap point ‘n’ shoots, like the Olympus Supertrip, if I want normal 35mm film results from one.
But that’s why I like the Sprocket Rocket so much. I think it’s one of the best things they’ve come out with, because it’s giving you the kind of image that relatively few other cameras natively can.
Yes, you can get some adapters and use 35mm film in your 120 camera. Or you could pick up a Lomography Spinner 360, if you want to get even wider and wilder.
But for a well-priced, ready-to-go option that gives you manageable panoramic sprocket hole shots straight out of the box, the Sprocket Rocket is it.
The plastic lens is perhaps sharper than you’d think in the middle, the build quality is perhaps better than you’d expect for a novelty camera from Lomography, and it’s perhaps more enjoyable to compose and shoot with than you’d imagine if you’ve only ever used more normal aspect ratios.
You can also mitigate the potentially pricey scanning by using it specifically and occasionally rather than for willy-nilly snapshots.
I’ve always liked using my Sprocket Rocket, and I guess my bottom line for this review is, if you’re at all on the fence about whether to pick one up… for how much they cost brand new and what they do, I think you should go for it. 🙂
If you found that Lomography Sprocket Rocket review useful, why not check out these other great film cameras too:


And if you think others will enjoy or benefit from this camera review too, help them find it by giving it a share 😀
