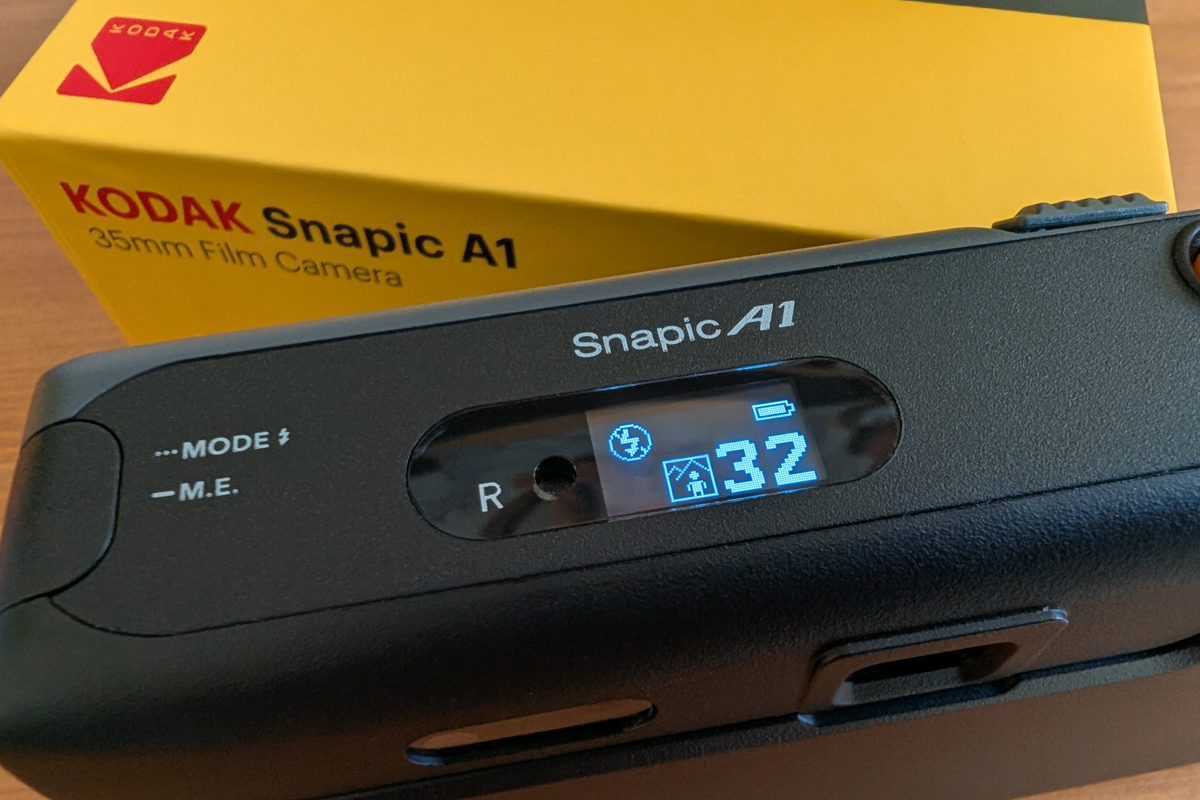
The good people at Reto have done it again. This Kodak Snapic A1 is the latest offering to come from the creative-minded company, following on from a number of other uniquely-featured film cameras down the years.
And just like their previous wide-angle Reto Pano and half-frame Kodak Ektar H35N, they’ve sent me a Snapic A1 to test out and review on here.
I told you they’re good people.
The aforementioned Pano and H35N were both fun to play with and gave results that I liked too, so I naturally had high hopes for this one also.
Did it live up to them, or did it disappoint?
You can read on to find that out, as well as learning lots of other stuff about this camera. And I think you’ll come away from this knowing whether or not you’d like to pick one up for yourself too.
Contents
- 1 First up, some quick Snapic A1 example shots
- 2 What is the Kodak Snapic A1 and who is making it?
- 3 The Snapic A1’s sneaky special powers
- 4 Kodak Snapic A1 specs and features at a glance
- 5 Snapic A1 ease of use and ergonomics
- 6 Image quality and qualities of the Snapic A1
- 7 Street photography with the Snapic A1
- 8 Low light photography with the Snapic A1
- 9 Kodak Snapic A1 double exposures
- 10 Using the flash on the Kodak Snapic
- 11 First of the roll shots from the Kodak Snapic
- 12 What film to use in your Kodak Snapic A1
- 13 Where to buy a Kodak Snapic A1
- 14 Final thoughts on the Kodak Snapic A1
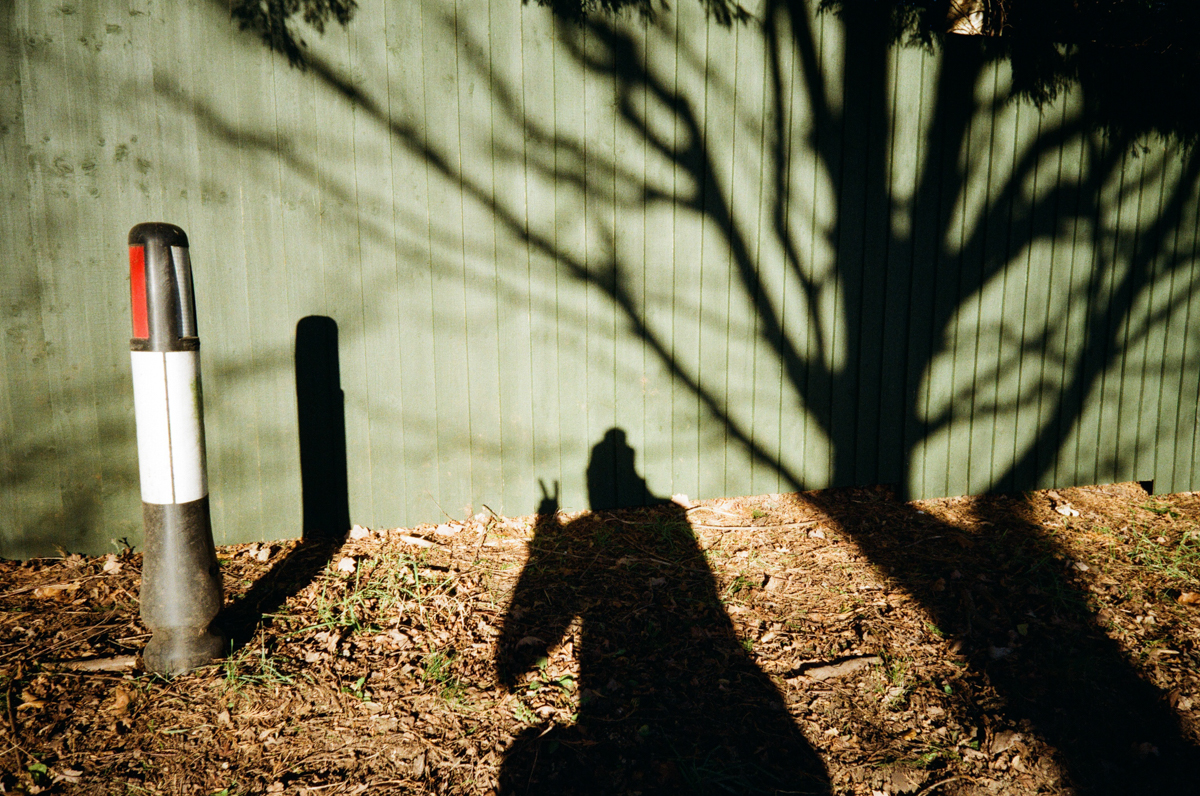
First up, some quick Snapic A1 example shots
On that last point – whether or not you might want to get a Kodak Snapic A1 for yourself – there are obviously going to be a few things that will make you decide either way.
Features and ergonomics of the camera. Price and value for money. Reliability and build quality.
But is anything more important than the image quality and qualities you get out of it?
Maybe, to be honest. I wouldn’t want to struggle with an unwieldy camera that cost me loads and then broke after a couple of rolls anyway, no matter how good the photographs were.
That said… it is important the photographs are good enough for you. So, before we get into anything else, let’s start this review with some quick example shots.
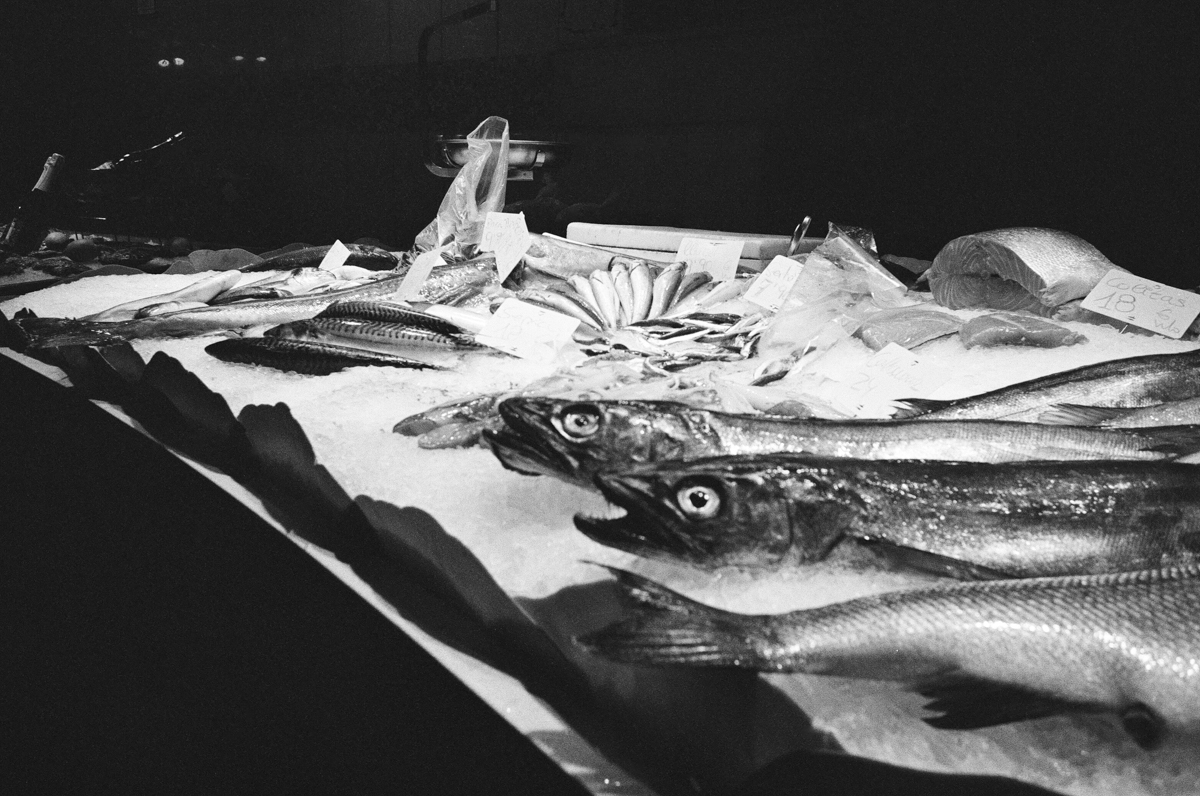
The monochrome ones were taken on Fomapan Action 400 and the colour ones on Kodak ColorPlus 200. Later in this review we’ll have images taken on Ilford FP4 125, Kodak Kodacolor 200, and Kodak T-Max 400 too.


What is the Kodak Snapic A1 and who is making it?
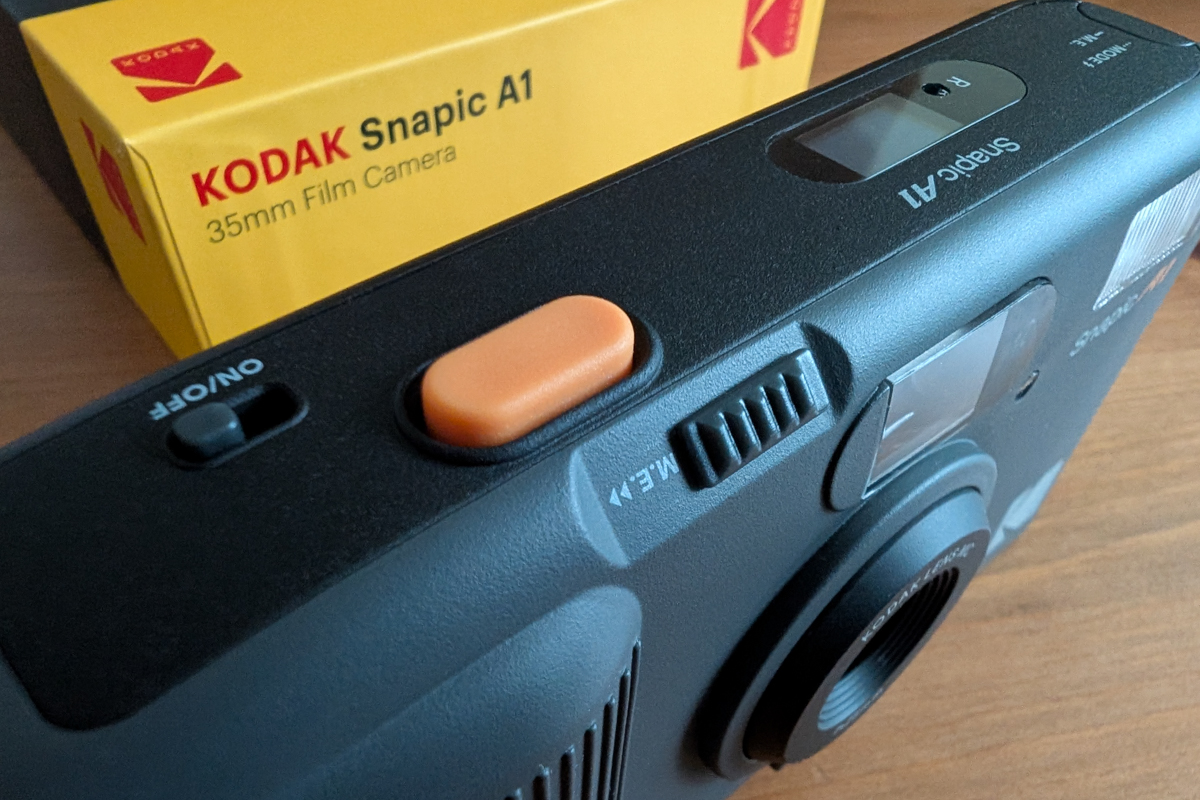
To answer that second question first, the Kodak Snapic A1 is produced by Reto, who have brought us a number of different cameras in recent years. Some of them, like the Reto Pano, get the Reto name, while others like this Snapic A1, get the licensed Kodak branding.
I’m not sure how they decide which get what, but that’s not really important here.
What is important is how good the cameras are. I’ve really liked everything else I’ve tried from this company and this looked like, in terms of potential for good quality images, their highest quality release to date.
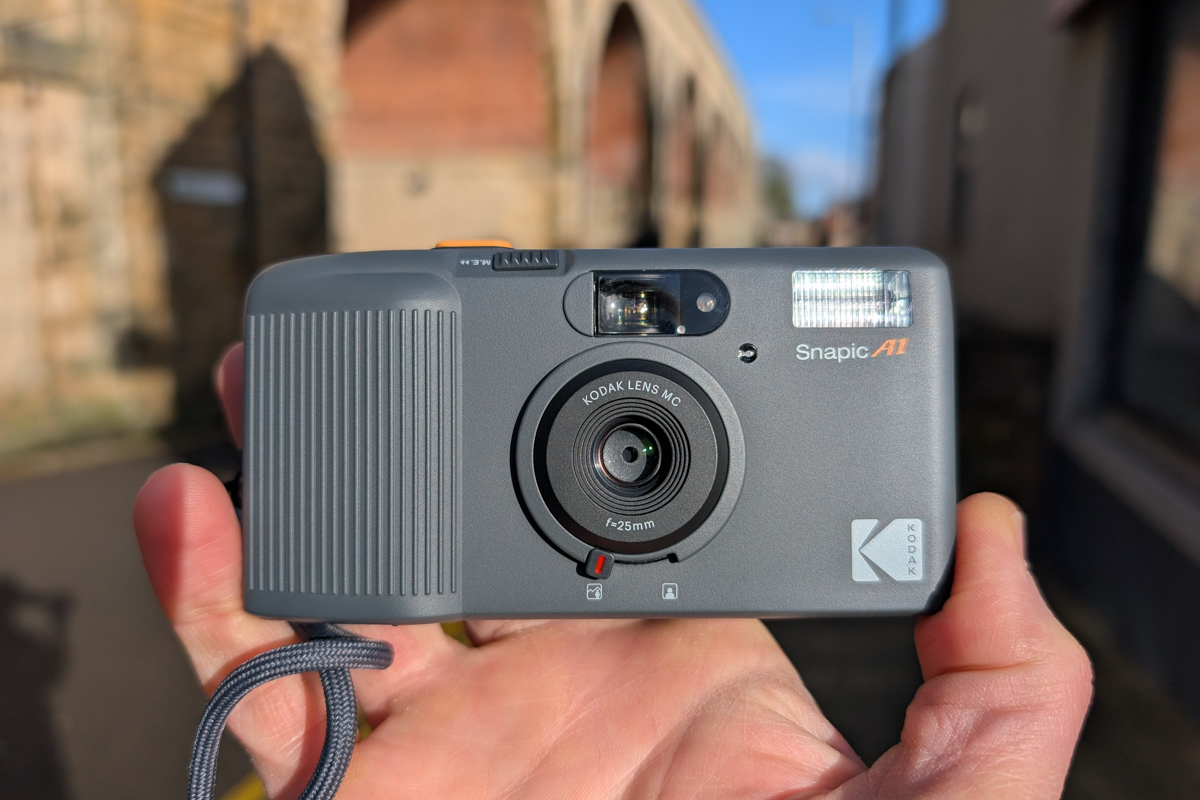
It’s the first one they’ve put out with a fully glass lens, an OLED screen, and motorised film advance and rewind too. While the body is still plastic, it definitely feels more premium than before, and the design is far classier too.
And speaking of that design…
Most of the cameras Reto have produced so far have been like modern-day versions or variants of older ones.
The Reto3D from a few years ago was a take on the old lenticular Nimslo, the Ultra Wide & Slim which I looked at here was the latest go-around of the old Vivitar one, and the original H35 and then the H35N were clearly based on an old Kodak Instamatic 133.
As you can see in the next image, the look of the Snapic A1 is absolutely inspired by another modern day classic camera.
The Ricoh GR series.
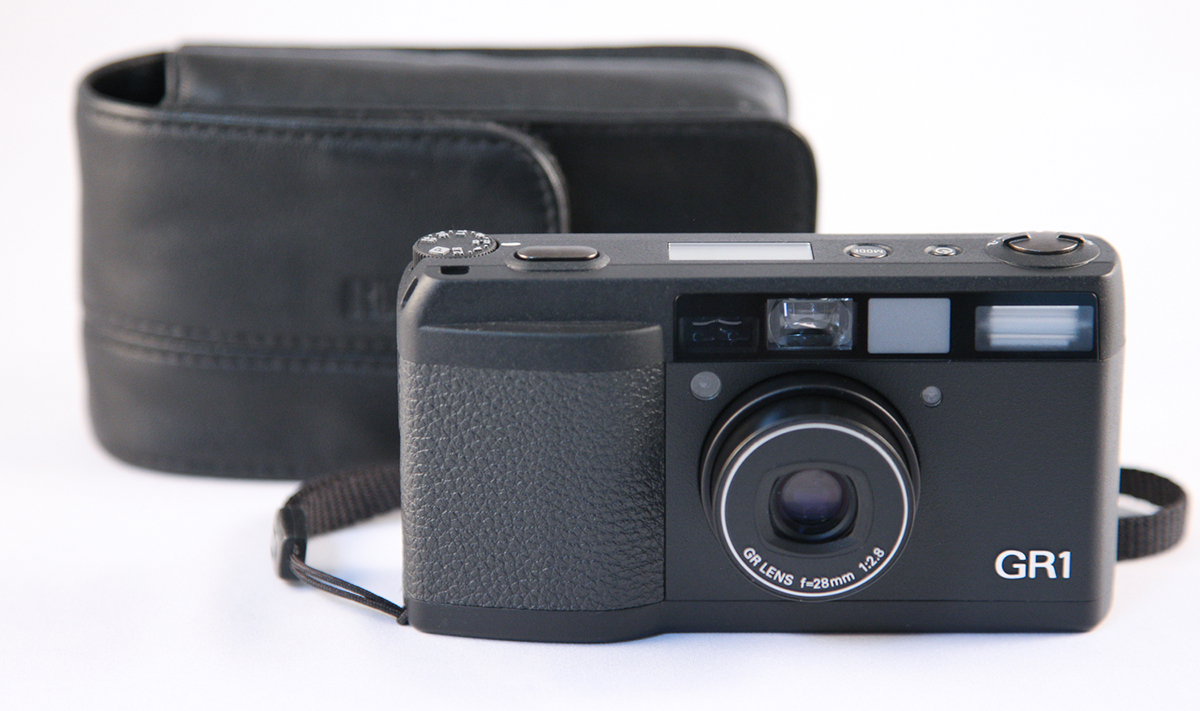
The Ricoh GRs, in their various versions, are some of the most esteemed compact cameras from the last couple of decades, having spanned from the film era of the 1990s to today, with the latest (at the time of writing) digital version coming out in 2025.
They’re cameras that lots of people use for convenient, quick, discreet, and high image quality travel and especially street photography.
So is that a style of shooting Reto has in mind for us here?
Of course you can do what you want with your camera. But one designed for travel and street sounds good for me and what I most often do.

The Snapic A1’s sneaky special powers
Something I find interesting about this particular release from Reto is that they’ve not really highlighted a couple of its more unique features in their marketing of it.
It felt that they were focusing more on the glass lens and motorised film winding, and the higher quality construction and design.
Their own slogan for this camera is Quick Clicks, Sharp Pics, and their blurb goes as follows:
The Kodak Snapic A1 is our first full-frame film camera release featuring a glass lens and numerous automatic functions such as auto wind and rewind, and auto flash etc. Equipped with a high-quality 3-element glass lens, the Snapic A1 ensures stunning clarity and detail in every shot. It also features 2-zone focus, allowing for a quick adjustment between landscape and close-up settings. The unique double exposure function also invites creative expression by blending two scenes into one captivating image.
With the minimalistic outlook, the understated colours reflect a sleek simplicity that enhances its modern design. It also speaks for convenience and versatility; its lightweight and compact structure makes it easy to carry on any adventure. Plus, attaching the included neck strap ensures you never miss a moment – whether you’re exploring city streets, attending events, or enjoying nature. Experience the joy of photography with the Kodak Snapic A1 – where quick clicks meet sharp pics!
While their previous cameras have been sold on the benefits of their special powers, like the UWS’s ultra wide lens, the H35N’s half-frame shooting, or the Pano’s panoramic aspect, the reason for buying the Snapic A1 seemed more like for the premiumness of it.
There are a couple of special powers snuck in here, though. They are both mentioned in the spec sheet, but neither are really championed as a major reason to buy this thing.
First is the Multiple Exposure mode. I’ll talk more about this in another section later, but it feels like quite a major feature that would have taken quite a bit of implementing, yet is kind of an also this on the spec sheet.
Second is that they’ve seemed to talk more about what the lens is made of than its actual focal length, when in fact it being a 25mm lens is kind of notable too.
By anyone’s standards, that’s pretty wide. It’s only 3mm wider than the 22mm lens on the Ultra Wide & Slim, which was sold as a camera with an ultra wide lens.
That’s probably a good illustration of what I mean here.
Their previous products seemed to be like ‘buy this camera for this feature’, whereas the Snapic A1 has felt like a more normal camera, with these things being right there on the spec sheet but not pushed front and centre this time.
So yes. The Kodak Snapic A1 is a more premium new camera from Reto. But that’s not all it has. If you like playing with wide lenses and multiple exposures, it’s sneakily got you covered there too.
Kodak Snapic A1 specs and features at a glance
- Frame format: 36mm x 24mm
- Film transport: Auto loading & advance
- Film rewind: Auto or force rewind
- Optical lens: 25mm; 3-element glass lens
- Maximum aperture: F9.5
- Focusing: manual 2 zone-focus (0.5-1.5m, 1.5m-infinity )
- Shutter speed: 1/100s
- Multiple exposure: Yes, max. 2 exposures
- Built-in flash: Yes, Guide No. approx. 8
- Flash mode: Flash on/off, auto flash
- Red-eye reduction: Yes
- Power supply: 2x AAA alkaline battery
- Battery life: Approx. 10 rolls of 24-exposure film
- Dimensions: 118 x 62 x 35mm
- Weight: 117g
- Materials: ABS
Snapic A1 ease of use and ergonomics
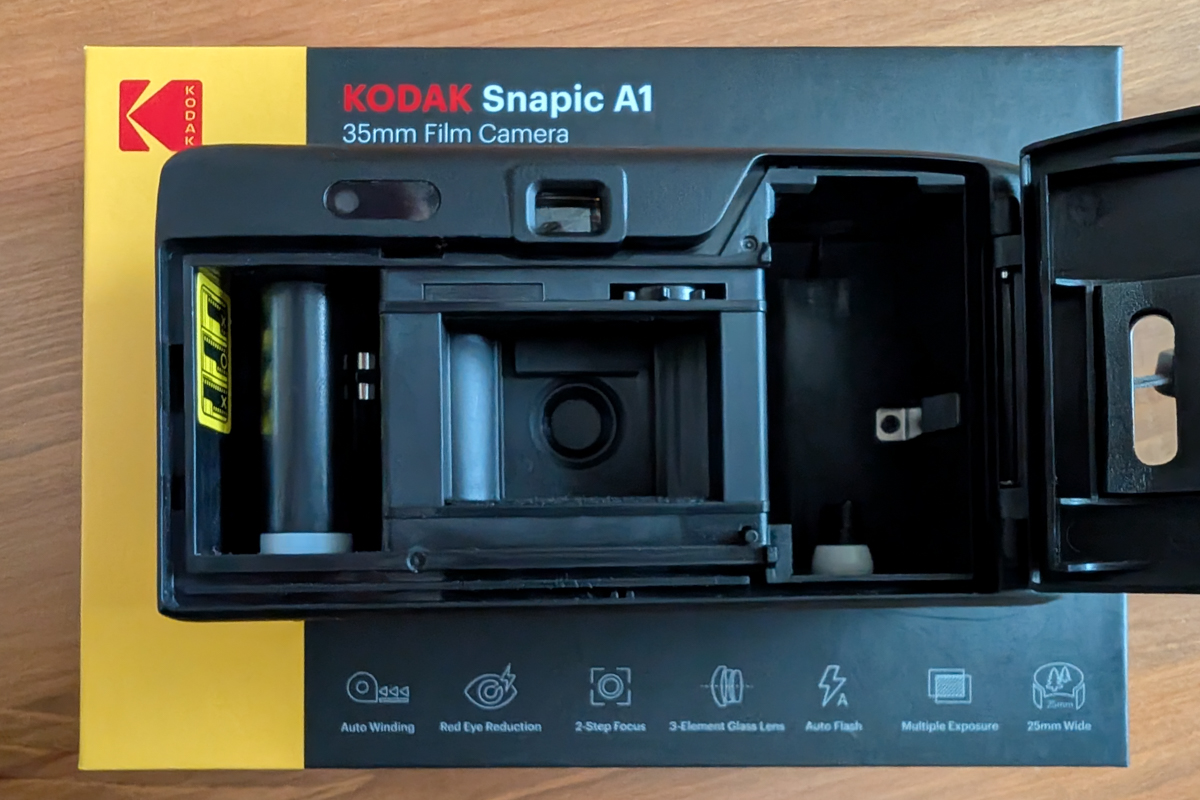
Loading film into your Snapic A1 is simple thanks to the automatic winding feature of the camera, and that yellow sticker on the inside of the mechanism is a handy guide on how to do it.
Insert your canister into the chamber on the right-hand side as normal, pull the film leader across to the left until it’s around halfway covering the spool, make sure the sprockets just above the lens are in the holes in your film, and close the door.
Once you press the shutter button, the film will automatically wind forward for you to begin shooting. And if anything does go awry, there’s a force rewind button you can use to start over and try again.
Overall, I found the Snapic very easy and a lot of fun to use.
There are only two focus settings, and the way I shoot means I have it in the 1.5m to infinity one the vast majority of the time anyway.
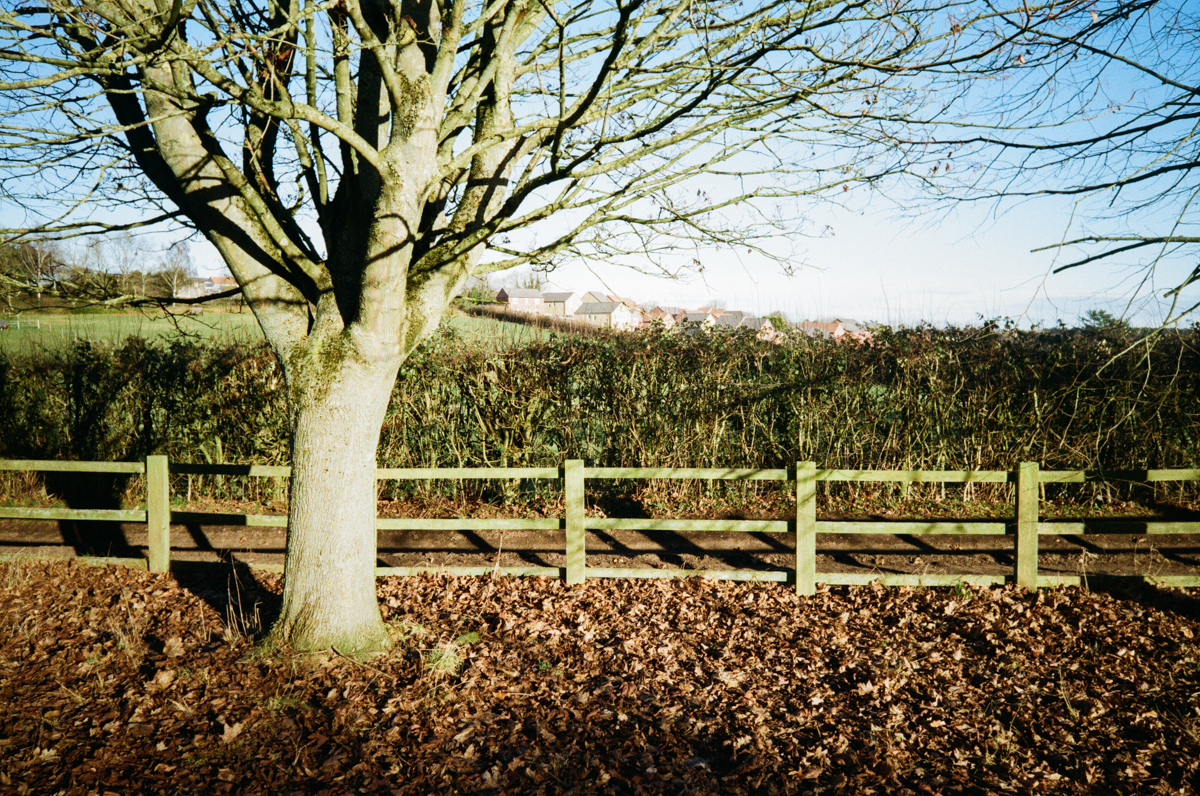
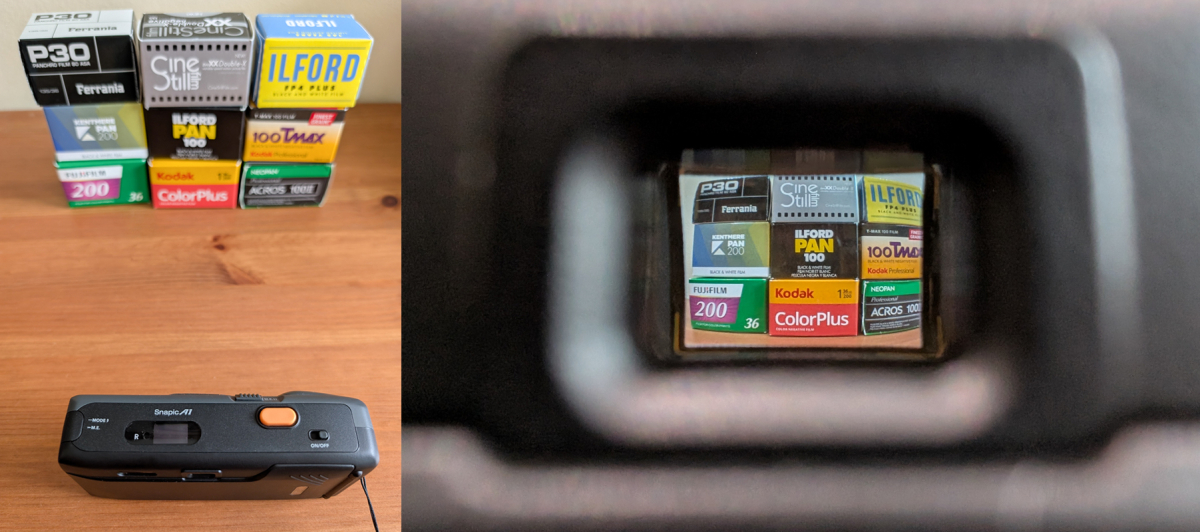
I like wide lenses, so the 25mm field of view is great for me. You can see in the image below how much you can fit in the frame from not very far away at all.
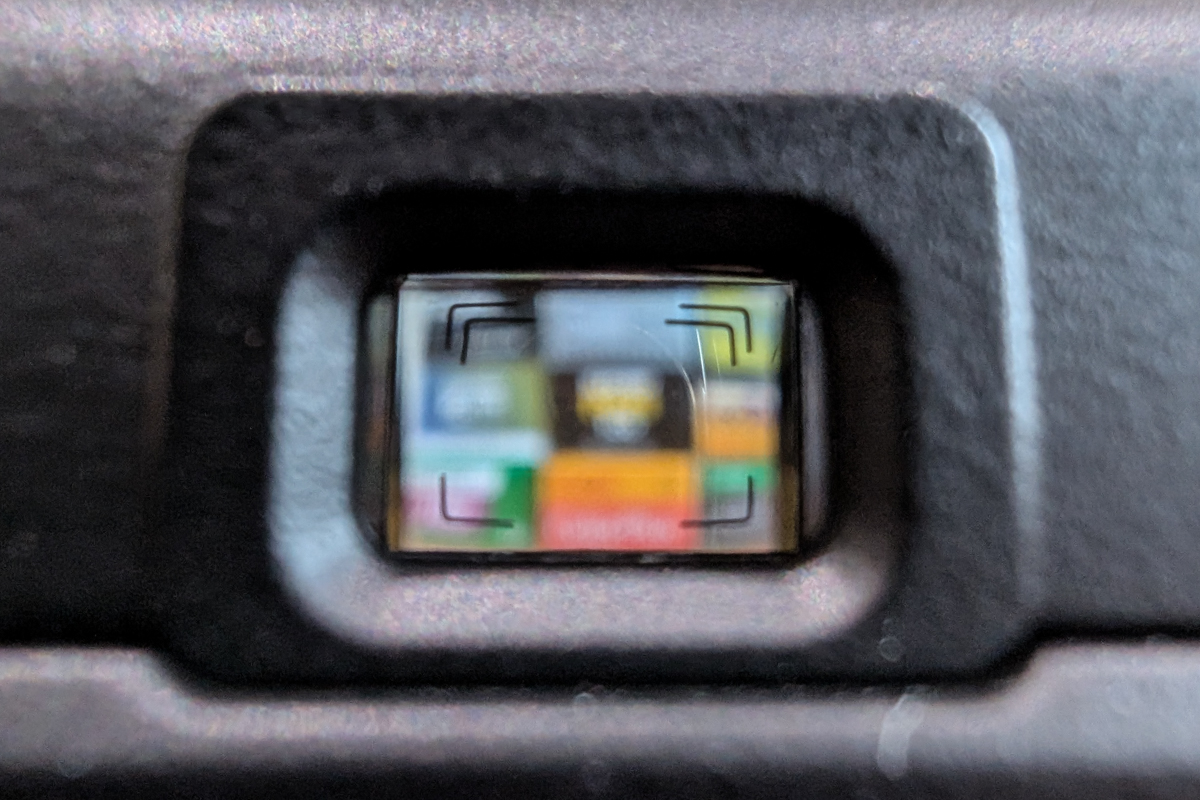
The viewfinder is nice and bright too, and seems pretty accurate – based on my real world experience I mean, not any technical testing. It even has some parallax frame lines to help you with close-up shots.
As for the ergonomics of the Snapic A1, it’s almost all good news with just one slight annoyance I encountered a couple of times.
Generally speaking, everything you might need to adjust feels like it’s in the right place – like the focus lever below the lens, for example – and it’s all very intuitive once you’ve used it for a little while.
The finger grip on the front is good too, and I’m very pleased I was able to use it without falling foul of something that blighted a few of my shots with the Reto Pano – my finger being inadvertently in the corner of the frame.
My only gripe with the design of the Snapic A1 is the placement of the flash button, up on the left shoulder of the camera. Because this is where I rest my fingers when holding it, I did accidentally press it a couple of times, which meant having to then go and press it a few more times to cycle it back to the setting I needed.
It’s a small thing however, is the one and only issue I had, and is something that you can easily become aware of and avoid anyway. But I thought it worth mentioning.

Image quality and qualities of the Snapic A1
On paper, the Kodak Snapic A1 should produce the best quality images of any camera Reto has released so far. This assumption is based purely on the fact it has a 3-element glass lens.
I remember the Kodak Ektar H35N having one glass element and one acrylic in its 2-element lens and that made good enough photographs for me, so I was optimistic about this one too.
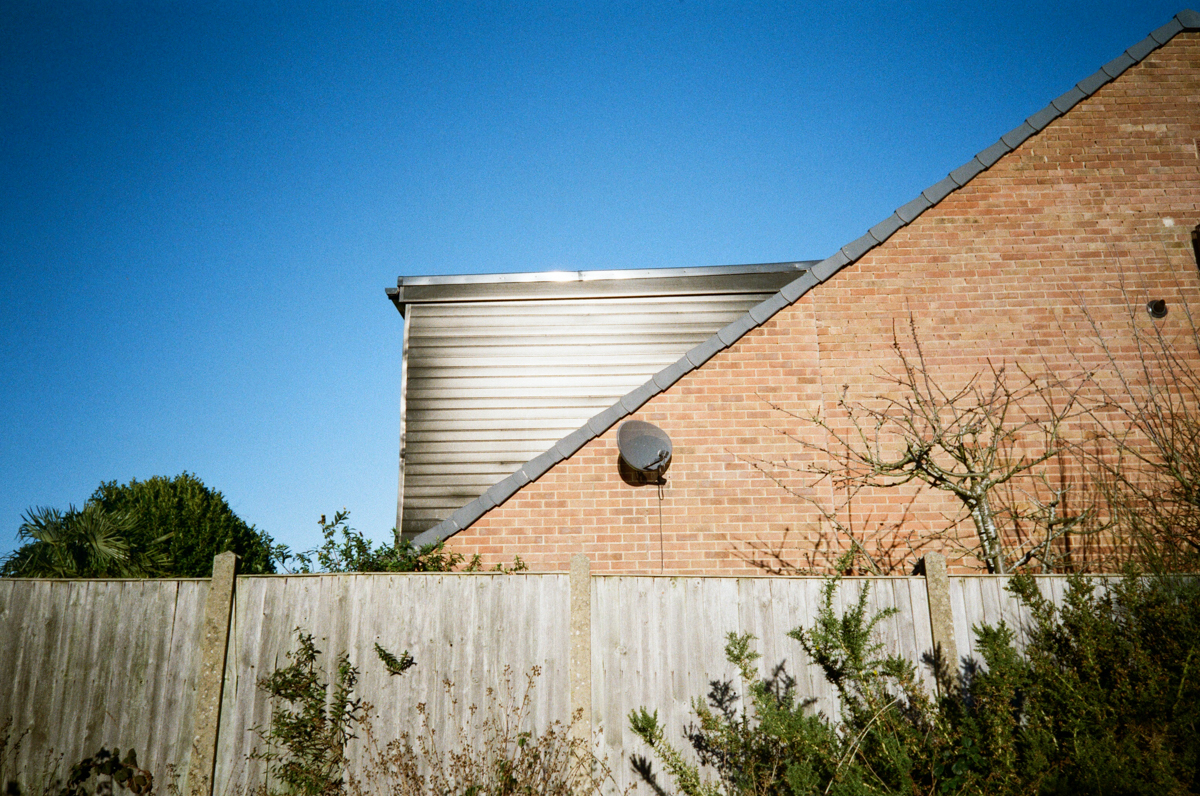
And I’m happy to say it didn’t disappoint. In terms of detail, sharpness, contrast, and relative lack of distortion for such a wide angle, it’s performed well pretty much every time I’ve used it.


Shooting close-up with the Snapic A1
There are two zone focus settings on the Kodak Snapic, which you easily switch between with the little slider below the lens. Your options are:
- 0.5 to 1.5 metres
- 1.5 metres to infinity
The vast majority of what I’ve shot has been at the latter setting, but I did try out some images at the former too. And what I found can be summed up in a couple of short sentences and a few photos (because they are apparently worth 1000 words each).
The first thing to say is that the Snapic does a good job of focusing on what is close-up in your shot when you’re set to the close-up setting. No issues there.
The second thing to say is that, because the aperture is fixed at f9.5, you shouldn’t expect your backgrounds to be especially blurred.


Shooting into the sun with the Snapic A1
The 25mm 3-element glass lens in the Snapic A1 is coated, which should help reduce flare in your shots if you’re shooting into a light source – be that artificial light, a reflection off something, or even just straight into the sun.
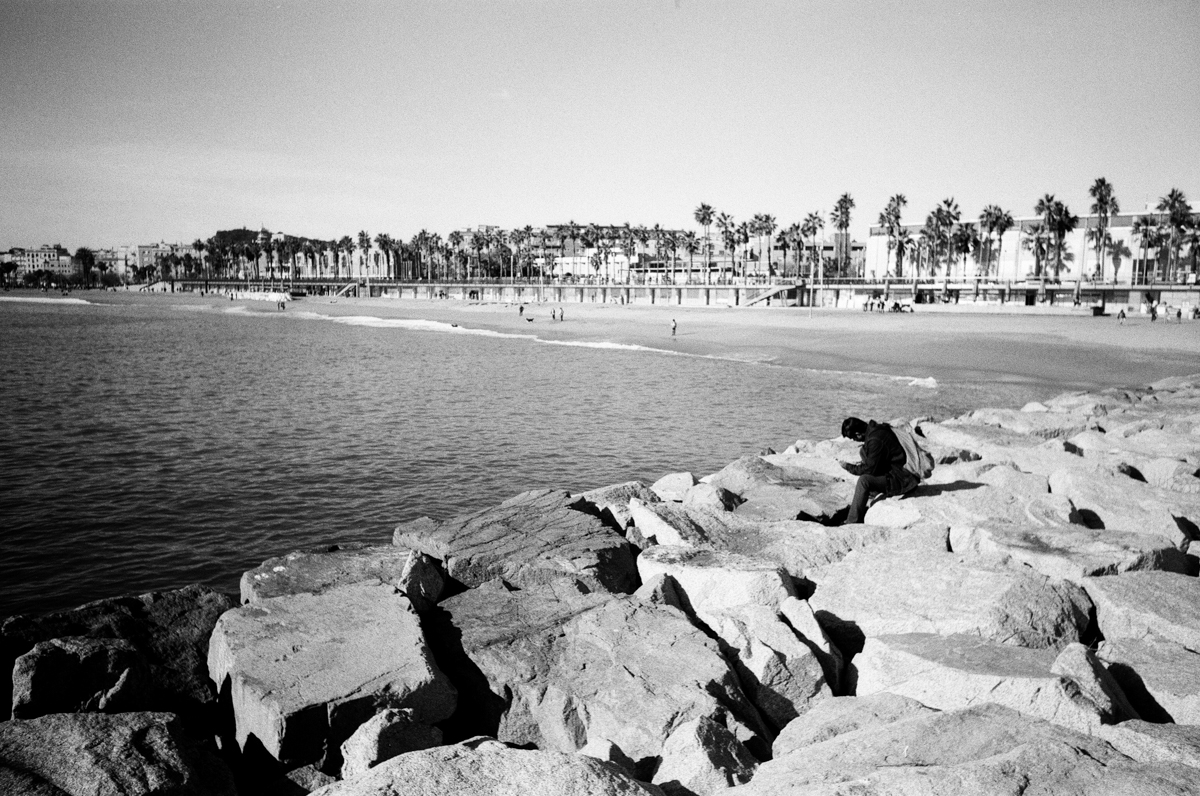
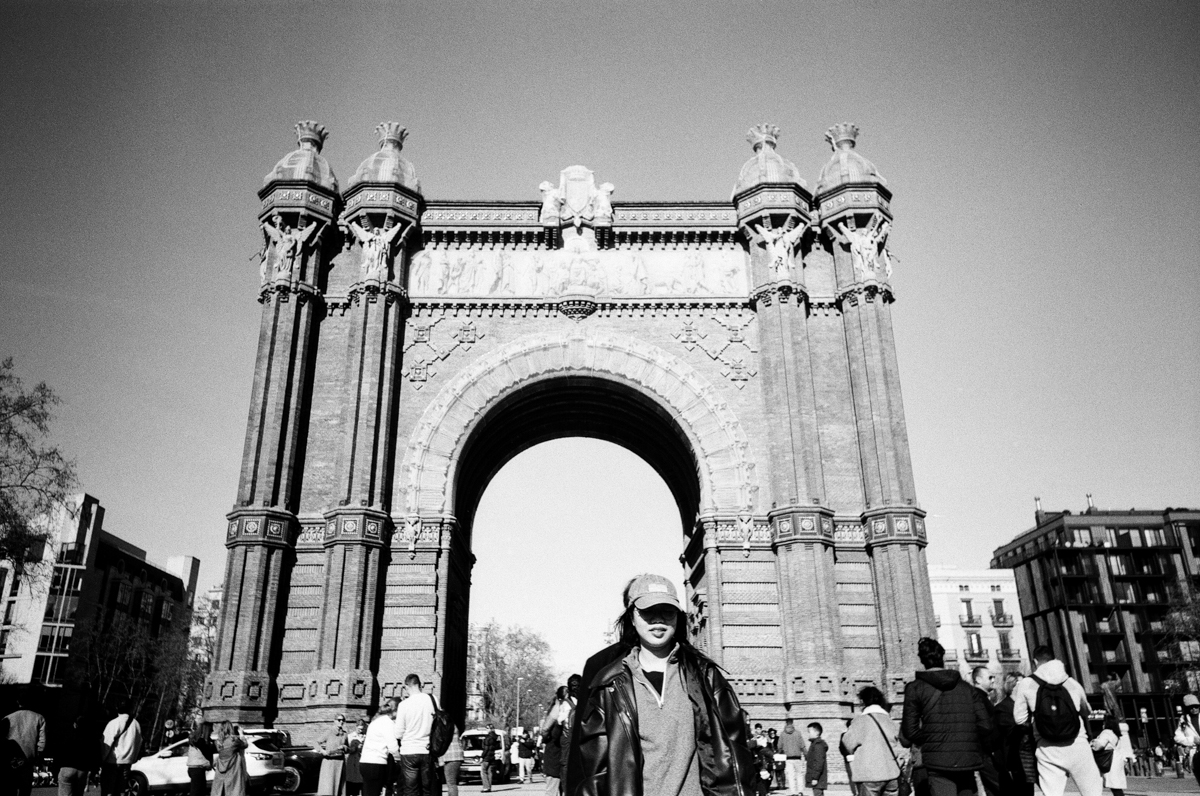
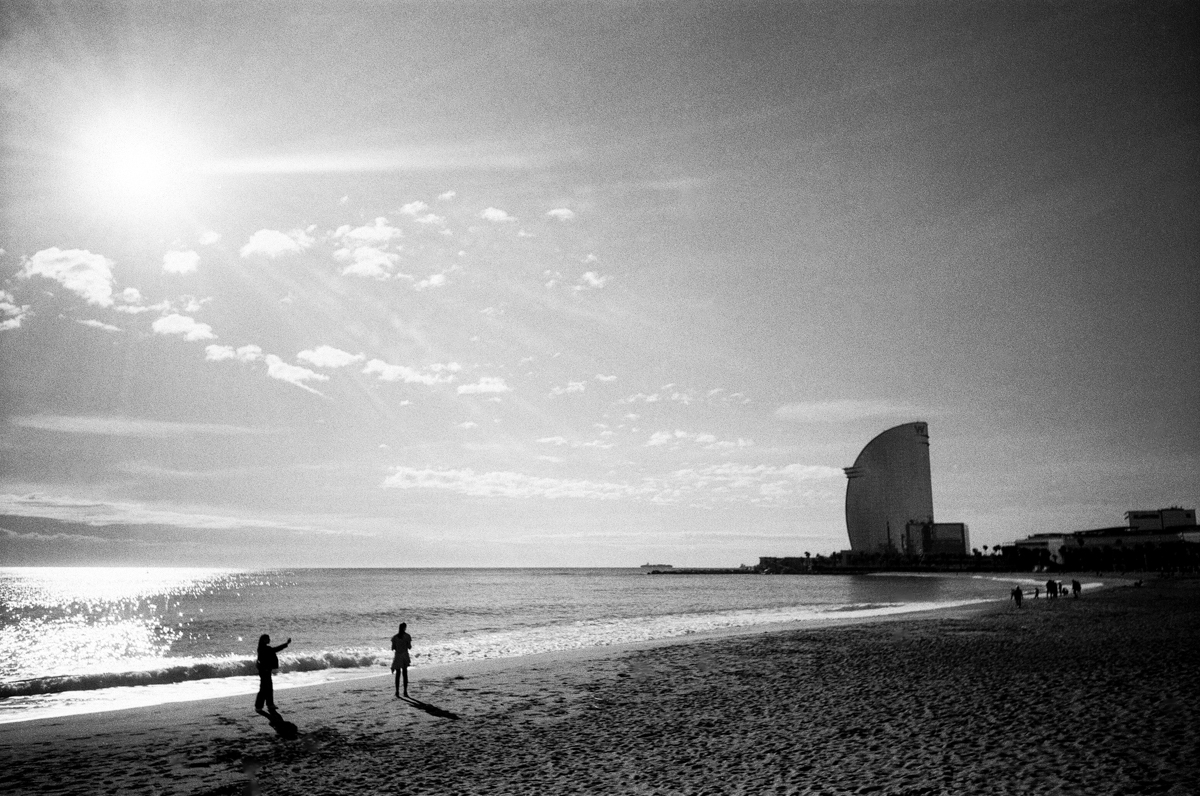
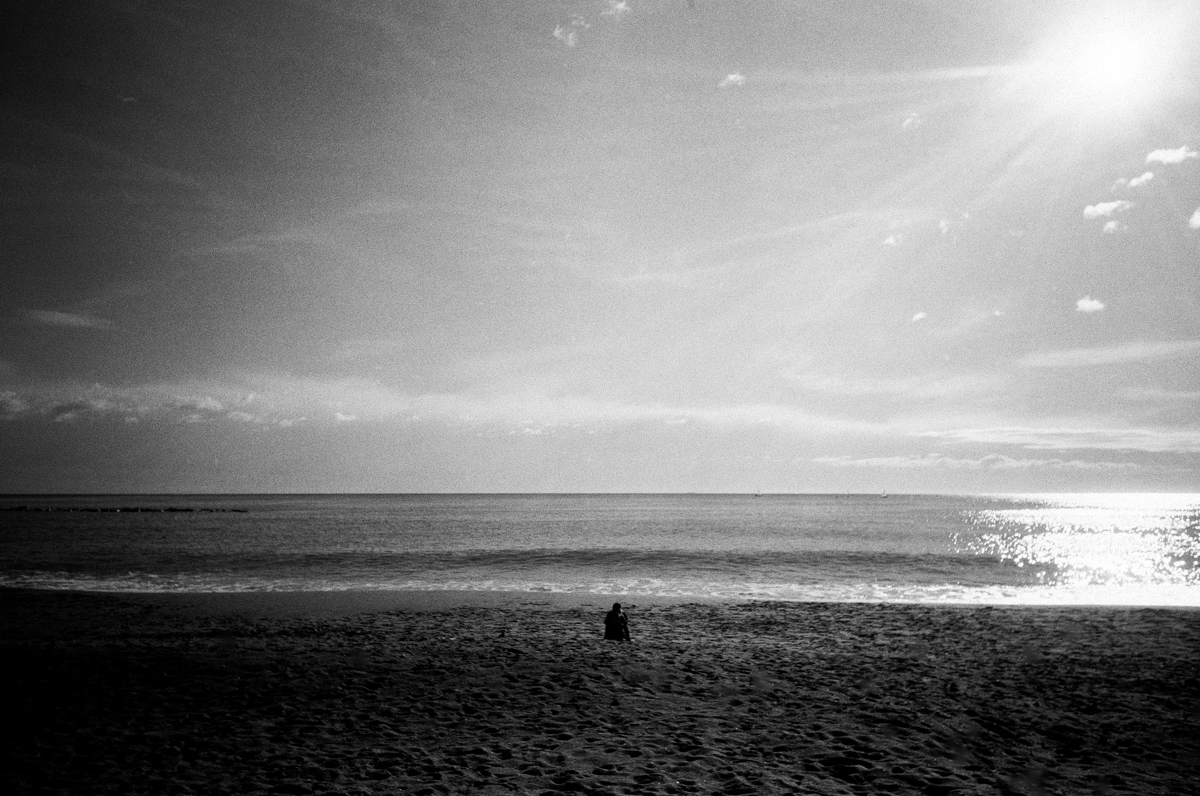
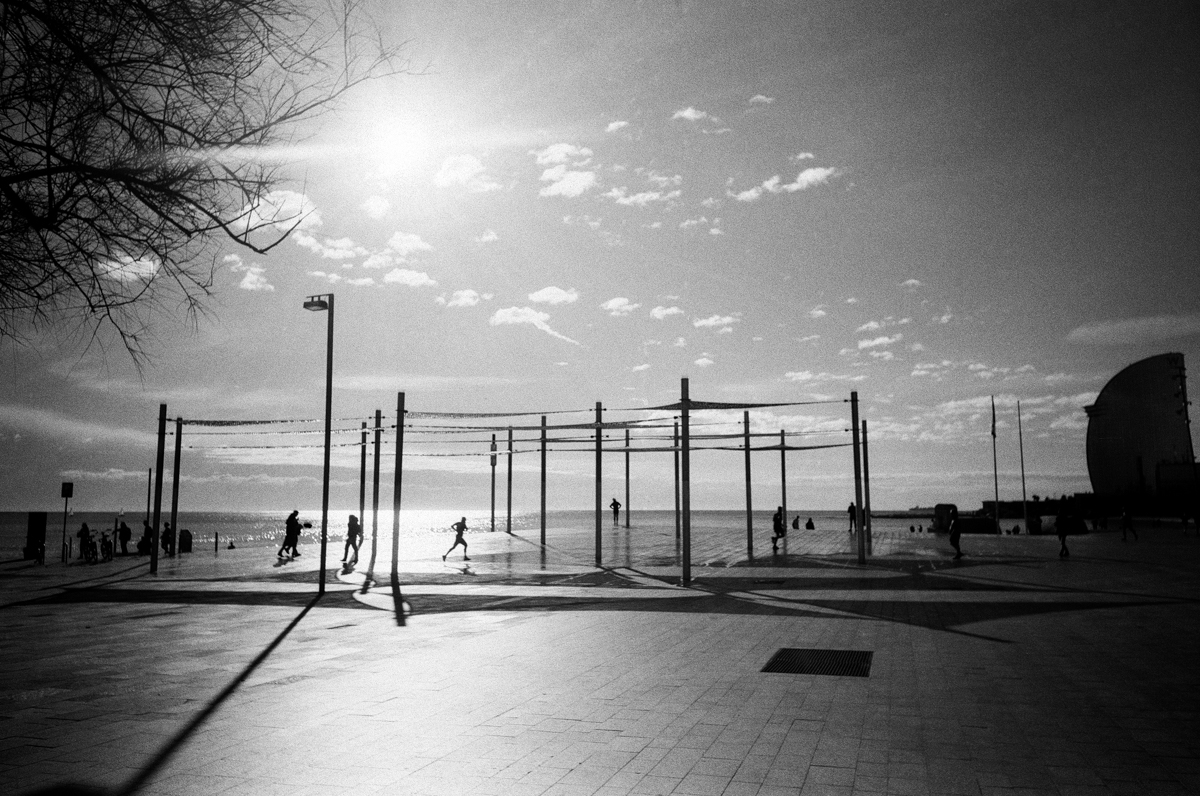
A bright day in Barcelona gave me the opportunity to test out those last two scenarios, with the sun high and later on low in the sky and bouncing nicely off the water too.
Something that’s noticeable on the monochrome shots here is a vignette on the opposite side of the image to the sun. I’m not sure why that is, but it doesn’t ruin anything for me.
Overall I think the Snapic does well enough when shooting into the sun. The skies aren’t blown out, there’s still plenty of detail in the photographs, and there’s plenty of contrast in the silhouettes too.
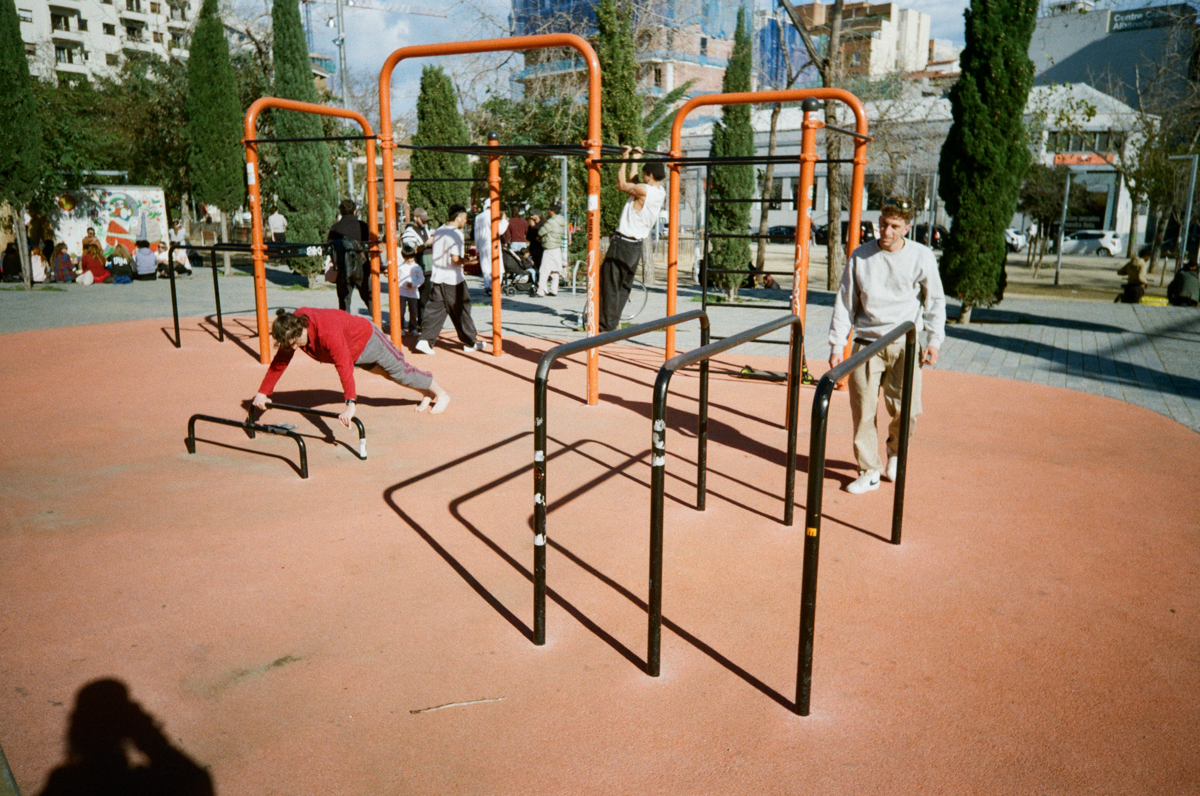
Street photography with the Snapic A1
The majority of camera reviews and film reviews I’ve published on this site have a ‘street photography with…’ section.
It may seem odd to focus on a specific genre of photography in them: like why don’t you have a ‘landscape photography with…’ or a ‘portrait photography with…’ bit too? But the reason is, good or bad, street was always the kind of photography I did the most.
And largely continue to do.
So it makes sense to me to talk about how good each product is for that particular use case when I have the experience of using it for that.
And I can tell you that the Snapic A1 felt immediately like a good camera for shooting out in the streets with. Let’s have a couple of example photographs, and then I’ll explain why.


Personal preference is everything, but I’d say the most important thing for a camera to be a good street photography camera for me is how easy it makes it to get the kind of shots I like.
I want it to be quick to compose and focus with, and I want it to be discreet enough that I’m not drawing too much attention to myself.
The Snapic A1 satisfies both of those desires.
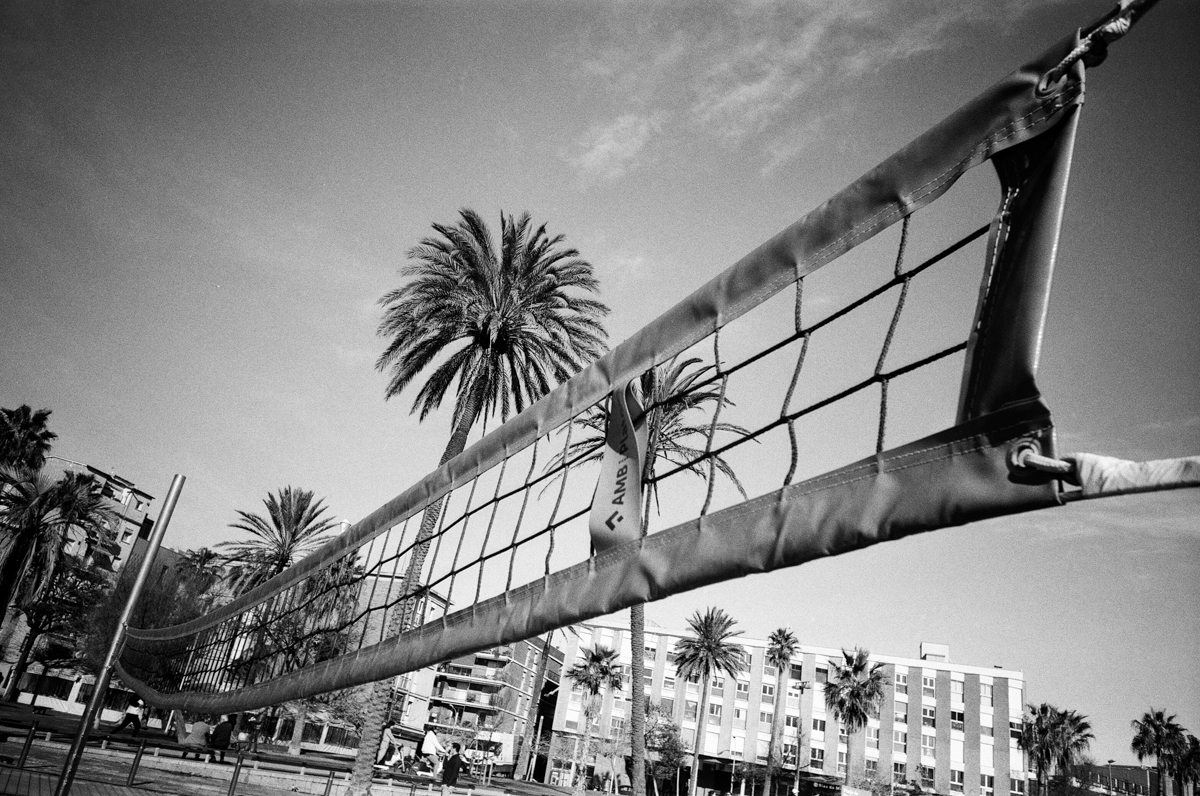
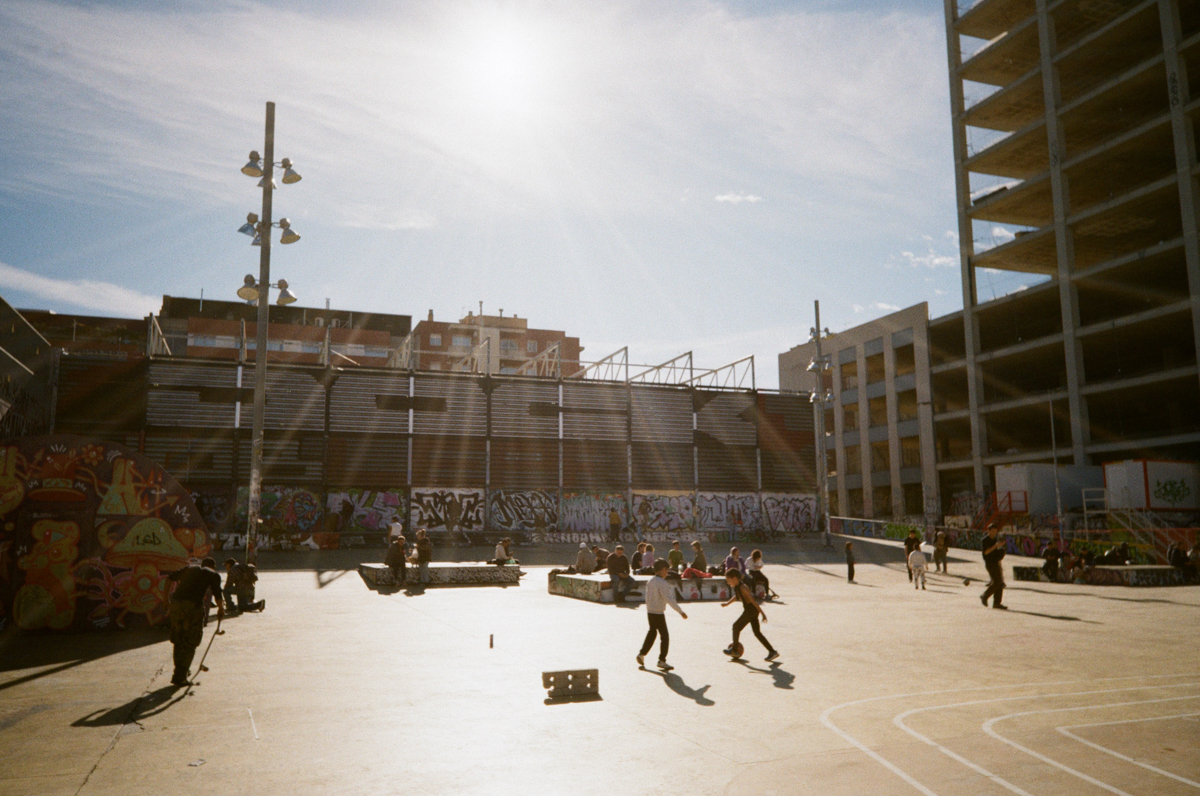
I like shooting in the streets with wider lenses anyway, and I found the Snapic’s 25mm one fun to fill with scenes. The fixed f9.5 aperture and 1/100 shutter speed mean everything should be sharp too; lots of depth of field and no motion blur most of the time if you hold the thing steady.
As for it being discreet, it’s a small point ‘n’ shoot that most people won’t notice you holding until you raise it to your eye. As mentioned, the design is based on the Ricoh GR series, and that has long been a favourite of street photographers for its size and inconspicuousness.
The motorised film advance is nice too. For all the clichéd talk of film slows me down, I find that when a camera winds your film on for you, it feels like an encouragement to move on and find your next shot quickly.
I said the same when I reviewed the Canon Sure Shot AF-7 a long time ago. It’s a small thing, but I feel it somehow helps to keep the energy flowing when I’m out shooting in the streets.


Those last four images were shot on Fomapan Action 400, which is a good budget film for this kind of photography and was the first roll I put through the Snapic A1.
We’ll end this section with a few more shots from the Barcelona trip.
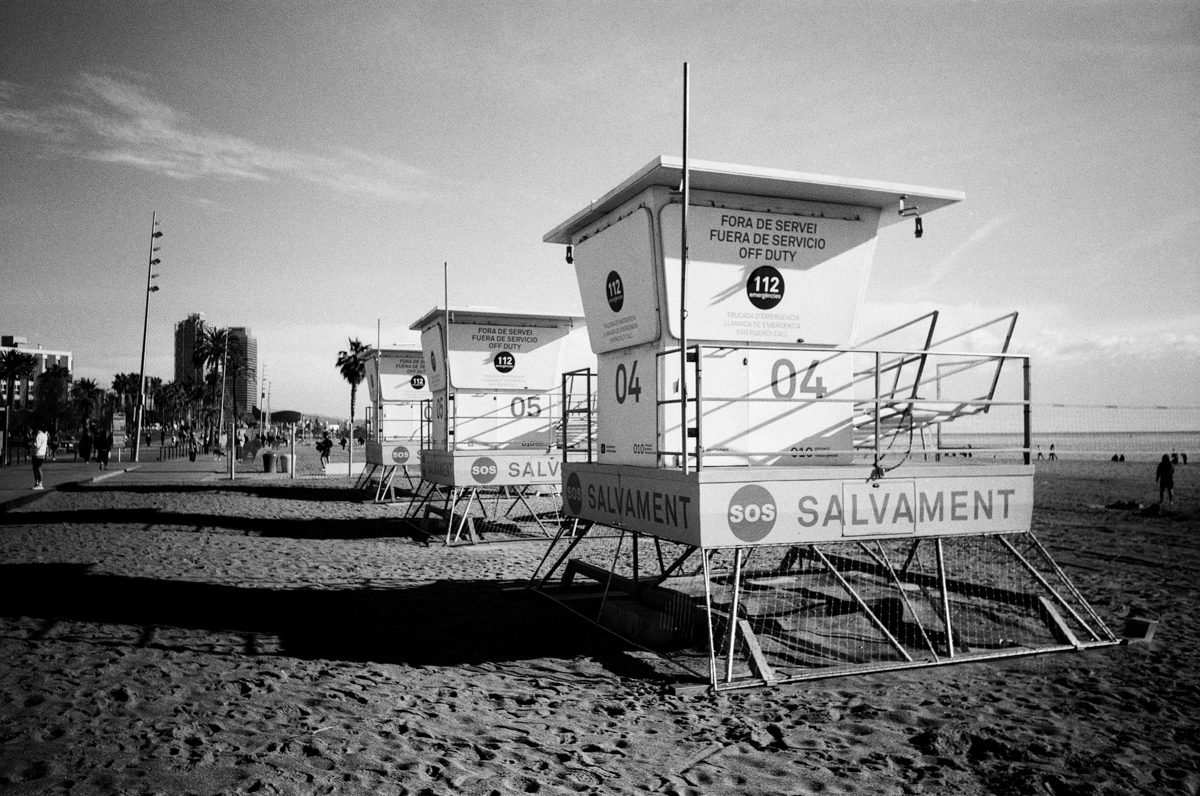
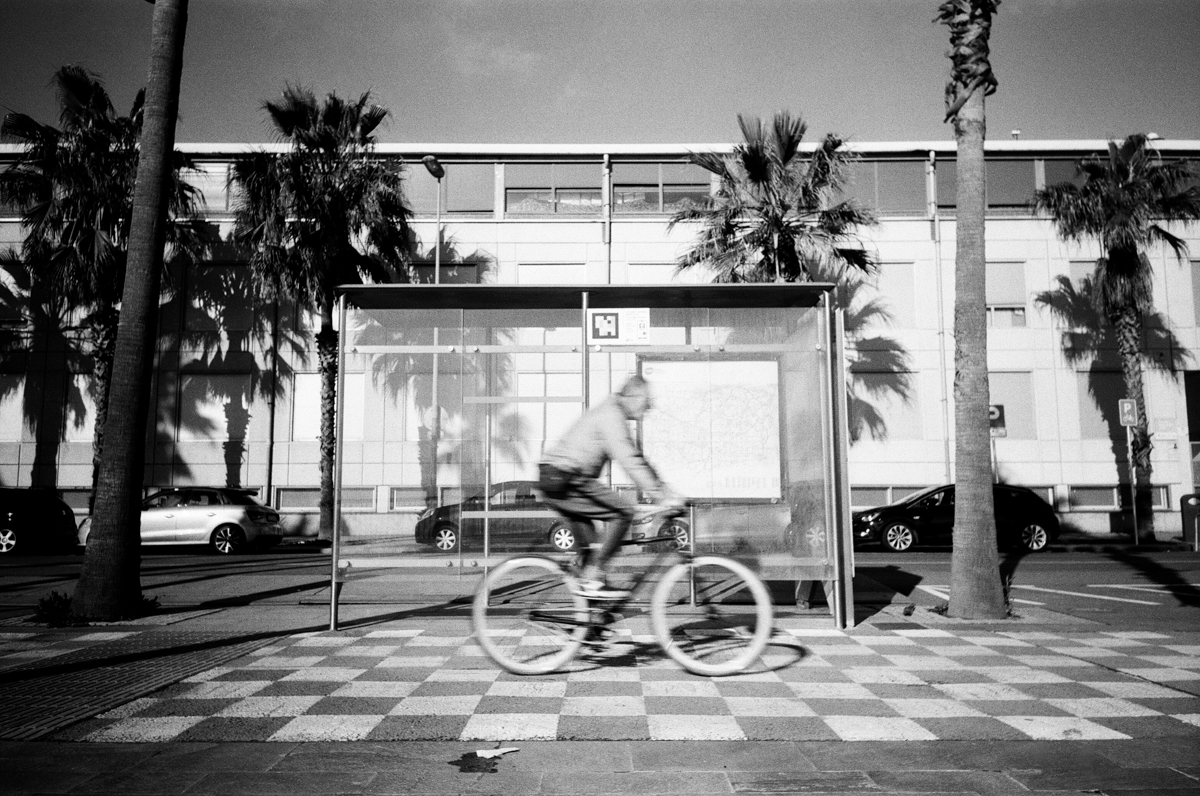
First up, on some Ilford FP4 Plus 125, is the classic and/or overdone person-passing-horizontally-on-a-bicycle.
The purpose of showing you this image is to illustrate that while the specifications of the Snapic are in most cases good for street work, that fixed 1/100 shutter speed won’t be fast enough to freeze objects moving above a certain speed.
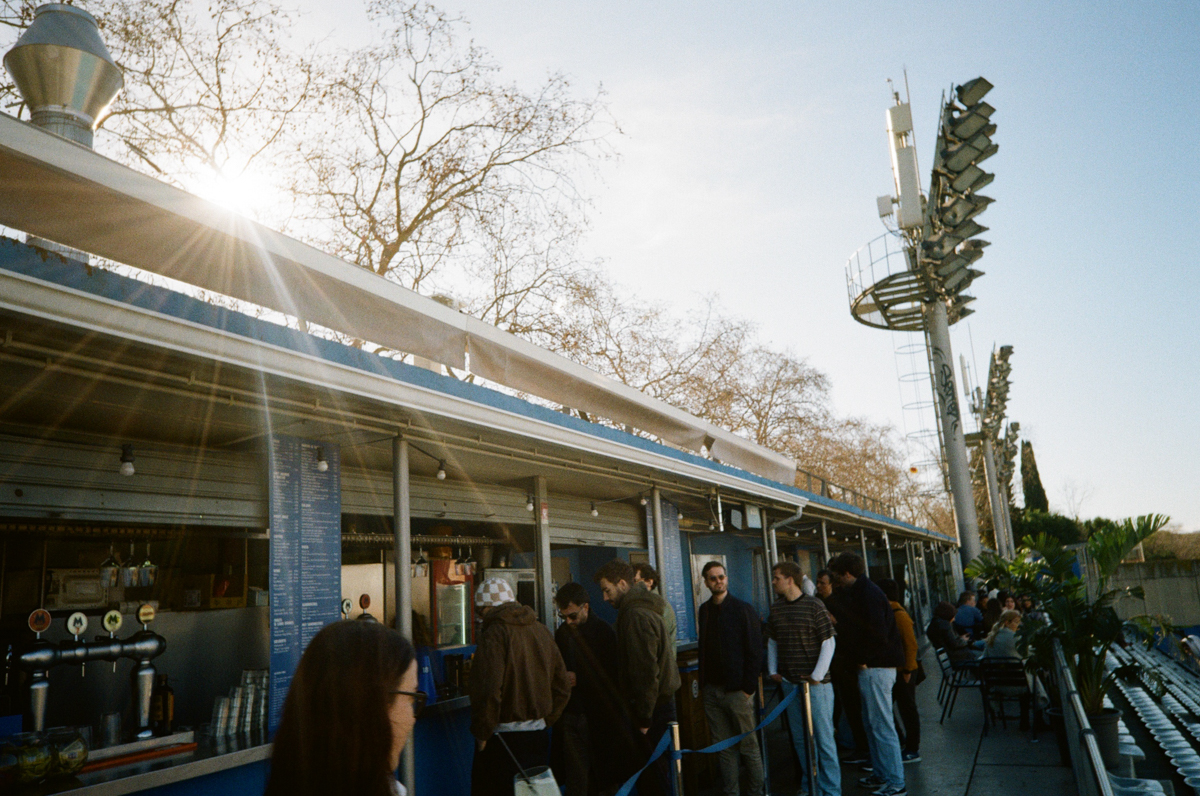
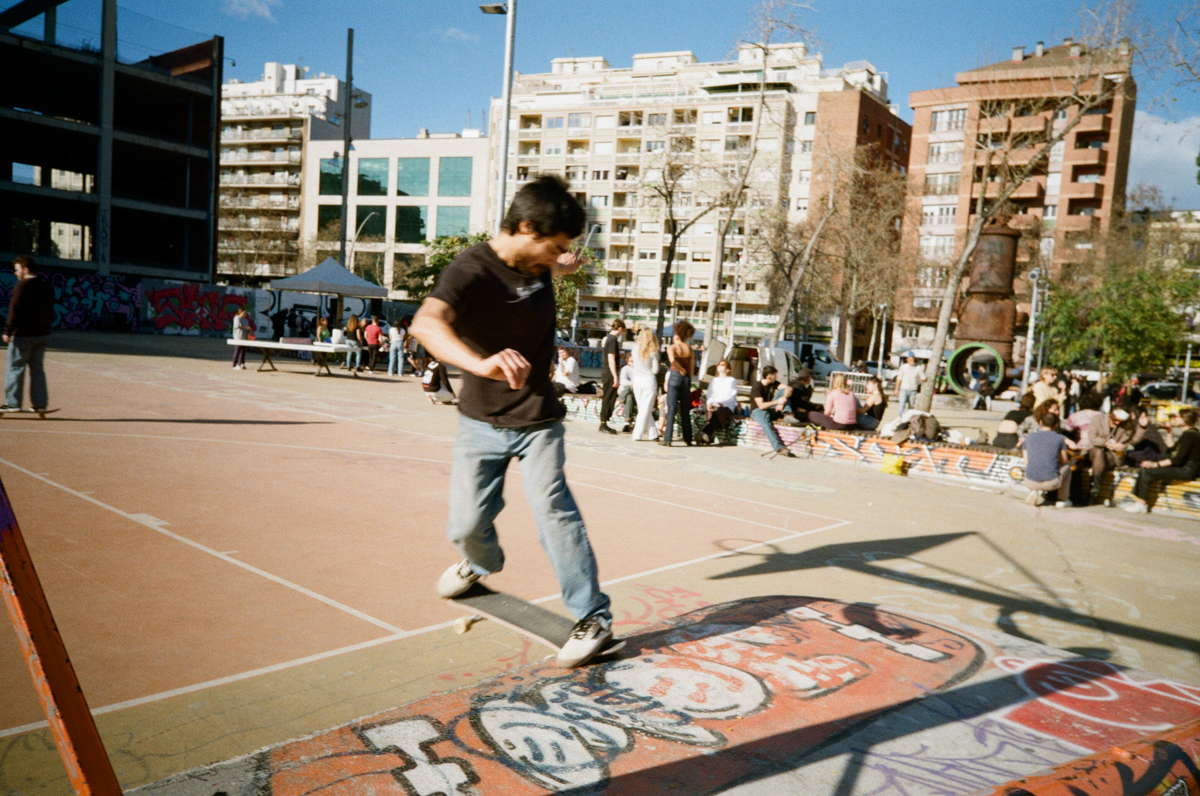
The final three were shot on Kodacolor 200 and are here really to bring some colour to this street photography with section.
But they do demonstrate a couple of things at the same time also.
That this camera is discreet enough to be used unobtrusively around people going about their own business, and that once again an object on wheels is likely going faster, and so will be harder to freeze in motion, than one on foot.
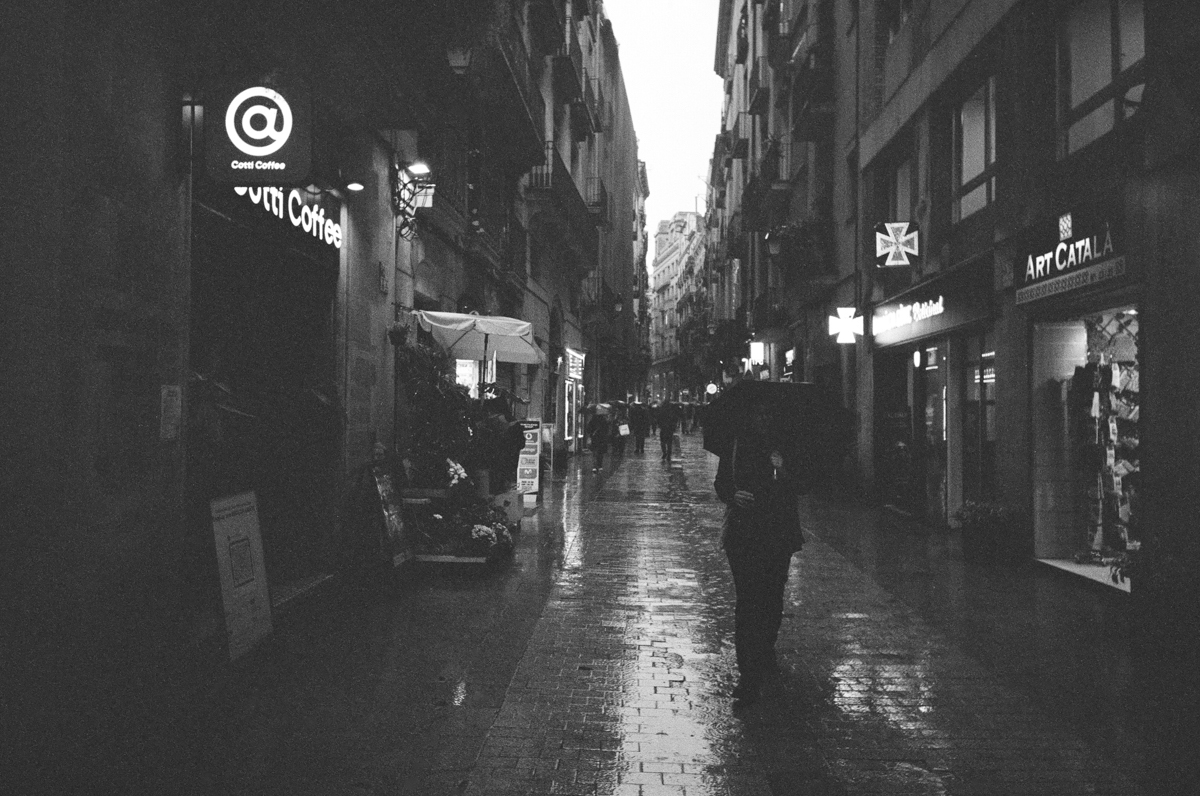
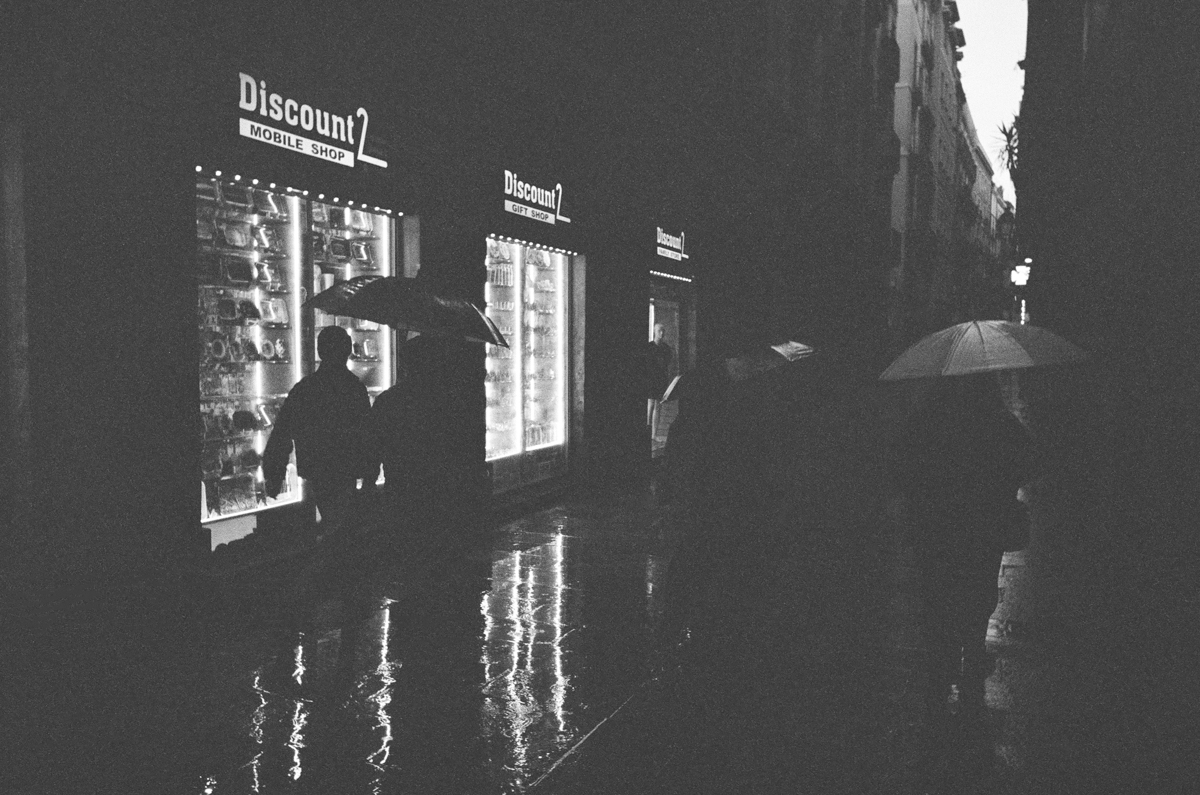
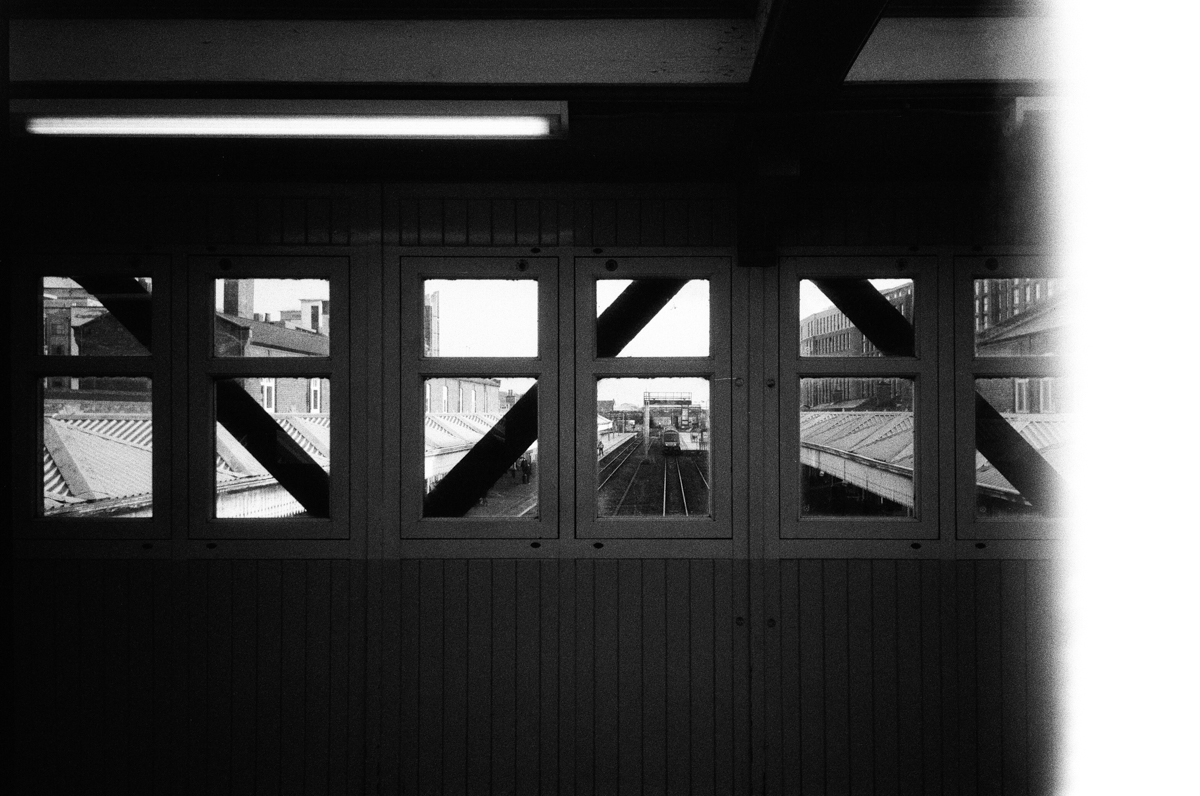
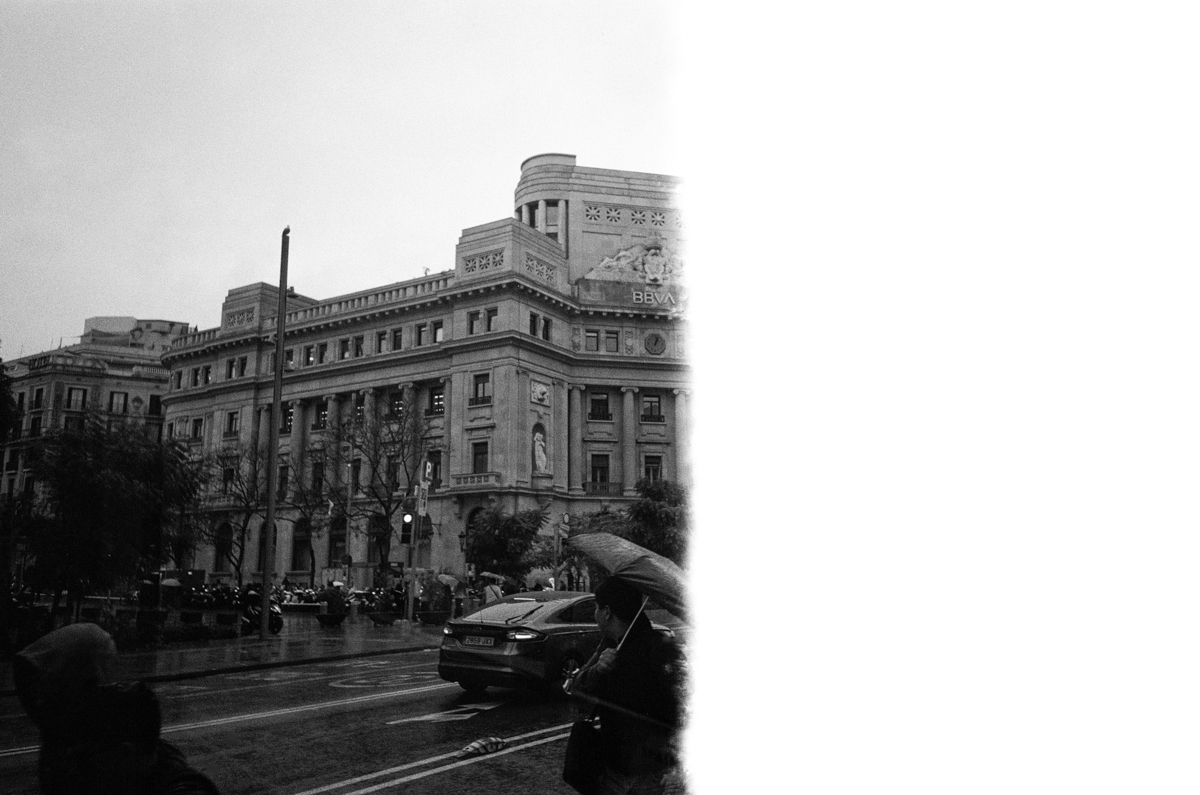
Low light photography with the Snapic A1
All of the images you’ve seen so far were taken in good light on films ranging from ISO 100 to ISO 200. They all came out well, because the Snapic’s f9.5 aperture and 1/100 shutter speed are fixed with that kind of use in mind – everyday shooting, outside on nice days.
But what if it’s not a nice day? What if you went somewhere you expected to be nice and when you got there it was rainy and horrible?
That’s what happened to me. And because I’d seen a comment on Reddit about how these cameras produce decent images in good light but does anyone ever try them in poor light, I thought I may as well make the most of that bad weather and see for myself.
These images were shot on Kodak T-Max 400.
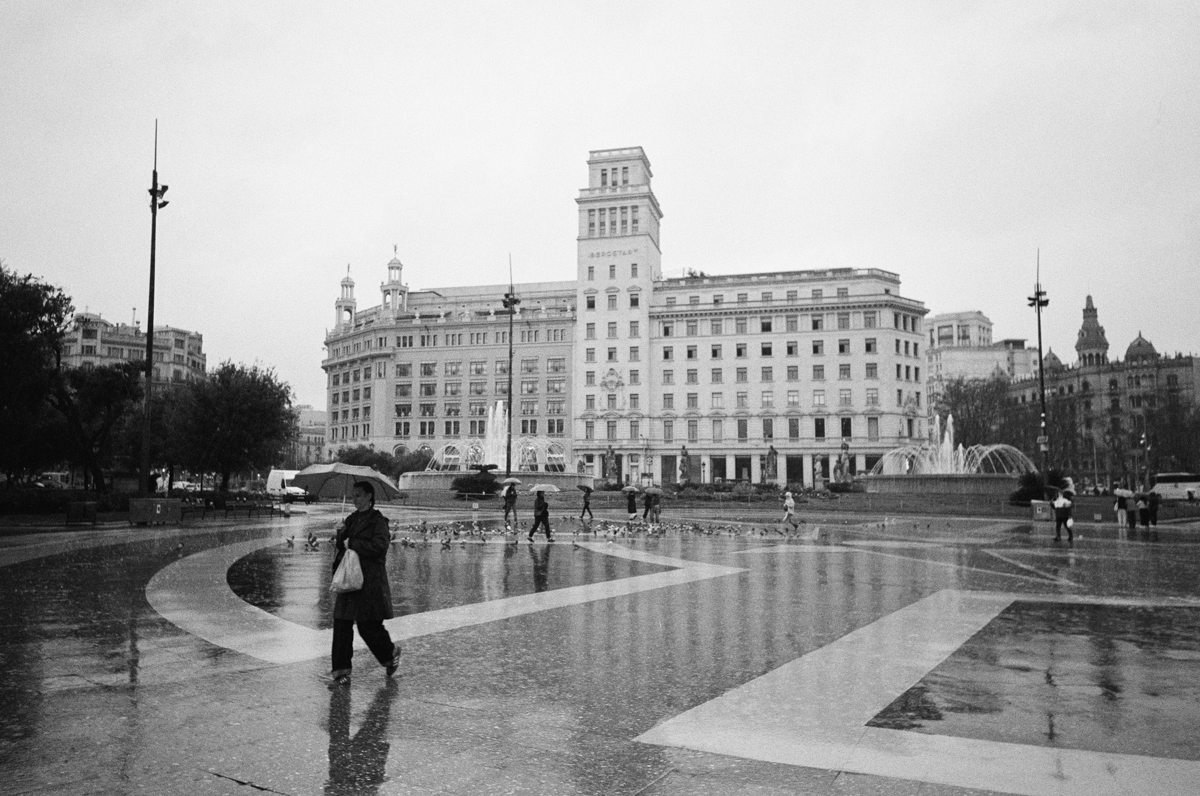


They came out ok then.
Proof that you can shoot your Kodak Snapic on damp, dank days like this, and also worth noting that it kept working perfectly despite getting quite wet as I was using it.
We’re not finished with this section on low light shooting yet, though. Because as beautiful as Barcelona is, I wasn’t overjoyed to be walking around with my jeans getting increasingly wetter with each passing minute.
So when I got to the Mercat de la Boqueria, I went in. And once I was in, I took the opportunity to shoot some indoor shots without using the Snapic A1’s flash.


They also came out ok then.
There is a bit of a technique to making photographs like this, though.
Like most things you shoot, you need to be using the light that is available to you. For me, that is usually coming from the sun. For you, it might be that too. Or a studio light. Or your camera’s flash.
In the case of these images, it’s the artificial light used to illuminate the goods and stalls in the market. You don’t need to use the flash indoors if there is already enough light from another source.
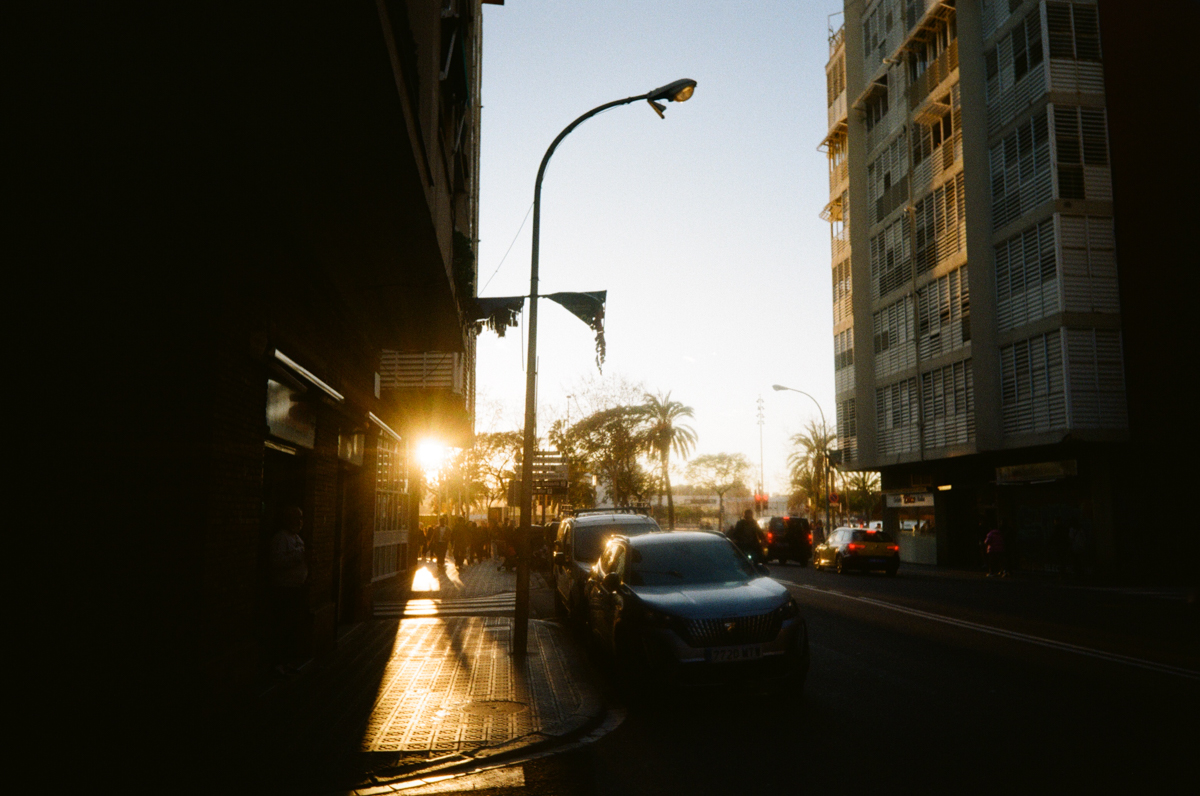
It wasn’t a perfect day of photography however. Although I got plenty of usable shots from those rainy streets, there were some where there simply wasn’t enough light to achieve what I was attempting – what I was seeing in my mind’s eye – on some occasions.
This may have been because I was shooting down a side street instead of out in the open, or it may have been because the sky had gotten a lot darker during a period of heavier rain.
In any case, I got some shots that were just underexposed and with no hope of rescuing them. Film is brilliant but it’s not magic. The exposure latitude won’t rescue you every time.
The Snapic A1 is capable of some low light photography even with its fixed f9.5 aperture and 1/100 shutter speed, but it does have its limits. In these next few failed images, I’ll show you what can happen if you try to push it too far.

Kodak Snapic A1 double exposures
When I first started reading about the Kodak Snapic A1 and its features, my initial impression was that it was a more premium yet normal camera than previous ones from Reto.
With those others, the value in buying it was in its special power. The Reto Pano has its panoramic mode. The H35N is a half frame camera. The Ultra Wide & Slim had… an ultra wide lens and a slim body.
But they were all very minimal when it came to luxuries. They all had manual film loading, winding, and rewinding. The UWS had no flash; nothing that needed any batteries.
So at first glance, it looked to me like the money you’re spending on a Snapic A1 is going on the glass lens, the motorised film mechanism and the OLED display rather than any funky feature.
Fear not however, because you can do double exposures with it using the native – and possibly slightly misleadingly-named – Multiple Exposure mode.
Check these. They’re not the greatest double exposure photographs ever taken. But check them anyway.


The Multiple Exposure feature of the Snapic A1 is simple to operate and pretty intuitive once you’ve done it a couple of times.
Briefly holding down the flash control button will bring up a flashing number 1 at the top of the OLED display. You can now take your first photograph.
The film will not advance as normal, and the flashing ‘1’ will be replaced by an M.E. and a couple of arrows to the right. When you see this, you need to flick the Multiple Exposure switch on the front of the camera.
Once you’ve done this, you’ll see a flashing ‘2’, which lets you know you’re ready to take the second shot of your double exposure. And once you have, the film will advance ready for your next composition.
A couple of things to note here: if you go into Multiple Exposure mode and change your mind before shooting, you can exit it by holding the flash control button again.
And if you change your mind after taking your first shot, you can turn the camera off and back on, and then half press the shutter button to advance safely to the next frame on your roll.
Using the flash on the Kodak Snapic
There are four flash modes on the Snapic A1, and you can toggle between them by using the same button you used to turn on the Multiple Exposure mode. These are:
- no flash
- flash on
- flash on with red-eye reduction
- auto flash with red-eye reduction
In truth, I’m not really one for doing much flash photography.
I know it’s a powerful tool to have in your arsenal, like using a fill flash for portraits on sunny days and whatnot, but it’s just not something I’ve ever messed about with. I prefer using natural light – even when there isn’t much of it, as we explored earlier.
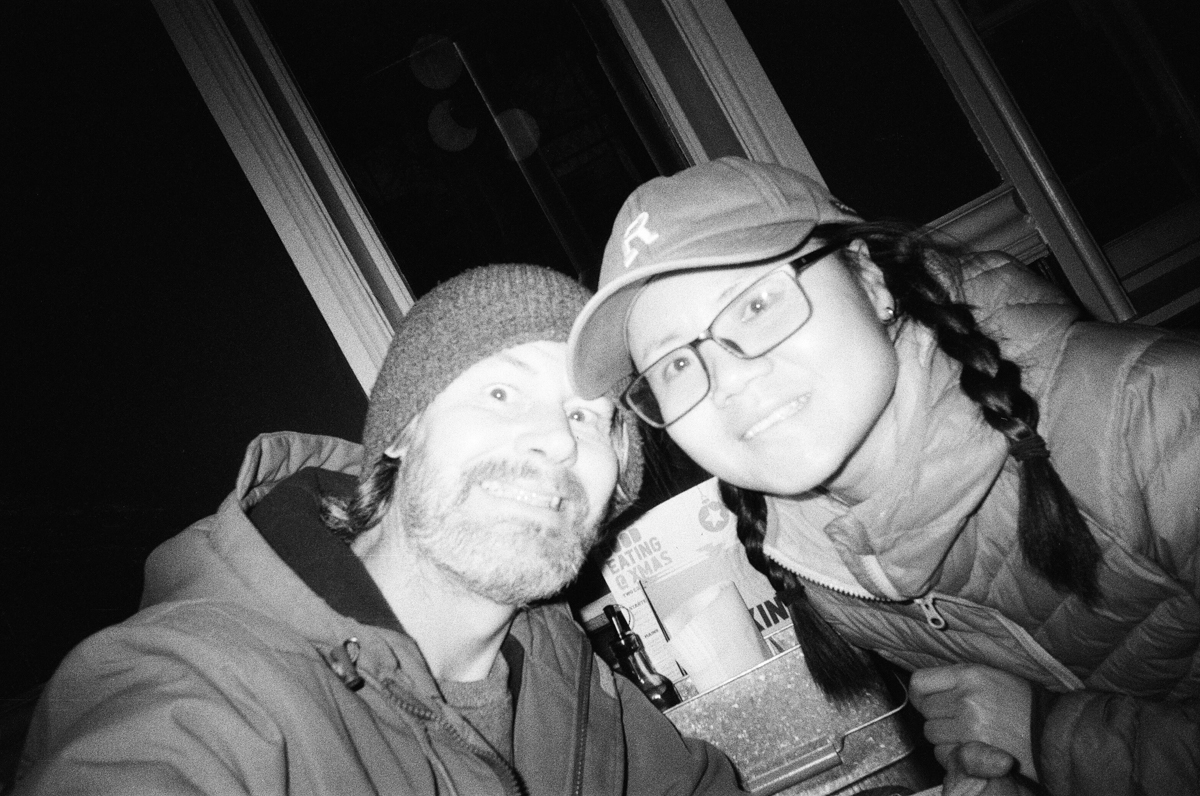
So this section of this review is going to be rather short. All I can really do is tell you that the Kodak Snapic A1 flash charges up nice and quickly, works, and is good enough for a snapshot of your dog or a selfie of you and your partner in a pub.

First of the roll shots from the Kodak Snapic
All being well, you shouldn’t get any first of the roll shots from your Kodak Snapic A1.
These usually happen in a camera with a manual film advance. When you load your roll in one of those, the first image you shoot once you’ve closed the back can have some of the edge burned off because it was slightly exposed before you closed the film door.
It’s nothing to worry about, and some people actually like the effect. Some even try to use it creatively each time.
As the Snapic A1 has a motorised film advance that winds on after you’ve loaded it, closed the film door and pressed the shutter button a couple of times, you shouldn’t get any of these kind of images from it.
However, because I messed up loading this thing twice – user error both times, nothing wrong with the camera – I’ve ended up with a couple of them.
If you’re a more competent person than I with these things, these might be the only Kodak Snapic first of the roll shots you’ll see.
What film to use in your Kodak Snapic A1
My advice for what film to use in your Kodak Snapic A1 is going to be the same as every other Reto-produced camera I’ve reviewed on here – from the Ultra Wide & Slim and the Ektar H35N, and on to the Pano.
Because your aperture and shutter speed are fixed at f9.5 and 1/100 of a second, all you can really do is choose a film that matches the amount of light available to you.
And unless you’re doing something out of the ordinary, something in between ISO 100 and ISO 400 is going to be likely.
A general rule for those would be ISO 100 and 200 films on brighter, sunnier days and ISO 400 on gloomier days when the light isn’t quite so good.
You could go for something higher like a Kodak Portra 800 for colour or Ilford Delta 3200 for monochrome, but I personally feel if I were shooting something that required such a high ISO, I’d probably be using a different camera with variable aperture and shutter speed anyway.
All that said, some suggestions for what you might go with would look like this:
For colour film, perhaps:
For black and white film, perhaps:
- Kentmere Pan 100
- Fomapan 200
- Ilford HP5 Plus 400
Where to buy a Kodak Snapic A1
You’ll be able to find a Snapic A1 at most places that sell new film cameras online.
Reto sell them themselves if you want to buy direct from the source, and their list of authorised dealers across the globe is a great resource to find one near to where you are too.
You can also check out the following stores specifically should you wish.
- find a Kodak Snapic A1 at B&H Photo
- find a Kodak Snapic A1 at Analogue Wonderland
- find a Kodak Snapic A1 on Amazon
Get creative with the well-crafted new Kodak Snapic A1. A fully glass 25mm lens in a compact and lightweight body with motorised film winding, it's ideal for travel, street, personal snapshots, and anything else that looks good shot on film.
Final thoughts on the Kodak Snapic A1
As I explained earlier, when I first saw the Snapic A1 and read the specs, I think my initial observation was that while it looked good, it felt like it was missing some sort of attention-grabbing, standout features that all the previous cameras from Reto had.
Something like the UWS’s ultra wide lens, the H35N’s half-frame shooting, or the Pano’s panoramic aspect, there was no singular obvious this is why you’d buy this camera attribute.
It looked like it was more of a normal everyday carry camera, where the investment had gone into making everything more premium than previous offerings. The fully glass lens, the motorised film winding, the OLED screen… even the plastic it’s all made from feels better than before.
All of the above makes it a lovely thing to take out and play with. I’ve had a great time shooting my Snapic A1 so far, and I’d even say it was the ideal camera to take with me on that trip to Barcelona.
Small enough to go into my hand luggage when that’s all I was taking, simple enough to just enjoy using whilst immersing myself in the city, cheap enough that I wouldn’t care if it got lost, and giving me good enough images that I wasn’t left wishing I’d taken something else.
But then you add that 25mm lens, and I’m a self-confessed lover of wider lenses, and this thing becomes even better.
The other special power, the multiple exposure mode, is a nice bonus. It’s not something I’ll ever really use, on this camera or any other. I’ll try it out for some example shots for these camera reviews, but then probably never bother with it again.
But it’s great that it’s there for people who do like that kind of thing.
As for me and my final opinion on this? All those higher quality specs and design elements that put it a level above all the other Reto cameras in terms of premiumness, and with a sneaky really wide lens to play with too?
I’m in.
The Kodak Snapic A1?
I’m a fan. 🙂
If you found that Kodak Snapic A1 review useful, why not check out these other great film cameras too:


And if you think others will enjoy or benefit from this camera review too, help them find it by giving it a share. 😀

Brilliant review, I purchased a Snapic a1 after I found out it had a glass lens, the results are very good from this camera. One thing I noticed which is not mentioned in the manual,is that the very long neck strap is perfect for judging the close focus distance. I also like that the film leader is left out when the film is rewound.
Thank you for the kind words Iain. That’s a couple of brilliant observations, ha. I had noticed the leader being left out after rewinding and thought that’s probably handy for the lab (I don’t dev my own film) but the neck strap zone focus thing is genius. 😀
I was looking into buying this camera too to replace my ricoh. The size and looks sold it for me. And looking at the pictures you took, is not bad too.
If only my ricoh has oled screen. Thats the only thing that broken.
Yes mate, it’s honestly a decent camera that’s obviously available brand new so shouldn’t have any issues and has warranty if it does. Really enjoyed shooting mine and had some good results too, in my biased opinion.
I’ve never shot a Ricoh GR btw but would love to put some rolls through one someday. 🙂
Thanks for the great review. I wasn’t convinced by all the sample photos I saw, but your turned out great. Hopefully I have some luck with this camera.
Thank you for the nice words, Tim. I had a great time shooting the Snapic and yes, I do quite like some of my results from it also. I wish the same for you 🙂 fun shooting and lots of shots you like too.